
Does the thought of tackling your kitchen cabinets fill you with excitement or a little bit of dread? You know those dated cabinets are dragging down your whole room’s look. Maybe you’ve scrolled through endless design photos, dreaming of a fresh, modern space. But then comes the big question: what is the absolute best way to paint cabinets for a professional, long-lasting finish?
Choosing the right method—spraying, brushing, or rolling—can feel like a maze of conflicting advice. You worry about drips, chipping paint, and wasting time on a process that doesn’t stick. If you want that smooth, factory-like result without hiring an expensive pro, you need a clear roadmap. Nobody wants to spend days prepping only to have their hard work peel off in a few months!
This post cuts through the confusion. We will break down the top techniques for painting cabinets, detailing the pros and cons of each approach. By the end, you will know exactly which painting method matches your skill level and desired outcome. Get ready to transform your kitchen from drab to dazzling with confidence!
Top Way To Paint Cabinets Recommendations
- Ideal for transforming old, outdated cabinets in kitchens, bathrooms, offices and more
- Quick-drying formula goes on smooth and provides exceptional flow and leveling
- Dries to the touch in 30 minutes and covers up to 50 sq. ft. per quart
- Provides a durable semi-gloss finish in just one step
- Use two coats for ultimate scratch protection and stain resistance

- Includes 30 featured and newest released color card. Sprayed on color to see our colors in your homes lighting for more accurate color choices.
- ALL-IN-ONE Paint - NO Sanding, NO Priming, NO Top Coat Required, Low Luster, Velvet Sheen Finish
- Interior/Exterior - Paint your whole house - Ideal for hard surfaces including walls, doors, cabinets, counters, furniture, metal, glass, ceramics and floor and wall tile
- Durable yet stretches to paint smooth fabrics, vinyl and leather
- Results cannot be guaranteed. Digital screens may not show color accurately. Product search - Heirloom Traditions Paint Color Collection Fan Deck, for an accurate color choice.
- Ideal for transforming old, outdated cabinets in kitchens, bathrooms, offices and more
- Quick-drying formula goes on smooth and provides exceptional flow and leveling
- Dries to the touch in 30 minutes and covers up to 50 sq. ft. per quart
- Provides a durable semi-gloss finish in just one step
- Use two coats for ultimate scratch protection and stain resistance

- Paint Roller kit 10 Pack: 2 inch foam paint roller covers 6 pack, 2 inch plastic paint tray, 2 inch paint tray liners 2 pack, small paint roller frame
- High Density Foam Paint Roller Covers: 2 Inch mini paint roller covers can be used with all kinds of paints, high density sponge design saves you paint and gives you a smooth finish
- Paint Tray with Liners: Pour paint into the disposable 2 inch paint tray, using the sponge roller to evenly dip the paint without dripping. Textured design for spreading the paint evenly. The paint tray is also easy to clean and reusable after use
- Paint Roller Frame: Sturdy paint roller frame 2 inch can matched with 2 inch sponge paint roller covers, the roll is very smooth, painting walls, doors, cabinets smoothly
- Wide Application: Mister Rui 2" mini sponge foam paint roller set is designed for painting the narrow and hard to reach places. The 2 inch paint roller kit also can be used to do some DIY crafts with your friends or family
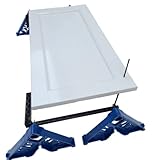
- PAINT CABINET DOORS EASILY – Patented design for reliable performance. Attach this bracket to extend your Stak Rack system to kitchen or cabinet doors. Makes spraying, brushing, and rolling cabinet panels hassle-free.
- STACKABLE SMARTLY – Designed to integrate seamlessly with the Stak Rack system, so you can paint and stack cabinet doors with minimal handling.
- VERSATILE & SPACE-CONSCIOUS – Keeps cabinet work compact, letting you dedicate one clean workstation without needing multiple tripods or sawhorses.
- FAST INSTALLATION – Easy to mount and compatible with panels of typical cabinet thickness, great for streamlining paint workflow, especially for multi-door jobs.
- DESIGNED FOR STAK RACK USERS – Enhances the overall system experience, ideal for teams or solo painters tackling both doors and cabinets together.

- RICH INCLUSIONS: This wooden filler set comprises 12 unique colors of resin repair fillers, offering a hassle-free solution for repairing wood furniture stains and scratches. Please note that the wooden furniture repair kit serves as a touch-up set, helping to blend colors to minimize the visibility of scratches or scuffs. It can also be used to repair small dents or cracks. After application, dry the area with a hair dryer and allow it to air dry for 2-3 days (away from water).
- DIVERSE RANGE OF COLORS: The set includes 12 unique colors—white, black, oak, padauk, black walnut, yellow sandalwood, teak, grey, ivory, amber yellow, original wood, and wood white. You can easily match the colors as needed, eliminating concerns about finding the right color to match your furniture.
- EASY APPLICATION & LONG-LASTING REPAIRS: Clear instructions are provided to alleviate any concerns about application difficulties. No additional glue, pens, markers, wax, paint, or crayons are needed. Simply squeeze the repair filler into the affected area and use the tail scraper to smooth the surface. Our furniture repair kit boasts high-quality materials that effortlessly and securely blend with the furniture's surface, drying quickly and providing long-lasting repairs.
- IDEAL FOR WOOD SCRATCH REPAIR: This kit is perfect for addressing scratches on wooden veneers, desks, wooden floors, cabinets, tables, beds, doors, and more. It effectively rectifies various damages such as debris, cracks, dents, holes, pet marks, and wear. With this kit, you can repair your furniture on your own without the need for professional assistance, saving you both time and money, and revitalizing your furniture.
- HELPFUL TIPS & 100% SATISFACTION GUARANTEE: If you find the color too dark, please avoid applying excessive force and instead gently apply and wipe off. It's best to test color mixtures in less visible areas to alleviate concerns about suitability. We promise to provide you with 100% satisfactory service. If you encounter any dissatisfaction with our products, please feel free to contact us.

- Includes 30 featured and newest released color card. Sprayed on color to see our colors in your homes lighting for more accurate color choices.
- ALL-IN-ONE Paint - NO Sanding, NO Priming, NO Top Coat Required, Low Luster, Velvet Sheen Finish
- Interior/Exterior - Paint your whole house - Ideal for hard surfaces including walls, doors, cabinets, counters, furniture, metal, glass, ceramics and floor and wall tile
- Durable yet stretches to paint smooth fabrics, vinyl and leather
- Results cannot be guaranteed. Digital screens may not show color accurately. Product search - Heirloom Traditions Paint Color Collection Fan Deck, for an accurate color choice.
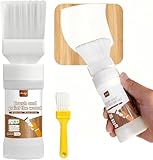
- 【All-in-One Touch-Up Paint】Built-in brush lets you fix scratches & damage on wood instantly. No tools, no mess.
- 【Fast-Drying, Better Coverage】Dries to the touch in 30 minutes, 3x faster than oil-based paint.
- 【Ready to Use】Shake, brush, and go. Recoat in 30 minutes for a smooth finish.
- 【Safe, Odorless & Easy Cleanup】Non-toxic and low-odor formula, safe for household use. Washes off skin and brushes with water.
- 【Smooth Application】Soft nylon bristles for fine details. Adjustable paint flow ensures even, professional results.
Your Guide to Choosing the Best Way to Paint Cabinets
Painting your cabinets can make a huge difference in your kitchen or bathroom. It gives old cabinets a fresh, new look without costing a lot of money. But how do you choose the right way to do it? This guide helps you pick the best method for your project.
Key Features to Look For
When looking at cabinet painting kits or methods, several features matter most.
- **Durability:** The paint needs to last a long time. Cabinets get touched a lot. You want a finish that resists chips and scratches.
- **Adhesion:** Good paint sticks well to the cabinet surface. Poor adhesion means the paint peels off quickly.
- **Finish Options:** Do you want a shiny look (gloss) or a flatter look (matte)? Look for options that offer the sheen you like.
- **Ease of Use:** Some methods require a lot of spraying skill. Others are easier for beginners to brush or roll on smoothly.
Important Materials You Will Need
The paint is just one part of the job. You need the right helpers to get a professional result.
Surface Preparation Materials
You must clean the cabinets well first. Grease and dirt stop paint from sticking. You will need:
- Degreaser or TSP substitute (to clean).
- Sandpaper (various grits, like 120 and 220) to rough up the surface.
- Wood filler (to fix any dents or holes).
Painting Supplies
The choice of application tool changes the final look.
- **Primer:** A high-quality bonding primer is essential. It helps the topcoat stick perfectly.
- **Topcoat Paint:** Oil-based (alkyd) paints are very durable but smell strong. Water-based acrylic enamels are easier to clean up and dry faster.
- **Applicators:** Small foam rollers give a smoother finish than standard fuzzy rollers. High-density foam brushes work well for detailed trim. If spraying, a paint sprayer is necessary.
Factors That Improve or Reduce Quality
The quality of your final cabinet paint job depends heavily on preparation and technique.
What Boosts Quality?
Taking your time during prep work greatly improves the result. Proper sanding ensures the paint grabs hold. Applying thin, even coats of paint, rather than one thick coat, prevents drips and runs. Always let each coat dry fully before starting the next one. A good bonding primer is your best friend for long-lasting results.
What Lowers Quality?
Rushing the cleaning process leaves behind oil, which causes bubbling or peeling later. Skipping the primer is a common mistake that ruins durability. Painting in a dusty environment introduces specks into your wet paint. Thick coats of paint look messy and take forever to cure hard.
User Experience and Use Cases
How easy the process is depends on your comfort level with DIY projects.
For Beginners:
Look for cabinet paint kits that specifically state they require minimal sanding. Water-based enamel paints offer a better user experience because cleanup involves soap and water, not harsh chemicals. Brushing and rolling is the simplest method, but you must work slowly to avoid brush marks.
For Experienced Painters:
If you have experience, using a paint sprayer will give you the smoothest, factory-like finish. HVLP (High Volume Low Pressure) sprayers are often recommended for cabinets because they offer great control.
10 Frequently Asked Questions About Painting Cabinets
Q: Do I have to remove the cabinet doors?
A: Yes, removing the doors and hardware makes the job much easier. You can paint the faces flat on sawhorses. This prevents drips on vertical surfaces.
Q: How long does the entire painting process take?
A: The actual painting time is short, but drying time is long. Plan for at least 3 to 5 days total. This allows for cleaning, sanding, priming, and multiple topcoats to fully cure.
Q: Can I paint over glossy cabinets?
A: You must dull down glossy cabinets first. If you skip sanding, the new paint will just peel off the slick surface.
Q: What is the best paint sheen for kitchen cabinets?
A: Semi-gloss or satin sheens are best for kitchens. They look good and are easy to wipe clean when splatters happen.
Q: Should I use oil-based or water-based paint?
A: Water-based acrylic enamel is popular now. It dries faster and cleans up easily. Oil-based paint offers extreme hardness but requires strong ventilation.
Q: What is ‘curing time’?
A: Curing time is how long the paint takes to become completely hard and scratch-resistant. It is much longer than just the dry time. Wait several weeks before aggressively cleaning your new cabinets.
Q: How do I prevent brush strokes?
A: Use a high-quality, thin foam roller or a fine-tipped brush. Apply paint in thin layers, and avoid going over the same spot repeatedly once the paint starts setting up.
Q: Do I need to use a specific type of primer?
A: Yes, use a bonding or stain-blocking primer. This helps the paint stick firmly to slick surfaces like laminate or old finishes.
Q: Is painting cabinets a good idea for dark wood?
A: Painting dark wood white requires excellent coverage. You might need two coats of primer and three coats of topcoat to fully hide the dark color underneath.
Q: Can I paint laminate cabinets?
A: Yes, you can paint laminate, but surface preparation is crucial. You must sand the laminate well and use a strong bonding primer specifically designed for slick surfaces.