
Do you dream of a kitchen makeover but dread the high cost of new countertops? Many homeowners feel stuck with dull, dated surfaces. Replacing kitchen counters costs a lot of money and takes a lot of time. It can feel overwhelming to choose the perfect paint color and finish that will actually last. You worry about spills, scratches, and whether the paint will look cheap.
But what if we told you there’s an affordable, creative way to transform your kitchen? Painting your existing countertops is a smart solution that gives you a custom look without the major expense. This guide cuts through the confusion. We will show you exactly what to look for in kitchen counter paint, how to choose the best type for your needs, and the simple steps to get a professional-looking result.
Ready to stop dreaming and start doing? Keep reading to unlock the secrets to durable, beautiful painted countertops and finally give your kitchen the fresh, modern update it deserves.
Top Paint For Kitchen Counters Recommendations

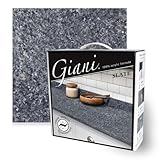
- Beyond paint counter top paint pint - color - charcoal
- No stripping-no sanding-no priming needed
- Application is quick and easy and the result is a beautiful and professional finish
- Country of Origin: United States

- Luxurious Aesthetic: Emulates the high-end look of white quartz with a glassy sheen, ideal for adding a touch of elegance to both traditional and contemporary spaces.
- Easy Transformation: A simple three-step process designed to revitalize Formica, laminate, Corian, butcher block, cultured marble, and traditional granite countertops in just one weekend.
- Comprehensive Kit: Comes with all necessary components, including primer, epoxy resin, rollers, brushes, and more, sufficient to cover up to 35 square feet of countertop space.
- Safe and Low Odor: Formulated for safe indoor use with very low odor and zero VOCs, ensuring a comfortable and eco-friendly application process.
- Durable and Protective Finish: Includes a high-gloss, crystal clear Epoxy Resin Topcoat that not only enhances the finish but also provides long-lasting protection against daily wear and tear.

- Beyond paint counter top paint pint - color - bone
- No stripping-no sanding-no priming needed
- Application is quick and easy and the result is a beautiful, professional finish
- Roll on application - self leveling
- Recommended to be used with beyond paint multipurpose sealer for more durability
- 3 simple steps that will transform Formica, laminate, Corian, ceramic tile, butcher block, cultured marble, and traditional granite in a single weekend.
- Authentic granite finish offered in 5 contemporary colors, that cover 35 sq. ft. or 16 running ft. of 24 in. wide countertops.
- 100% Acrylic formula - Low odor, low VOC, water-based, durable, high-gloss, food safe topcoat that lasts for years.
- Simple sponge on and roll on application that is customizable to the look of your space. Step by step detailed instructions.
- All Giani Paints and Coatings are 100% Manufactured and Packaged in the USA.
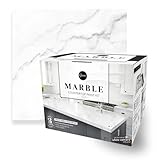
- Giani Countertop Paint is a simple, three-step application that will transform Formica, laminate, Corian, ceramic tile, butcher block, cultured marble, and traditional granite in a single weekend.
- Each kit contains all necessary tools and covers 35 square feet of surface, which is the average amount of countertop area in a kitchen.
- The updated Giani Marble Kit comes with a NEW extra-durable, high-gloss Epoxy Resin Topcoat that finishes and protects the application against the everyday use of your countertops.
- Giani Countertop Paint is safe for interior use, very low odor, and zero VOC. The specialized primer hides existing discoloration, burns, stains, and minor scratches, while the mineral colors create the characteristics of marbled quartz
- AVAILABLE AND IMPROVED! Giani Marble now includes our brand new Giani Epoxy Resin Topcoat for an even more durable and glossy finish. Stain and water-resistant and as tough as engineered quartz, this second generation of our countertop paint kit will help you remake your kitchen into the space you’ve always dreamed of.
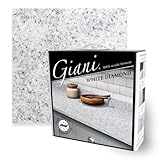
- 3 simple steps that will transform Formica, laminate, Corian, ceramic tile, butcher block, cultured marble, and traditional granite in a single weekend.
- Authentic granite finish offered in 5 contemporary colors, that cover 35 sq. ft. or 16 running ft. of 24 in. wide countertops.
- 100% Acrylic formula - Low odor, low VOC, water-based, durable, high-gloss, food safe topcoat that lasts for years.
- Simple sponge on and roll on application that is customizable to the look of your space. Step by step detailed instructions.
- This kit is cool-toned, with subtle blue undertones. This can show up more in your space depending on your lighting and surrounding colors.

- 3 simple steps that will transform Formica, laminate, Corian, ceramic tile, butcher block, cultured marble, and traditional granite in a single weekend.
- Authentic granite finish offered in 5 contemporary colors, that cover 35 sq. ft. or 16 running ft. of 24 in. wide countertops.
- 100% Acrylic formula - Low odor, low VOC, water-based, durable, high-gloss, food safe topcoat that lasts for years.
- Simple sponge on and roll on application that is customizable to the look of your space. Step by step detailed instructions.
- All Giani Paints and Coatings are 100% Manufactured and Packaged in the USA.

- Includes 30 featured and newest released color card. Sprayed on color to see our colors in your homes lighting for more accurate color choices.
- ALL-IN-ONE Paint - NO Sanding, NO Priming, NO Top Coat Required, Low Luster, Velvet Sheen Finish
- Interior/Exterior - Paint your whole house - Ideal for hard surfaces including walls, doors, cabinets, counters, furniture, metal, glass, ceramics and floor and wall tile
- Durable yet stretches to paint smooth fabrics, vinyl and leather
- Results cannot be guaranteed. Digital screens may not show color accurately. Product search - Heirloom Traditions Paint Color Collection Fan Deck, for an accurate color choice.
The Ultimate Buying Guide for Painting Your Kitchen Counters
Painting your kitchen counters is a fantastic way to update your kitchen without the high cost of replacement. This guide will help you choose the right paint for a beautiful, long-lasting finish.
Key Features to Look For
When shopping for counter paint, you need products built for tough kitchen life. Look for these main features:
- Durability: Kitchen counters see spills, heat, and scrubbing. The paint must resist chips and scratches. Look for terms like “heavy-duty” or “commercial grade.”
- Water Resistance: Your counters get wet often. The paint needs strong water resistance to prevent bubbling or peeling.
- Heat Tolerance: While you should avoid placing hot pots directly on painted counters, the paint should handle normal warmth from dishes or small appliances without damage.
- Easy Cleanup: A good counter paint allows you to wipe down messes easily with standard kitchen cleaners.
Important Materials and Types of Paint
The material of your existing counter greatly affects which paint you should use. Most counter paint kits are two-part systems.
Epoxy Paints
Epoxy paints are very popular for counters. They mix a resin and a hardener. This mixture creates a very tough, plastic-like surface when it dries. Epoxy adheres well to many surfaces like laminate, tile, or even old solid surfaces. They offer excellent water and stain resistance.
Polyurethane Topcoats
Sometimes, you apply a clear polyurethane coat over a base color. This topcoat adds an extra layer of protection. It boosts scratch resistance and shine. Always check if the paint system recommends a topcoat for best results.
Surface Preparation Materials
The paint itself is only half the battle. You must have high-quality primers and degreasers. A strong bonding primer is essential, especially for slick surfaces like laminate. Poor preparation means the paint will fail quickly.
Factors That Improve or Reduce Quality
The quality of your final look depends on preparation and application.
Factors That Improve Quality:
- Thorough Cleaning: You must remove all grease, soap scum, and old sealants. Use a strong degreaser.
- Sanding: Lightly sanding the old counter creates a rough surface. This roughness helps the primer grip the counter tightly.
- Following Cure Times: This is crucial. If you rush and use the counter before the paint fully cures (hardens), you will ruin the finish instantly. Cure times can sometimes take several days.
Factors That Reduce Quality:
- Painting Over Dirt: If any dust or oil remains, the paint will lift or bubble where the contamination is.
- Applying Too Thick: Thick layers of paint take longer to dry and are more likely to sag or drip. Thin, even coats build a stronger final layer.
- Ignoring Ventilation: Most strong counter paints require good airflow. Poor ventilation can affect how the paint cures, leading to a soft finish.
User Experience and Use Cases
Painting counters is best for homeowners looking for a budget-friendly refresh.
User Experience:
The actual painting process usually involves cleaning, priming, applying the color coat (often with a roller), and then applying a topcoat. It takes patience. Most users find the prep work is the longest part. The application itself is often quick, but waiting for drying times is essential.
Use Cases:
This is perfect for updating old, dated laminate counters that are still structurally sound. It works well in low-to-medium traffic kitchens. It is not usually recommended for areas that experience extreme, constant heat, such as directly next to a stovetop burner.
10 Frequently Asked Questions (FAQ) About Counter Paint
Q: How long does painted counter paint last?
A: If prepared and cured correctly, quality epoxy counter paint can last three to five years, sometimes longer in low-use kitchens.
Q: Can I paint over tile countertops?
A: Yes, but proper prep is vital. You must use a special primer that sticks to the grout lines and the tile surface well.
Q: Is the paint safe once it is fully cured?
A: Once fully cured (hardened), most modern counter paints are considered food-safe for contact, but manufacturers’ instructions must always be followed.
Q: Do I need to seal the paint?
A: Many two-part epoxy kits already include a sealant hardener. If you use a standard acrylic paint, a strong polyurethane topcoat is highly recommended for protection.
Q: What is the hardest part of the job?
A: The hardest part is the surface preparation—cleaning, degreasing, and sanding—and waiting for the full cure time before using the counters.
Q: How do I clean my newly painted counters?
A: Use mild dish soap and water or non-abrasive cleaners. Avoid harsh chemicals like bleach or abrasive scrub pads, as these damage the finish.
Q: Can I paint over granite or real stone?
A: It is possible, but not usually recommended. Stone is porous, and the paint may not bond as well as it does to laminate or solid surfaces.
Q: What is the typical drying time before I can lightly touch the surface?
A: Light touch drying often takes 4 to 8 hours, but the full functional cure time where you can place items on it is usually 3 to 7 days.
Q: Does the paint have a strong smell?
A: Yes, most durable paints, especially epoxies, have strong fumes. You must work in a well-ventilated area, usually with fans running.
Q: What if I chip a small area later?
A: Small chips can usually be touched up. You will need the original paint and primer. Lightly sand the chip area, apply primer, then the color coat, and reapply the topcoat over the small area.