
Ever step into your bathroom and feel like something is just… off? Sometimes, the simplest change makes the biggest difference. Choosing the right paint finish for your bathroom is one of those crucial details that can totally transform the space. It’s not just about picking a pretty color; the finish you select battles steam, splashes, and humidity every single day.
This is where things get tricky. Should you pick a shiny paint or a dull one? A flat finish looks nice, but it might peel after a few steamy showers. A high-gloss finish resists water well, but it shows every single tiny imperfection on your walls. Dealing with mold, mildew, and paint that flakes off is frustrating and wastes time and money.
Don’t worry! This guide cuts through the confusion. We will explain exactly what each bathroom paint finish offers. You will learn which finish stands up best to moisture and which one hides those little wall bumps. By the end of this post, you will confidently select the perfect, durable paint finish for your bathroom makeover.
Top Paint Finish For Bathrooms Recommendations

- Porcelain-like finish
- Chip resistant
- Excellent durability in hot water & strong finish that resists peeling
- For use on Porcelain, Glass, Fiberglass, Ceramic Tile, Other glossy, non-porous surfaces
- Dry to touch in 25 minutes or less

- SENVEN TUB & TILE REFINISHING SPRAY PAINT: Apply this Tile Spray Paint to ceramic, porcelain, or fiberglass surfaces, including tiles, sinks, and tubs. Specifically for ceramic, porcelain surfaces like bathtubs, tile floors/walls, toilets, sinks and countertops. DIY refinish your bathroom with just one quick and easy spray step for a refreshed look. The SENVEN Tub & Tile Refinishing Kit is here to reduce costs without breaking the bank on new fixtures or hiring a contractor
- HIGH-QUALITY TUB & TILE REFINISHING SPRAY PAINT: SENVEN tile spray paint offers superior abrasion and scratch resistance, making it ideal for high humidity environments. Its chip-resistant formula ensures excellent durability, even in hot water, and its strong finish resists peeling. SENVEN tile spray paint specifically engineered for these surfaces, it withstands moisture and extreme hot temperatures, ensuring a durable and corrosion-resistant finish
- EASY TO USE: SENVEN Tile Refinishing Spray Paint is incredibly convenient to apply. Simply activate the spray by shaking it well before use. It ensures a uniform spraying thickness, allowing for fast construction speed, a delicate paint film, and rapid drying. To enhance the adhesion of the coating, it is recommended to perform multiple uniform spraying layers
- HOW MANY CANS DO I NEED: 6 cans cover approximately 80-105 sq.ft.(with 2 light coats). Allow the first light coat to dry completely (wait about 10 minutes) before applying the second coat. 2 cans cover approximately 30-35 sq.ft.(with 2 light coats). Allow the first light coat to dry completely (wait about 10 minutes) before applying the second coat
- TIP FROM THE PROS: The tile spray paint formula dries to the touch in 20 minutes. Allow the surface to dry for 3 days prior to water exposure. The spray coating cures and becomes hard, like a semi-gloss porcelain finish, providing superior abrasion and scratch resistance. Please note that it has a strong odor. Therefore, please wear a respirator while applying, with the windows and doors open and fans running
- Made in America
- Not intended for use on bathtubs, showers, or sinks
- Great for Kitchens and bathroom walls, ceilings, and cabinets
- High hiding
- Semi-Gloss finish

- 【Broad Applicability】The tub paint is ideal for indoor and outdoor tiles, wood, glass,ceramics, acrylic, and marble surfaces like sinks, floors, bathtubs, walls.. Not suitable for artificial marble, metal, powdery or peeling substrates. Cast iron tubs (iron alloys with porcelain enamel) can be painted; regular iron tubs cannot
- 【33 oz Capacity】Generous 33 oz capacity covers an area of 50-55 sq ft, perfect for medium to large renovation projects. The tile paint also comes with a sponge roller, a brush, a pair of gloves, a masking tape, a masking film, two sandpapers, a user manual to complete your project efficiently
- 【Low Odor & VOCs】This tile floor paint has a low odor and minimal volatile organic compounds (VOCs), providing a more pleasant painting experience. Ideal for use in enclosed spaces without overpowering fumes
- 【Waterproof & Anti-Peeling】The tub refinishing kit features a water-based acrylic resin formula that offers exceptional waterproofing and anti-peeling properties. This creates long-lasting durability and protection against wear and tear, maintaining a fresh look over time
- 【Fast Drying】Quick-drying sink paint formula allows for easy application. Wait about 2 hours between coats and 24 hours for full curing. Your painted surface will be ready for use in just 7 days, minimizing downtime and inconvenience. Please clean the surface thoroughly before apply

- Paint for Bathroom Wall: Perfect for High-Humidity Areas Designed specifically as paint for bathroom wall, it handles daily moisture exposure well—keeps walls looking clean even in damp bathroom environments. Works great on bathroom ceilings too, meeting your primary wet-space painting needs.
- Low VOC White Finish: Bright & Clean Look This white interior wall paint delivers a fresh, bright finish (matches "extra white" decor styles) with low VOC and low odor. Safe for closed bathroom spaces, no harsh smells during application.
- Washable & Scrubbable: Easy to Maintain Highly washable design lets you easily wipe away bathroom water spots, soap scum, and light marks—no need to repaint frequently. Durable finish stays intact even after repeated cleaning.
- Versatile for Most Indoor Surfaces Adheres firmly to bathroom wall materials like plaster, cement, and previously painted walls. Also works for other indoor spaces (not just bathrooms) but shines in high-humidity areas.
- Easy to Apply: Touch Dry in 1-2 Hours Simple to use with brush or roller—ideal for DIY bathroom renovations. Touch dry in 2-3 hours, recoatable in 4 hours. Clean tools with warm soapy water, saving post-project effort.

- SENVEN TUB & TILE REFINISHING SPRAY PAINT: Apply this Tile Spray Paint to ceramic, porcelain, or fiberglass surfaces, including tiles, sinks, and tubs. Specifically for ceramic, porcelain surfaces like bathtubs, tile floors/walls, toilets, sinks and countertops. DIY refinish your bathroom with just one quick and easy spray step for a refreshed look. The SENVEN Tub & Tile Refinishing Kit is here to reduce costs without breaking the bank on new fixtures or hiring a contractor
- HIGH-QUALITY TUB & TILE REFINISHING SPRAY PAINT: SENVEN tile spray paint offers superior abrasion and scratch resistance, making it ideal for high humidity environments. Its chip-resistant formula ensures excellent durability, even in hot water, and its strong finish resists peeling. SENVEN tile spray paint specifically engineered for these surfaces, it withstands moisture and extreme hot temperatures, ensuring a durable and corrosion-resistant finish
- EASY TO USE: SENVEN Tile Refinishing Spray Paint is incredibly convenient to apply. Simply activate the spray by shaking it well before use. It ensures a uniform spraying thickness, allowing for fast construction speed, a delicate paint film, and rapid drying. To enhance the adhesion of the coating, it is recommended to perform multiple uniform spraying layers
- HOW MANY CANS DO I NEED: 6 cans cover approximately 80-105 sq.ft.(with 2 light coats). Allow the first light coat to dry completely (wait about 10 minutes) before applying the second coat. 2 cans cover approximately 30-35 sq.ft.(with 2 light coats). Allow the first light coat to dry completely (wait about 10 minutes) before applying the second coat
- TIP FROM THE PROS: The tile spray paint formula dries to the touch in 20 minutes. Allow the surface to dry for 3 days prior to water exposure. The spray coating cures and becomes hard, like a semi-gloss porcelain finish, providing superior abrasion and scratch resistance. Please note that it has a strong odor. Therefore, please wear a respirator while applying, with the windows and doors open and fans running
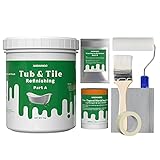
- Included: compound emulsion 1kg/35 oz(part A), Hardener 20g/0.7 oz (part B), user manual, gloves, brush, roller, pre-taped masking film , masking tape, sandpapers. We proudly provide you all items that allows you to bring you refinishing projects to life with no unnecessary stress!
- DIY in a few simple steps: All you need is mix compound part A and Part B together, then apply the mixture to the surface using a roller or brush.
- Once dry, the surface is semi-gloss. Cured in 24 hours. Wait the full cure time of 7 days (time it takes for new finish to reach its maximum hardness) before taking a hot bath.
- Use to refinish porcelain ceramic surface like tub, tile, shower, vanities, sink. Also work on fiberglass, stone, plastic. Perfect for renters, apartment dwellers, and residential or commercial tubs, sinks, showers.
- Unique water-based two parts, has less smell when applied to to surfaces. also delivering a durable finish that is as long lasting as it is beautiful. Each set(1kg/ 35 oz) covers about 50 sq.ft for 2 coats. Color: white

- Long-lasting & Affordable: Low VOC and odor, this Long-lasting high gloss acrylic paint and topcoat are heat and stain resistant which can against everyday use. TIPS:Please SAND & CLEAN the furniture before painting to guarantee that the paint applies evenly and securely to the surface. Lightly sand the surface of the furniture again before applying the 3A topcoat. After painting, wait 5 to 7 days until the paint has completely hardened before using the furniture
- Fantastic DIY Project: Easy to use with step-by-step instructions, upgrade and paint your countertop with a gloss finish to similate the look of granite
- Cover 38 square feet (16 linear feet of standard 24” wide counter) for ceramic tile, laminate, corian, butcher block, and traditional granite
- Using Tips: ①Ensure that the surface of the object is free of dust and keep the surface clean and dry. ②Due to transportation and weather conditions, there may be layering of the paint, please mix the countertop paint evenly and then you can use it normally. ③If your countertop has damage such as holes, scratches, please repair it before using this product
- Construction Kit: Countertop Paint comes with a complete set of painting tools, including GLAINTE Countertop Paint, a paint roller, and a sponge. NOTE: PAINT TRAY NOT INCLUDED! Whether you are an experienced DIY enthusiast or a novice, this all-in-one kit will make your painting project a breeze. It helps you achieve a professional finish while keeping your expenses under control
Choosing the Best Paint Finish for Your Bathroom
Bathrooms are special rooms. They get wet and steamy a lot. This means you need paint that can handle the moisture. Picking the right paint finish makes a big difference. It keeps your walls looking good for a long time. This guide helps you choose the perfect paint.
Key Features to Look For
When buying paint for a bathroom, look for these important things:
- Moisture Resistance: The paint must fight off water and steam. If it doesn’t, the paint will bubble or peel.
- Mildew Resistance: Damp areas can grow mildew (that fuzzy, black stuff). Good bathroom paint has ingredients to stop this growth.
- Durability and Scrubbability: Bathrooms sometimes get splashes. You need paint you can wipe clean without hurting the color or finish.
- Sheen Level: This is how shiny the paint looks. Higher shine usually means better water protection.
Understanding Sheen Levels (Shiny vs. Matte)
Paint sheen is very important in bathrooms. Here is a quick look:
Flat/Matte Finishes:
These look dull and hide wall imperfections well. However, they are not very good against moisture. They are usually best for very low-use powder rooms that rarely get steamy.
Eggshell/Satin Finishes:
Satin is a popular middle ground. It has a soft shine. It resists moisture better than flat paint. You can clean satin finishes easily. This is great for most family bathrooms.
Semi-Gloss and High-Gloss Finishes:
These are the shiniest options. They offer the best protection against water and mildew. They clean up the easiest. High-gloss can show every small bump on your wall, so make sure your walls are smooth before using it.
Important Materials and Paint Types
The material of the paint matters most for bathroom performance.
- Latex (Water-Based) Paint: Most modern bathroom paints use latex. Look specifically for “100% Acrylic Latex.” Acrylic helps the paint stick well and resist water damage.
- Oil-Based Paint: Oil paints are very tough. They resist moisture well. However, they smell strong, take a long time to dry, and yellow over time. Most people choose high-quality acrylic latex today.
- Specialized Bathroom Paints: Some companies make paint specifically for bathrooms. These often include extra mildewcides for maximum protection.
Factors That Improve or Reduce Quality
Good preparation and quality ingredients lead to a better paint job.
What Improves Quality:
- High Solids Content: Paints with more solid material (less water) create a thicker, stronger film when dry. This film protects your walls better.
- Primer Use: Always use a moisture-blocking primer first, especially if painting over old, glossy paint or drywall that has seen water damage. Primer helps the topcoat stick strongly.
- Proper Curing Time: You must let the paint dry completely before exposing it to heavy steam. Check the can, but usually, wait several days before heavy shower use.
What Reduces Quality:
- Using Flat Paint: Flat paint absorbs moisture like a sponge. This quickly leads to peeling.
- Skipping Primer: Skipping primer means the paint might not stick well. Water can get behind the paint layer.
- Poor Ventilation: If your bathroom fan does not work well, moisture stays trapped. No paint can fully stop constant, heavy moisture build-up.
User Experience and Use Cases
How you use your bathroom should guide your finish choice.
High-Use Family Bathroom: Use Satin or Semi-Gloss. These finishes let you scrub off toothpaste splatter or soap scum easily. The experience is low-stress because cleaning is simple.
Guest Bathroom or Powder Room: If the room never gets steamy, you might choose Eggshell for a softer look. The risk of moisture damage is low here.
Small Bathroom with No Window: You absolutely need Semi-Gloss or High-Gloss paint. These finishes handle the constant dampness best. The walls will stay protected even when the fan is running for a long time.
10 Frequently Asked Questions (FAQ) About Bathroom Paint Finishes
Q: Which finish is the most durable for a shower area?
A: Semi-gloss or high-gloss finishes are the most durable because they resist water penetration the best.
Q: Can I use regular interior paint in my bathroom?
A: You can, but only if it is a high-quality acrylic latex with mildew resistance. Standard wall paint will likely fail quickly.
Q: Do I need a special primer for the bathroom?
A: Yes, a moisture-blocking primer is highly recommended. It seals the drywall better than a standard primer.
Q: How long should I wait before showering after painting?
A: Wait at least 24 to 48 hours for the paint to dry, but wait a week for it to fully “cure” before exposing it to heavy, hot steam.
Q: What sheen level hides wall bumps the best?
A: Flat or matte finishes hide bumps the best, but they are the worst choice for moisture protection.
Q: Is oil-based paint better than latex for bathrooms now?
A: Not usually. Modern 100% acrylic latex paints perform just as well as oil paints for bathrooms, but they clean up easier and smell less.
Q: What is the main enemy of bathroom paint?
A: Constant, high humidity and poor ventilation are the main enemies. They lead to peeling and mildew.
Q: Should I use paint with mildewcides?
A: Yes. Look for paints labeled “Kitchen & Bath” or those stating they contain mildewcides for extra protection in damp spots.
Q: How often do I need to repaint a bathroom?
A: If you use a good quality satin or semi-gloss paint, it can last five to ten years before needing a refresh.
Q: What if my bathroom has many stains?
A: Clean the stains thoroughly first. Then, use a stain-blocking primer over the spots before applying your finish coat.