
What is the best way to teach art to kids? The best way to teach art to kids is to make it fun, encouraging, and process-oriented, rather than focusing solely on the final product. It’s about igniting their imagination and providing them with the tools and freedom to explore.
Teaching art to children is a rewarding journey that nurtures their imagination and self-expression. It’s about more than just drawing or painting; it’s a vital part of their development, helping them to think critically, solve problems, and see the world in new ways. This guide offers a wealth of fun and creative ideas for fostering creativity in children through engaging children’s art activities. Whether you’re a parent, a teacher, or simply someone who loves making art with kids, you’ll find practical tips and inspiring art lesson plans for kids that will spark joy and learning.
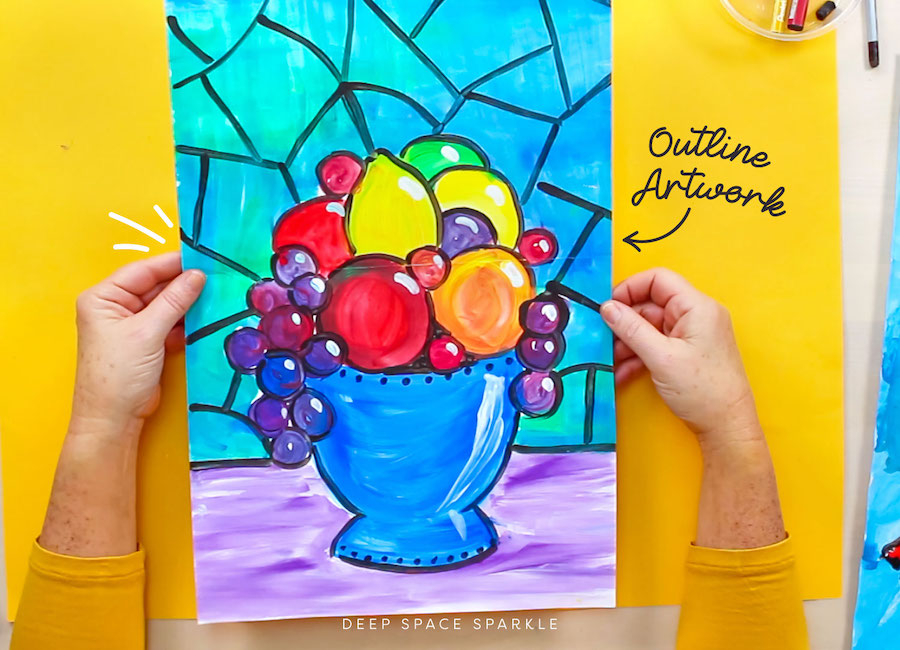
Image Source: www.deepspacesparkle.com
The Foundation of Art Education for Kids
Art education for kids provides a unique avenue for them to process their emotions, communicate their ideas, and develop fine motor skills. When we focus on teaching art to young children, we’re not just teaching them techniques; we’re building their confidence and encouraging them to embrace their individuality. The emphasis should always be on the joy of creation and the exploration of materials.
Why Art Matters for Young Minds
- Boosts Self-Esteem: Completing an art project, no matter how simple, gives children a sense of accomplishment.
- Enhances Problem-Solving: Art often involves figuring out how to make something work, like how to balance a sculpture or mix a specific color.
- Develops Fine Motor Skills: Holding a crayon, cutting with scissors, or molding clay all help develop the small muscles in their hands and fingers, which are crucial for writing and other tasks.
- Encourages Self-Expression: Art provides a safe space for children to express their feelings, thoughts, and experiences.
- Promotes Observation: When children draw or paint from life, they learn to look closely at the details of the world around them.
- Sparks Imagination: Art is a playground for the mind, allowing children to create worlds, characters, and stories.
Setting the Stage for Creative Exploration
Creating a supportive and stimulating environment is key to successful art education for kids. This means providing a dedicated space, offering a variety of materials, and adopting a positive and encouraging attitude.
Creating an Art-Friendly Space
- Designated Area: If possible, set aside a specific spot for art. This could be a table in the kitchen, a corner of a room, or even an easel.
- Easy Cleanup: Use a drop cloth, old newspapers, or a plastic tablecloth to protect surfaces. Have wipes or a damp cloth readily available for quick cleanups.
- Accessible Materials: Keep supplies organized and within reach. Jars for crayons, bins for paper, and shelves for paints make it easy for children to get what they need.
Essential Art Supplies for Children
Having a good selection of materials opens up a world of possibilities for creative art projects for children.
- Paper: Construction paper, drawing paper, cardstock, scrap paper, newspaper, butcher paper.
- Drawing Tools: Crayons, colored pencils, markers, chalk, pastels.
- Painting Supplies: Washable tempera paints, watercolors, brushes of various sizes, palettes or paper plates for mixing.
- Sculpting Materials: Play-Doh, air-dry clay, modeling clay, salt dough.
- Cutting & Pasting: Child-safe scissors, glue sticks, liquid glue.
- Other Fun Bits: Googly eyes, pipe cleaners, pom-poms, yarn, fabric scraps, natural items (leaves, twigs).
Fun Art Ideas for Children: Sparking Joyful Creation
When it comes to making art with kids, variety is the spice of life! Introducing different mediums and techniques keeps things exciting and helps children discover their preferences. Here are some fun art ideas for children that cover a range of skills and themes.
Painting Adventures
Painting is a classic for a reason. It’s messy, vibrant, and allows for a lot of experimentation.
Splatter Painting
- Concept: Create abstract art by flicking, dripping, or splashing paint onto paper.
- How-to: Dilute tempera paints slightly with water. Place paper on a drop cloth or outside. Use brushes to flick paint, or dip string into paint and let it drip. You can also use old toothbrushes for a finer splatter.
- Tips: Encourage children to experiment with different brush strokes and paint consistencies.
Sponge Painting
- Concept: Use sponges to create unique textures and patterns.
- How-to: Cut sponges into various shapes. Dip the sponges into paint and press them onto paper. Layer colors or use different sponges for different effects.
- Tips: Sponges are great for covering larger areas quickly or for creating dotted patterns.
Finger Painting
- Concept: Embrace the tactile experience of painting directly with fingers.
- How-to: Use washable finger paints. Provide large sheets of paper. Let children explore color mixing and texture by spreading, swirling, and dabbing the paint.
- Tips: This is particularly engaging for very young children. You can also use cotton swabs or sponges for different mark-making.
Drawing and Coloring Delights
Drawing is often the first art form children engage with, and it continues to be a fundamental skill.
Collaborative Drawing
- Concept: Work together on a single piece of art.
- How-to: Start with a large sheet of paper. One person starts drawing something, and then passes it to the next person to add to it. This can go back and forth many times.
- Tips: This teaches teamwork and how to build upon someone else’s ideas.
Texture Rubbings
- Concept: Capture the texture of objects by rubbing over them with a crayon.
- How-to: Place a piece of paper over a textured surface (like a leaf, coin, wood grain, or textured tray). Rub the side of a crayon firmly over the paper to reveal the texture.
- Tips: This is a simple yet effective way to explore patterns and textures.
Blind Contour Drawing
- Concept: Draw an object without looking at the paper.
- How-to: Choose an object (like a hand, a fruit, or a toy). Place your pen on the paper and look only at the object. Draw its outline and details as your eye moves across it, without lifting your pen or looking at your paper.
- Tips: This exercise is excellent for improving observation skills and accepting imperfect results. The outcome is often surprisingly abstract and interesting.
Collage Creations
Collage is a fantastic way to introduce mixed media and develop cutting and pasting skills.
Nature Collage
- Concept: Create art using natural materials.
- How-to: Gather leaves, twigs, flower petals, small stones, or seeds. Glue them onto paper or cardboard to create pictures or abstract designs.
- Tips: This connects children with nature and encourages observation of the natural world.
Magazine Collage
- Concept: Cut out pictures and words from old magazines to create new images.
- How-to: Provide magazines, scissors, and glue. Encourage children to find images that fit a theme (e.g., animals, food, feelings) or to create a fantastical scene.
- Tips: This is great for storytelling and developing visual literacy.
Fabric and Yarn Collage
- Concept: Use fabric scraps, yarn, and other textiles to add texture.
- How-to: Offer various fabric pieces, felt, yarn, buttons, and ribbon. Children can glue these onto paper or cardboard to create textured artwork.
- Tips: This is a wonderful sensory experience and introduces different material properties.
Sculpting and 3D Art
Working in three dimensions helps children develop spatial reasoning and a different kind of creative thinking.
Play-Doh Creations
- Concept: Simple and fun for all ages, Play-Doh is a versatile medium.
- How-to: Provide Play-Doh in various colors. Offer tools like plastic knives, rollers, and cookie cutters. Encourage them to make animals, food, or abstract shapes.
- Tips: For a longer-lasting creation, you can bake Play-Doh creations at a low temperature (follow package instructions).
Salt Dough Sculptures
- Concept: Make your own modeling material for durable sculptures.
- How-to: Mix 2 cups flour, 1 cup salt, and ¾ cup water. Knead until smooth. Shape into figures or objects. Bake at 250°F (120°C) for 2-3 hours until hard. Once cool, they can be painted.
- Tips: Salt dough is a great alternative to store-bought clay and can be painted and decorated after baking.
Recycled Material Sculptures
- Concept: Transform everyday items into imaginative sculptures.
- How-to: Gather cardboard boxes, toilet paper rolls, plastic bottles, egg cartons, and other recyclables. Provide tape, glue, and scissors. Let children assemble and decorate their creations to make robots, castles, or creatures.
- Tips: This teaches about sustainability and how to see potential in discarded items.
Structuring Art Lesson Plans for Kids
Having a basic structure can help guide your art sessions, but remember to remain flexible and allow for spontaneous creativity. Art lesson plans for kids can be as simple as introducing a new technique or exploring a theme.
Sample Art Lesson Plan: “My Colorful Garden”
This plan focuses on elementary art projects and encourages observation and color mixing.
H3: Objective
Children will create a colorful garden scene using painting and collage techniques, exploring color mixing and composition.
H4: Materials
- Large white paper
- Tempera paints (various colors, including green, brown, red, yellow, pink, blue)
- Paintbrushes
- Water cups
- Paper plates for palettes
- Construction paper scraps (green, brown, floral colors)
- Child-safe scissors
- Glue sticks
- Optional: Flower petals, leaves, pipe cleaners
H5: Steps
- Introduction (5-10 minutes):
- Talk about gardens. What do they see in a garden? (Flowers, leaves, bugs, soil).
- Show pictures of colorful gardens.
- Discuss the different colors found in nature.
- Creating the Background (15-20 minutes):
- Encourage children to paint a sky (blue) and some soil/grass (green and brown).
- They can mix colors to create their own shades of green or brown.
- Adding Flowers (20-25 minutes):
- Option 1 (Painting): Demonstrate how to mix colors for flowers (e.g., red + yellow = orange, red + blue = purple). Children can paint flowers directly onto the paper.
- Option 2 (Collage): Provide pre-cut flower shapes or allow children to cut their own from colorful construction paper. They can also use real flower petals if available.
- Glue or paint the flowers onto their garden scene.
- Adding Details (10-15 minutes):
- Use green paint or construction paper scraps to add leaves and stems.
- Encourage children to add other elements like a sun, a fence, or a bug using paint or small scraps. Pipe cleaners can be used for stems or antennae.
- Cleanup and Sharing (5-10 minutes):
- Clean brushes and workspace.
- Allow children to share their garden artwork and talk about what they created.
H5: Extensions
- Sensory Bin: Create a sensory bin with soil, plastic flowers, and small gardening tools.
- Flower Pressing: Press real flowers to use in future collages.
- Sculpture Garden: Have children create clay or salt dough flowers and plants to arrange together.
Another Example: “Animal Mask Creations”
This is a great project for exploring imagination and basic sculpting or collage techniques.
H3: Objective
Children will design and create animal masks using paper plates, cardboard, paint, and various decorative materials.
H4: Materials
- Paper plates or cardboard circles
- Elastic string or yarn
- Hole punch
- Markers, crayons, or paint
- Scraps of construction paper, felt, or fabric
- Glue sticks or liquid glue
- Child-safe scissors
- Optional: Feathers, yarn, pom-poms, pipe cleaners
H5: Steps
- Brainstorming Animals (10 minutes):
- Discuss favorite animals. What makes each animal unique? (Ears, noses, fur, patterns).
- Look at pictures of different animal faces.
- Designing the Mask Base (15 minutes):
- Children can either paint their paper plate/cardboard circle to represent the animal’s face color, or they can cover it with paper or fabric.
- Help them draw or cut out eye holes.
- Adding Features (20-25 minutes):
- Use construction paper, felt, or fabric to cut out ears, noses, mouths, and other features.
- Glue these onto the mask. For example, long triangles for cat ears, a round circle for a pig’s nose, stripes for a tiger.
- Use markers or crayons to add details like whiskers, spots, or stripes.
- Decorating and Embellishing (10-15 minutes):
- Add feathers for a bird mask, yarn for a lion’s mane, or pom-poms for eyes.
- Pipe cleaners can be bent into antlers or whiskers.
- Finishing Touches (5 minutes):
- Punch holes on the sides of the mask and tie elastic string or yarn so it can be worn.
- Show and Tell (5 minutes):
- Let children wear their masks and act like their chosen animal.
H5: Considerations
- Safety: Ensure all materials are non-toxic and scissors are child-safe. Supervise the use of hole punches.
- Adaptability: This project can be adapted for any age group by simplifying or adding complexity to the materials and techniques.
Developing an Art Curriculum for Kids
An art curriculum for kids doesn’t need to be rigid. It’s more about introducing a range of experiences and skills over time, allowing children to build upon their learning. Think of it as a progression of exploration rather than a strict sequence of lessons.
Key Elements of a Kid-Friendly Art Curriculum
- Variety of Mediums: Exposure to drawing, painting, collage, sculpture, printmaking, and mixed media.
- Exploration of Techniques: Learning different ways to use tools and materials (e.g., blending colors, creating textures, cutting accurately).
- Art Appreciation: Introducing children to different artists and art movements in an age-appropriate way. Discussing what they see and how it makes them feel.
- Thematic Units: Exploring concepts like seasons, animals, feelings, or stories through art.
- Process Over Product: Emphasizing the creative journey, experimentation, and learning from mistakes.
Age-Appropriate Art Activities
The approach to teaching art to young children will differ from teaching older children.
Toddlers (Ages 1-3): Sensory Exploration
- Focus: Pure sensory experience. Large movements, bright colors, and safe, non-toxic materials.
- Activities:
- Finger painting with edible paints (yogurt mixed with food coloring).
- Crayon scribbling on large paper.
- Play-Doh or cloud dough sensory play.
- Sticking large paper shapes.
- Water play with brushes and containers.
Preschoolers (Ages 3-5): Developing Skills and Imagination
- Focus: Fine motor skill development, early color mixing, and imaginative play through art.
- Activities:
- Sponge painting.
- Cutting and pasting simple shapes.
- Creating with Play-Doh and simple clay tools.
- Drawing with crayons and chunky markers.
- Nature collages.
- Introduction to simple printmaking (e.g., potato prints).
Early Elementary (Ages 5-8): Introducing Concepts and Techniques
- Focus: Learning about basic art concepts like color, line, shape, and texture. Developing more control with tools.
- Activities:
- More refined painting techniques (brush control, color mixing).
- Collage with various materials.
- Basic sculpting with air-dry clay or salt dough.
- Introduction to perspective (e.g., drawing a road going into the distance).
- Simple printmaking (leaf prints, block prints).
- Pattern making.
- Introduction to famous artists and their styles.
Upper Elementary (Ages 8-11): Deeper Exploration and Skill Building
- Focus: Experimenting with more complex techniques, exploring different art styles, and developing personal expression.
- Activities:
- Watercolor techniques (washes, wet-on-wet).
- Drawing from observation with more detail.
- More intricate collage and mixed media projects.
- Sculpture with more challenging materials (e.g., wire, cardboard construction).
- Introduction to perspective drawing, shading, and still life.
- Exploring different art movements (Impressionism, Cubism) through simplified activities.
- Storytelling through sequential art (comics).
Fostering Creativity: More Than Just Art Supplies
Fostering creativity in children is about nurturing a mindset, not just providing materials. It’s about encouraging a spirit of curiosity, experimentation, and resilience.
The Role of Encouragement and Feedback
- Praise Effort, Not Just Talent: Instead of saying “You’re such a good artist,” try “I love how you used so many different colors here!” or “You really worked hard on that detail.”
- Ask Open-Ended Questions: “What inspired you to draw that?” “How did you decide to use those colors?” “What was the hardest part?”
- Focus on the Process: Talk about the steps they took, the choices they made, and what they learned.
- Avoid Over-Correction: Unless a technique is clearly causing frustration or the child is asking for guidance, let them explore and make their own discoveries. It’s okay if things aren’t “perfect.”
- Celebrate Mistakes as Learning Opportunities: If a painting doesn’t turn out as planned, discuss what happened and how it could be approached differently next time. “That’s an interesting texture that happened when the paint got too wet!”
Inspiring Creativity Beyond the Art Table
- Nature Walks: Encourage observation of shapes, colors, and textures in the natural world.
- Storytelling: Read books, tell stories, and encourage children to create their own narratives, perhaps illustrating them.
- Music and Movement: How does music make them feel? How can they express that feeling through movement or drawing?
- Open-Ended Play: Provide loose parts (blocks, scarves, cardboard tubes) that can be used in countless imaginative ways.
- Museum Visits (Virtual or In-Person): Expose them to a wide range of art and artists. Discuss what they see.
Frequently Asked Questions About Teaching Art to Kids
Q1: How young is too young to start art activities with children?
A1: It’s never too early! Even toddlers can benefit from sensory art experiences with safe, non-toxic materials like finger paints made from yogurt or pureed fruits/vegetables, or simply scribbling with large crayons on big paper. The focus for very young children is on exploration and sensory engagement, not on creating a specific outcome.
Q2: My child is afraid of making a mess. How can I encourage them to try art?
A2: Start with less messy art forms like drawing with crayons or colored pencils. If they are hesitant about paint, try using paint sticks or washable markers first. For painting, create a very controlled environment with a large drop cloth or plastic sheeting, an apron, and focus on activities like sponge painting where the paint application is more deliberate. Reassure them that messes are part of the fun and that cleanup is easy.
Q3: What if my child doesn’t seem “talented” at art?
A3: Art is about expression and process, not innate talent. Focus on the joy of creating, the exploration of materials, and the development of skills rather than artistic output. Celebrate their effort, their unique ideas, and their willingness to try. Everyone can be creative, and art is a wonderful way to discover and nurture that.
Q4: How can I balance teaching specific techniques with letting children be free and creative?
A4: Think of it as providing tools. You can demonstrate a technique, like how to mix secondary colors or how to create a texture with a brush, and then let them apply that knowledge in their own way. Present different options and let them choose what resonates with them. The goal is to equip them with possibilities, not to dictate a single way of creating.
Q5: My child only wants to draw the same thing over and over. How can I encourage variety?
A5: Introduce new prompts or themes. Instead of just saying “draw something,” suggest “draw a house in a jungle,” “draw your favorite food as a monster,” or “draw what happiness looks like.” You can also introduce new materials or techniques that might inspire different subjects. Sometimes, simply showing them different art styles can spark new ideas.
By embracing a playful, encouraging, and process-driven approach, you can effectively teach art to children, helping them to discover their own unique creative voices and enjoy the wonderful world of making art.