
Can you seal an acrylic painting on canvas? Yes, absolutely! Sealing an acrylic painting on canvas is a crucial step in protecting your artwork from damage and preserving its vibrant appearance for years to come. This process, often referred to as varnishing, adds a protective layer that guards against dust, dirt, UV rays, and minor abrasions.
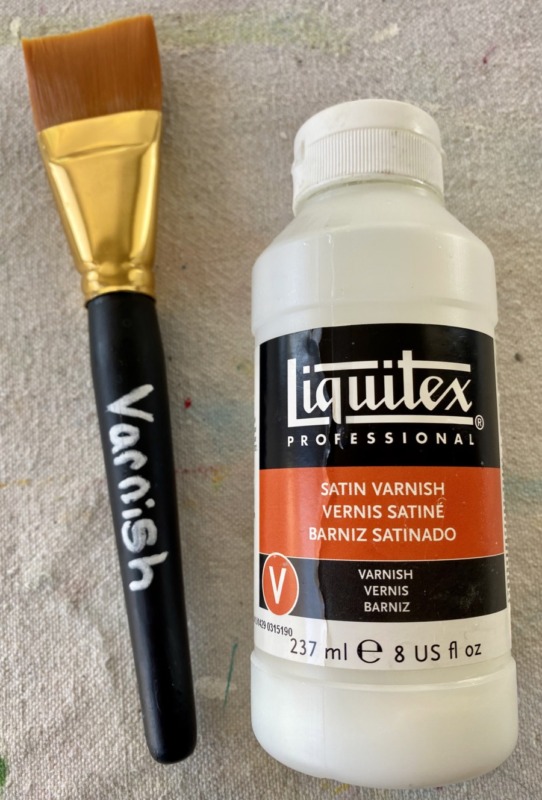
Image Source: stepbysteppainting.net
Why Sealing Your Acrylic Painting Matters
Acrylic paints, while durable once dry, can still be susceptible to environmental factors. Sealing your artwork provides a vital barrier, ensuring your artistic efforts endure. Think of it as a shield for your masterpiece.
- Protection from Dust and Dirt: Over time, dust and grime can settle on the surface of your painting, dulling its colors and making it appear aged. A sealant creates a smooth, cleanable surface.
- UV Protection: Sunlight and artificial light can cause colors to fade. Many modern sealants contain UV inhibitors that help prevent this degradation.
- Moisture Resistance: While acrylics are water-based, a sealant can add a layer of protection against accidental spills or humidity, preventing water damage.
- Abrasion Resistance: Minor scuffs and scratches can damage the paint layer. A good sealant adds a tough, protective coating to resist such damage.
- Enhancing Color Vibrancy: Some varnishes can subtly deepen and enrich the colors of your painting, making them pop.
Choosing the Right Sealant for Your Acrylic Artwork
Selecting the correct sealant is paramount. The market offers various options, each with its own properties and best uses. It’s important to choose an archival varnish if you’re concerned about long-term preservation and stability.
Types of Sealants
- Acrylic Varnishes: These are specifically designed for acrylic paints. They are flexible, non-yellowing, and come in different finishes.
- Spray Sealants/Fixatives: These are often used for pastels or charcoal but can also be used for acrylics, especially for initial layers or to create a specific texture. However, for a durable final coat on acrylics, a liquid varnish is generally preferred. A fixative for acrylics is a more specialized term, often referring to products that bind loose pigment or prepare a surface, rather than a protective topcoat.
Finish Options: Matte vs. Gloss Varnish
The finish of your sealant significantly impacts the final look of your painting. This is often a matter of artistic preference.
Matte Varnish
- Appearance: Reduces shine, creating a non-reflective, velvety finish.
- Best For: Paintings where you want to avoid glare and maintain the subtle texture of the paint. It can give a more “painterly” feel.
- Pros: Minimizes reflections, often preferred for fine art display.
- Cons: Can sometimes slightly lighten or “gray out” very dark colors.
Gloss Varnish
- Appearance: Provides a shiny, reflective surface.
- Best For: Paintings where you want to enhance color saturation and depth, creating a luminous effect.
- Pros: Makes colors appear richer and more vibrant, can flatten out subtle surface texture.
- Cons: Can create significant glare, making it difficult to view from certain angles.
Satin Varnish
- Appearance: A middle ground between matte and gloss, offering a soft sheen.
- Best For: A balanced look that enhances colors without excessive shine or dullness.
Other Considerations
- Archival Quality: Look for products labeled “archival” or “conservation grade.” These are designed to remain clear and stable over time, without yellowing or becoming brittle.
- Flexibility: Acrylics can expand and contract slightly with temperature changes. A flexible varnish will move with the paint layer, preventing cracking.
- Water-Based vs. Solvent-Based: Water-based varnishes are easier to clean up and have less odor. Solvent-based varnishes may offer greater durability for some applications but require more care in handling and ventilation.
- Removability: Some high-quality archival varnishes are designed to be removed with specific solvents, allowing for future cleaning or repair without damaging the original artwork.
Preparing Your Acrylic Painting for Sealing
Proper preparation is key to a successful sealing process. Rushing this step can lead to an uneven finish or trapped imperfections.
Ensuring the Paint is Completely Dry
This is the most critical step. Acrylic paint needs to be fully cured, not just dry to the touch.
- Drying vs. Curing: “Dry to the touch” means the surface no longer feels wet. “Cured” means the paint has undergone its final chemical hardening process.
- Timeframe: While some acrylics can be dry to the touch within minutes, they can take days, weeks, or even months to fully cure, depending on paint thickness, humidity, and temperature. A general rule of thumb is to wait at least 72 hours to 2 weeks for thinner applications, and 1-3 months for very thick impasto work.
- Why it matters: Applying varnish to paint that isn’t fully cured can trap moisture, leading to cloudiness or a compromised finish. The curing process allows the paint to achieve its maximum hardness and flexibility.
Cleaning the Surface
Before applying any sealant, the painting’s surface must be free of dust, oils, or debris.
- Gentle Dusting: Use a soft, dry, lint-free cloth or a soft brush (like a makeup brush or a dedicated art brush) to gently remove any loose dust.
- Avoid Water or Solvents: Unless you are dealing with specific, stubborn marks (which should be approached with extreme caution and testing), avoid using water or cleaning solvents directly on the paint surface, as this could reactivate or damage the paint.
Testing Your Varnish
Always test your chosen sealant on a scrap piece of canvas with a similar paint application or in an inconspicuous area of your painting (like an edge). This helps you see how the varnish affects the colors and texture before committing to the entire piece.
How to Apply Varnish to Your Acrylic Painting
Applying varnish requires patience and a steady hand. The goal is to achieve a smooth, even coat without brush strokes or drips.
The Application Process
-
Set Up Your Workspace:
- Choose a clean, well-ventilated area free from dust.
- Lay your painting flat on a stable surface. If the canvas is not stretched, you might need to prop it up slightly to allow air circulation underneath.
- Ensure good lighting so you can see where you have applied the varnish.
-
Prepare Your Tools:
- Varnish: Stir the varnish gently. Do not shake, as this can introduce air bubbles.
- Applicator:
- Soft, Wide Brush: A high-quality, soft, wide synthetic brush is ideal for liquid varnishes. Ensure it is clean and free of debris.
- Foam Roller: A fine-cell foam roller can also be used for smooth, even application, especially on larger works.
- Spray Can: For spray sealants, follow the manufacturer’s instructions for distance and application.
-
Applying Liquid Varnish:
- Initial Coat: Dip your brush or roller into the varnish, loading it evenly.
- Work in Sections: Start at one edge of the painting and work your way across. Apply the varnish in long, even strokes.
- Maintain a Wet Edge: Overlap your strokes slightly to avoid creating lap marks. Always work from one edge to the other, ensuring the previously applied varnish remains wet where you overlap.
- Direction: Apply the varnish in one direction (e.g., horizontally) for the first coat. Allow it to dry completely. For subsequent coats, you can apply in the opposite direction (e.g., vertically) to ensure even coverage.
- Avoid Overworking: Don’t brush back and forth excessively, as this can lead to brush strokes. Aim for smooth, consistent coverage.
- Thin Coats: It’s better to apply two thin coats than one thick, uneven coat.
-
Applying Spray Sealant:
- Shake the Can: Shake the can vigorously as per the manufacturer’s instructions.
- Distance: Hold the can about 10-12 inches away from the surface.
- Even Sweeping Motion: Apply in smooth, even, side-to-side or top-to-bottom sweeping motions.
- Overlap Passes: Overlap each pass by about 30-50% to ensure complete coverage.
- Multiple Thin Coats: Apply several thin coats rather than one heavy coat to avoid drips and runs. Allow drying time between coats as recommended by the manufacturer.
- Ventilation: Ensure excellent ventilation as spray sealants can have strong fumes.
Drying and Curing Times
- Drying to the Touch: This usually takes a few minutes to an hour, depending on the product and environmental conditions.
- Recoating: Most varnishes recommend waiting a specific period, usually 2-4 hours, before applying a second coat. Check the product instructions.
- Full Curing: The varnish needs several days to weeks to fully cure and reach its maximum hardness and durability. Avoid handling the painting excessively during this time.
Frequently Asked Questions (FAQ)
Q: Do I need to seal my acrylic painting?
A: While not strictly mandatory, sealing your acrylic painting is highly recommended for long-term preservation and protection against environmental damage like dust, UV rays, and moisture.
Q: Can I use hairspray as a sealant for acrylics?
A: No. Hairspray is not a suitable or archival sealant for acrylic paintings. It is not designed for longevity, can attract dust, may yellow over time, and can damage the paint layer. Always use products specifically formulated for artwork.
Q: How many coats of varnish should I apply?
A: Typically, two to three thin, even coats are sufficient for good protection. More coats might be needed for very delicate surfaces or areas prone to handling, but avoid over-applying, which can obscure details.
Q: What if I get brush strokes when varnishing?
A: Brush strokes are often caused by applying too much pressure, using a poor-quality brush, or overworking the varnish. Ensure you use a soft, wide brush, apply thin coats with light pressure, and maintain a wet edge to avoid lap marks. If minor strokes are present after drying, some varnishes can be lightly sanded with very fine grit sandpaper (e.g., 600-grit or higher) and then revarnished. Test this technique first.
Q: Can I varnish a painting that is still a bit tacky?
A: No. It is crucial for the acrylic paint to be fully cured before varnishing. Applying varnish to tacky paint will trap solvents or moisture, leading to a cloudy or damaged finish.
Q: What is the difference between a spray sealant and a liquid varnish for acrylics?
A: Spray sealants offer a quick, easy application and can be good for preliminary layers or textured surfaces. Liquid varnishes, applied with a brush or roller, typically offer a more durable, controllable, and often superior finish for a final protective coat on acrylic paintings.
Q: My varnish looks cloudy. What did I do wrong?
A: Cloudiness is usually caused by applying varnish too thickly, applying it to paint that hasn’t fully cured, or applying it in humid conditions. Trapped moisture is the most common culprit. Ensure proper drying and curing times and apply thin coats in a dry environment.
Advanced Techniques and Tips for Finishing Acrylic Art
Once you’ve mastered the basics of sealing, you might explore advanced techniques to enhance your finishing acrylic art.
Creating Different Surface Textures
- Adding Mediums: Some artists mix fine pumice powder or texture gels into their varnish to create a subtle textured finish. Test this on a separate surface first.
- Sanding Between Coats: For an exceptionally smooth finish, you can very lightly sand between coats of varnish with an ultra-fine grit sandpaper (600+ grit) to knock down any dust nibs or minor imperfections. Clean off all dust thoroughly before applying the next coat.
Dealing with Impasto or Textured Paintings
- Varnish Thickness: For heavily textured or impasto paintings, a thicker acrylic varnish or a gel medium mixed with varnish might be necessary to fill in crevices and provide an even protective layer.
- Spray Varnish: Spray varnishes can be particularly useful for reaching into textured areas without disturbing the paint. Multiple thin coats are essential.
Revitalizing Old Acrylic Paintings
If you have older acrylic paintings that have lost their luster, cleaning them gently and applying a fresh coat of archival varnish can breathe new life into them. Ensure you follow the preparation steps carefully.
Protecting Your Investment
Protecting acrylic paintings is an essential part of the artistic process. By understanding the different types of sealants, proper preparation, and application techniques, you can ensure your artwork remains vibrant and well-preserved for generations. Whether you choose a subtle matte vs gloss varnish, the act of sealing is a professional step that elevates your art. Investing time and care into this final stage of sealing paint on canvas is a testament to your dedication as an artist and ensures the longevity of your creative vision. Remember, preserving acrylic artwork is about more than just appearance; it’s about safeguarding your artistic expression against the ravages of time and environment.
By carefully selecting an acrylic varnish and applying it with precision, you are not just sealing a painting; you are ensuring the enduring legacy of your art. The commitment to how to apply varnish correctly is what separates a finished piece from a masterpiece that stands the test of time.