
Can you seal a painting? Yes, sealing a painting is a crucial step in preserving your artwork. It acts as a protective barrier against dust, dirt, UV rays, and environmental damage, ensuring your masterpiece endures for years to come. This process, often referred to as varnishing a painting or sealing artwork, involves applying a clear coating to the protect painted surface. Whether you’re working with acrylics, oils, or even delicate pastels, the right sealant can make a significant difference in the longevity and appearance of your creation.
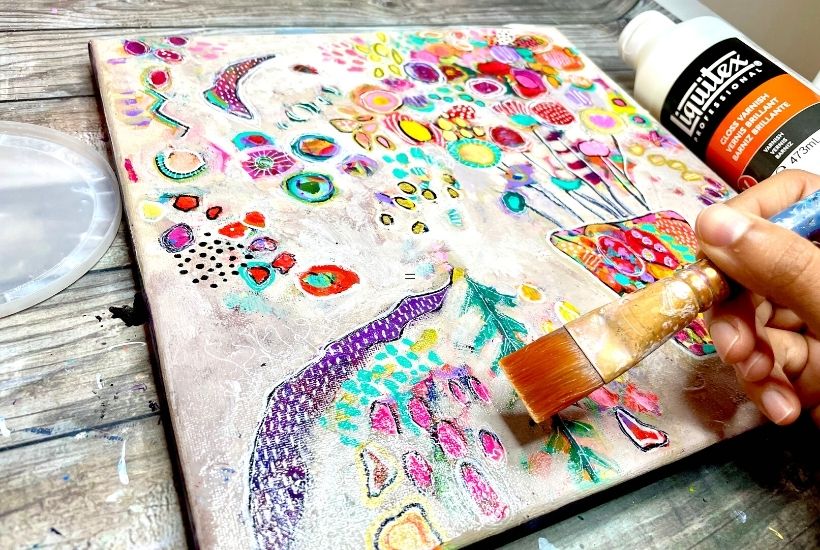
Image Source: feelingnifty.com
Why Sealing Your Artwork is Essential
Preserving painted art is more than just an aesthetic choice; it’s about safeguarding the artistic investment of time, effort, and emotion. A well-sealed painting is less susceptible to common forms of degradation. Think of it as a shield for your creative vision.
h4: Protection from Environmental Factors
- Dust and Grime: Over time, dust and airborne particles settle on paintings, dulling their colors and requiring careful cleaning. A sealant provides a smooth surface that is easier to dust without damaging the paint layers.
- UV Rays: Sunlight and artificial lighting can fade pigments, especially vibrant hues. Many modern varnishes contain UV inhibitors that significantly reduce this damage.
- Moisture and Humidity: Fluctuations in humidity can cause paint layers to crack or warp, particularly on certain surfaces. A sealant can help regulate the moisture exchange between the paint and the environment.
- Scratches and Abrasion: Accidental bumps or improper handling can lead to minor scratches on the paint surface. A varnish layer offers a degree of resistance against such physical damage.
h4: Enhancing Visual Appeal
Beyond protection, sealing can dramatically enhance the visual qualities of your painting.
- Depth and Saturation: Varnishes, especially gloss varieties, can deepen colors and make them appear richer and more saturated. They fill in microscopic cracks and irregularities in the paint surface, giving it a more uniform sheen.
- Uniformity of Sheen: Many artists intentionally create a varied surface texture with their paint application. However, the “raw” paint surface can absorb light unevenly, leading to a patchy appearance. A sealant unifies this sheen, bringing out the true vibrancy of the colors.
- Correcting Surface Issues: Sometimes, after the paint has dried, certain areas might appear duller or have a different sheen than others. Applying a varnish can even out these inconsistencies.
Types of Sealants for Paintings
The choice of sealant depends heavily on the type of paint used and the desired finish. It’s crucial to select a product specifically designed for artists’ use to avoid damaging your work.
For Acrylic Paintings: The Versatile Sealant
Acrylic paints dry quickly and form a flexible plastic film. This makes them quite durable, but they can still benefit greatly from sealing.
h5: Acrylic Painting Sealant Options
- Acrylic Varnishes: These are water-based or solvent-based sealants specifically formulated for acrylic paints. They are generally flexible and non-yellowing. Available in various finishes.
- Acrylic Mediums as Sealants: Many acrylic mediums, such as gloss or matte mediums, can also be used as a final protective layer after the paint has fully cured.
h4: Considerations for Acrylics
- Curing Time: Acrylic paints need to be fully dry and cured before applying any sealant. This can take anywhere from a few days to a few weeks, depending on the thickness of the paint layers. Applying sealant too soon can trap moisture or solvents, leading to cloudiness or adhesion problems.
- Surface Preparation: Ensure the acrylic surface is free of dust and oils. A gentle wipe with a lint-free cloth can be sufficient.
For Oil Paintings: The Traditional Varnish
Oil paints cure much slower than acrylics, and this curing process is critical before applying a protective varnish.
h5: Oil Painting Varnish Choices
- Dammar Varnish: A traditional natural resin varnish. It yellows over time, which can be desirable for certain antique looks but is generally avoided for modern artworks.
- Synthetic Resin Varnishes: These are more stable and less prone to yellowing. Common synthetic resins include acrylics, alkyds, and vinyls. They offer better clarity and longevity.
- Removable Varnishes: Many modern oil painting varnishes are formulated to be removable with specific solvents. This is a significant advantage, as it allows for future cleaning and re-varnishing without damaging the original paint layers.
h4: Key Points for Oil Painting Varnish
- Drying vs. Curing: Oil paint dries to the touch relatively quickly, but it continues to cure and harden for months, even years. It is generally recommended to wait at least six months to a year before varnishing an oil painting. Varnishing too early can trap solvents and hinder the paint’s long-term curing process, potentially leading to cracking.
- Flexibility: Oil paint remains slightly flexible for a longer period. The varnish needs to be flexible enough to accommodate this without cracking.
For Other Mediums: Special Considerations
- Pastels and Charcoal: These are very delicate and require a specialized fixative spray for art. These fixatives are typically lighter and do not saturate the pigment as much as a varnish. Multiple light coats are usually recommended.
- Watercolor and Gouache: These water-based media are typically not varnished in the same way as oils or acrylics. They are often framed under glass, which provides sufficient protection. However, some artists may use specialized spray sealants designed for these media, but testing is crucial.
Choosing Your Finish: Matte, Satin, or Gloss
The finish of your sealant can significantly alter the final appearance of your painting.
h4: Matte Finish Sealant
A matte finish reduces glare and provides a non-reflective surface.
- Pros: Eliminates distracting reflections, preserves the velvety texture of some paints, can create a subdued, sophisticated look.
- Cons: Can sometimes dull colors slightly, may not enhance depth as much as gloss.
- Best for: Paintings where a subtle, natural look is desired, or where reflections would be problematic.
h4: Gloss Varnish for Art
A gloss varnish provides a high-shine, reflective surface.
- Pros: Intensifies colors, adds depth and brilliance, creates a vibrant, “wet” look.
- Cons: Can create significant glare and reflections, which may obscure details.
- Best for: Portraits, still lifes, or any artwork where vibrant color and depth are paramount, and reflections are manageable.
h4: Satin Finish
A satin finish offers a balance between matte and gloss, providing a soft sheen.
- Pros: Offers a pleasant sheen without excessive glare, enhances colors moderately, provides a good all-around protective finish.
- Cons: Less dramatic effect than gloss, may not be as non-reflective as matte.
- Best for: Most general purposes, offering a good compromise between protection and visual enhancement.
The Process of Varnishing a Painting: Step-by-Step Guide
Sealing artwork properly requires careful preparation and application. Rushing this process can lead to undesirable results.
Step 1: Ensuring the Painting is Fully Dry
This is the most critical first step.
- Acrylics: Allow at least 72 hours, but ideally a week or more, for acrylics to fully cure. Thick impasto applications may require longer.
- Oils: Wait at least six months, and preferably one year, for oil paintings to dry to the touch and begin their curing process.
h4: Testing for Dryness
Gently touch an inconspicuous area of the painting. It should feel completely dry, hard, and not at all tacky.
Step 2: Cleaning the Surface
A clean surface is essential for a smooth, even application.
- Dusting: Use a soft, dry, lint-free cloth or a very soft brush to gently remove any surface dust.
- For stubborn grime (use with caution): For oil paintings, a slightly dampened cloth with distilled water can be used very carefully. For acrylics, a mild soap solution on a damp cloth can be used, but ensure it’s wiped off thoroughly and the surface is completely dry before proceeding. Always test cleaning methods on a small, hidden area first.
Step 3: Applying the Sealant
This is where the protective layer is applied.
h5: Application Methods
- Brush Application: This is the most common method for varnishes.
- Choose a good quality, wide, soft-bristled brush specifically designed for varnishing or applying varnishes.
- Load the brush with an even amount of varnish. Avoid overloading.
- Apply the varnish in long, even strokes, working from top to bottom or side to side.
- Overlap each stroke slightly to ensure complete coverage and avoid streaks.
- Maintain a wet edge to prevent lap marks (visible lines where one stroke ends and another begins).
- Apply a second coat in the opposite direction of the first coat after the initial coat has begun to set (usually after 15-30 minutes, check product instructions).
- Spray Application: This is ideal for fixative spray for art or when a very fine, even finish is desired for acrylics or some oil varnishes.
- Ensure the painting is in a well-ventilated area, preferably outdoors or in a spray booth.
- Use a respirator mask to protect yourself from fumes.
- Hold the can about 10-12 inches away from the surface.
- Apply in light, sweeping motions, moving back and forth.
- Avoid spraying too heavily in one spot, which can cause drips or runs.
- Apply multiple thin coats rather than one thick one. Allow adequate drying time between coats as per the manufacturer’s instructions.
h4: Important Tips for Application
- Test Area: Always test your chosen sealant on a scrap piece of canvas or a less visible area of the painting to ensure you like the effect and there are no adverse reactions.
- Environment: Apply sealant in a dust-free, well-ventilated area. Avoid humid conditions, as this can cause clouding. Room temperature is generally ideal.
- Evenness: The key to a good varnish is even application. Avoid puddling or thin spots.
- Multiple Coats: Most paintings benefit from two thin coats rather than one thick one.
Step 4: Drying and Curing
After application, the sealant needs time to dry and cure fully.
- Drying: This is when the sealant becomes touch-dry. This can take a few hours.
- Curing: This is when the sealant reaches its maximum hardness and durability. This can take several days to weeks, depending on the product and environmental conditions. Avoid handling or framing the painting until it is fully cured.
Canvas Sealing: Specifics for Unprimed Canvas
Canvas sealing often refers to preparing the canvas before painting, but it can also apply to sealing the edges or the back of a stretched canvas after the artwork is complete, especially if the sides are painted or left exposed.
- Protecting the Back: If you have a stretched canvas and want to protect the back of the canvas from dust or moisture, or if you’ve painted the sides of the canvas as part of your artwork, you can apply a sealant.
- Materials: A clear acrylic spray sealant or a dilute acrylic medium can be used for this purpose.
- Application: Apply in a well-ventilated area. Ensure the sealant does not seep through to the front of the painting.
Maintaining Your Sealed Painting
Once your painting is sealed, it’s easier to maintain, but not maintenance-free.
- Regular Dusting: Gently dust your painting periodically with a soft, dry cloth or a feather duster.
- Avoid Harsh Cleaning: Never use household cleaners or abrasive materials on your artwork.
- Framing: Framing your sealed painting under UV-protective glass offers an additional layer of protection, particularly against airborne pollutants and physical damage.
- Storage and Display: Avoid hanging paintings in direct sunlight, near heat sources, or in areas with high humidity.
Troubleshooting Common Varnishing Issues
Even with careful application, sometimes issues can arise.
| Problem | Cause | Solution |
|---|---|---|
| Cloudy Varnish | Applied too soon on uncured paint; high humidity; trapped solvents. | If minor, sometimes reapplying a thin, even coat of a good quality varnish can fix it. For severe cases, the varnish may need removal. |
| Streaks or Lap Marks | Uneven application; brush strokes too visible; not maintaining a wet edge. | Difficult to fix after drying. May require careful sanding and re-varnishing. Some removable varnishes can be stripped and redone. |
| Drips or Runs | Varnish applied too thickly; uneven surface. | If wet, carefully remove excess with a brush. Once dry, the drips can be carefully sanded down and the area re-varnished. |
| Brush Hairs Embedded | Dirty brush; brush not properly conditioned. | Carefully remove the hair while the varnish is still wet. If dry, gently try to lift it. In severe cases, re-varnishing may be needed. |
| Yellowing Varnish | Using older varnishes (like Dammar) or lower quality synthetic ones. | Use modern, non-yellowing acrylic or synthetic varnishes. Removable varnishes can be stripped if significant yellowing occurs. |
Frequently Asked Questions (FAQ)
Q1: Can I use spray sealant on oil paintings?
A1: Yes, there are specific spray varnishes formulated for oil paintings, but it’s crucial to ensure the oil paint has fully cured (typically 6-12 months). Spray varnishes can provide a very fine, even finish.
Q2: Will sealing change the look of my painting?
A2: Yes, it can. Gloss varnishes will make colors appear deeper and more saturated, and create a shiny surface. Matte varnishes will reduce shine and may slightly mute colors. Satin finishes offer a middle ground. It’s always best to test on a scrap piece first.
Q3: How do I remove old varnish from a painting?
A3: This is a specialized process and depends on the type of varnish. Many modern artist varnishes are “removable,” meaning they can be dissolved with a specific solvent recommended by the manufacturer. Attempting to remove varnish without proper knowledge can damage the original paint layer. It’s advisable to consult a professional art conservator for older or valuable artworks.
Q4: What is the difference between a fixative and a varnish?
A4: A fixative is typically a lighter spray used to protect delicate media like pastels or charcoal, preventing them from smudging. Varnishes are generally thicker, more durable coatings applied to fully dried paintings (oils, acrylics) for protection and to enhance appearance. Varnishes also come in different finishes (matte, gloss), whereas fixatives usually offer a more matte finish.
Q5: How often should I re-varnish a painting?
A5: High-quality, modern artist varnishes are designed to last for many years without significant degradation. Re-varnishing is usually only necessary if the existing varnish becomes damaged, dirty, or if you wish to change the sheen. For very old or valuable artworks, consult a conservator.
By taking the time to properly seal your paintings, you are not just protecting them from the ravages of time and environment; you are also ensuring that your artistic vision continues to shine through, vivid and true, for generations to come. This careful step in preserving painted art is an investment in its future.