
Can you fix a tear in a canvas painting? Yes, you can, but it requires patience, the right materials, and a careful approach. This guide will walk you through the process of canvas repair, drawing upon techniques used in artwork restoration and textile adhesive applications to help you mend your precious artwork.
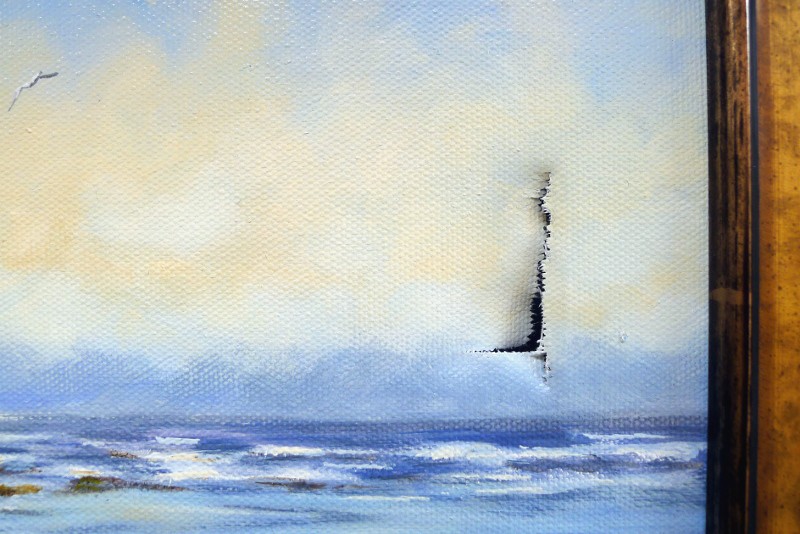
Image Source: www.chrischalkart.com
Assessing the Damage: The First Step in Tear Mending
Before you grab any tools, it’s crucial to assess the damage thoroughly. Is the tear fresh or old? Is the paint flaking or stable? Is the canvas itself weakened or just the paint layer?
Types of Canvas Tears
Tears can vary in severity and origin. Knowing what you’re dealing with helps determine the best repair method.
- Abrasions: These are surface-level scuffs that might affect the paint but not the canvas weave itself.
- Pinholes: Small punctures, often from tacks or sharp objects.
- Linear Tears: Straight rips through the canvas, which can range from minor to extensive.
- Cracks and Folds: These can lead to tears if the canvas becomes brittle or is mishandled.
Evaluating the Canvas Material
The type of canvas you have matters. Most paintings are on cotton canvas or linen canvas. Linen canvas is known for its strength and durability, while cotton canvas is more common and generally less expensive. Both can be repaired, but the fabric’s behavior might differ slightly during the repair process.
Considering the Paint Layer
The condition of the paint layer is as important as the canvas.
- Stable Paint: If the paint is well-adhered and not flaking, you have a better chance of a successful repair without further damaging the artwork.
- Flaking Paint: If the paint is lifting or flaking, extra care is needed. You might need to consolidate the paint before attempting the canvas repair. This is a more advanced step that may require professional help.
Preparing Your Workspace and Materials
A clean, well-lit, and stable workspace is essential for painting conservation and effective tear mending.
Essential Tools and Supplies
Gathering everything you need beforehand will prevent interruptions and ensure a smoother repair process.
- Protective Gloves: To keep your hands clean and prevent oils from transferring to the canvas.
- Soft Brushes: For gently cleaning dust and debris.
- Tweezers: For carefully manipulating loose threads.
- Micro-Spatula or Bone Folder: For gently lifting and smoothing.
- Archival Tissue Paper or Blotting Paper: For absorbing excess adhesive.
- Weight (e.g., glassine sheets with weights): To apply gentle, even pressure during drying.
- Backing Fabric (if needed): A piece of strong, stable archival fabric for reinforcement.
- Textile Adhesive: A reversible, archival-quality adhesive. This is crucial for fabric patching.
- Fine-tipped Applicator: For precise application of the adhesive.
- Clean, Lint-Free Cloths: For wiping excess.
Setting Up Your Workspace
- Clean Surface: Ensure your work surface is clean, flat, and stable. Cover it with a protective layer like clean sheeting or archival paper.
- Good Lighting: Adequate lighting is vital to see the fine details of the tear and the weave of the canvas.
- Ventilation: If using adhesives, ensure good ventilation in your workspace.
Step-by-Step Guide to Repairing a Canvas Tear
This process involves careful manipulation and application of archival materials. The goal is to stabilize the tear and, if necessary, reinforce the canvas without compromising the artwork’s integrity.
Step 1: Gentle Cleaning
- Use a soft, dry brush to gently remove any loose dust or debris from the surface of the painting and around the tear. Work from the edges of the tear towards its center.
- Avoid any rubbing or scrubbing, as this can further damage fragile paint or canvas.
Step 2: Aligning the Canvas Threads
This is perhaps the most delicate part of the canvas repair.
- Using Tweezers: Very carefully, use fine-tipped tweezers to gently lift and align the frayed or torn edges of the canvas.
- Micro-Spatula: A micro-spatula or a bone folder can be used to coax the threads back into their original position.
- Patience is Key: This step requires immense patience. Do not force the threads. If they resist, it might mean the canvas is too brittle, or the tear is more complex.
Step 3: Applying Textile Adhesive
The choice of adhesive is critical for artwork restoration. You need an archival-quality, reversible adhesive that will not yellow or degrade over time.
- Choosing the Right Adhesive: Look for specialized textile adhesives used in conservation or museum work. These are often solvent-based or water-based and designed for delicate fabrics. Research brands recommended for painting conservation.
- Application:
- Apply a very small amount of adhesive to the tip of a fine applicator (like a needle or a fine brush).
- Gently touch the adhesive to the underside of the aligned canvas threads along the tear. The aim is to bond the threads to themselves, not to create a thick layer of adhesive.
- For larger tears, you might apply a tiny amount to the edges of the canvas that meet.
- Blotting Excess: Immediately blot any excess adhesive with archival tissue paper or a lint-free cloth. Too much adhesive can seep through the canvas weave and stain the front, or make the canvas stiff.
Step 4: Gentle Pressing and Drying
- Using Weights: Once the adhesive is applied and excess is blotted, place a piece of archival glassine paper or a thin sheet of blotting paper over the repaired area.
- Applying Pressure: Gently place weights (like more glassine sheets with small, clean weights on top) over the protected area. This ensures the threads stay aligned and bond evenly as the adhesive dries.
- Drying Time: Allow the adhesive to dry completely according to the manufacturer’s instructions. This can take several hours or even overnight.
Step 5: Reinforcement (If Necessary)
For more significant tears or weakened canvas, reinforcement might be needed. This is akin to fabric patching or techniques used in upholstery repair and needlepoint repair, but adapted for delicate artwork.
- Choosing Backing Fabric: Select a piece of strong, stable, archival-quality fabric. Linen or a fine cotton weave is often suitable. It should be slightly larger than the area of the tear.
- Attaching the Backing:
- Apply a thin, even layer of the same archival textile adhesive to the backing fabric.
- Carefully position the backing fabric onto the underside of the canvas, aligning it with the repaired tear.
- Gently press it into place, ensuring no air bubbles are trapped.
- Weighting: Place weights over the reinforced area as described in Step 4 to ensure a strong bond.
Step 6: Final Checks
Once everything is dry, carefully remove the weights and protective paper.
- Gently examine the repaired area. The tear should be stable.
- Check for any signs of adhesive seepage or stiffness.
- Ensure the paint layer remains unaffected.
Advanced Techniques and Considerations for Canvas Repair
Some tears or conditions require more specialized approaches, often best handled by professionals.
Dealing with Paint Loss
If the tear has caused paint to flake or come away entirely, the canvas repair alone won’t restore the visual appearance.
- Paint Consolidation: This involves using a reversible consolidant to stabilize loose paint before or during the canvas repair. This is a highly specialized skill.
- In-painting: After the canvas is repaired and stable, a conservator might carefully fill in any areas of paint loss to match the surrounding artwork. This is an artistic skill as much as a technical one.
Repairing Stretcher Bar Issues
Sometimes, a tear occurs because the canvas is pulling away from the stretcher bars or the bars themselves are damaged.
- Re-stretching: If the canvas has become loose, it might need to be carefully re-stretched. This involves re-securing the canvas to the stretcher bars, often with archival staples or tacks, ensuring even tension.
- Stretcher Bar Repair: Damaged stretcher bars can sometimes be repaired or replaced by a framer or restorer.
Mending Fragile or Brittle Canvas
Older canvases, especially those made of linen canvas, can become brittle over time.
- Gauzing: For very fragile areas, a fine, strong gauze or a piece of very fine linen canvas can be adhered to the back of the painting, extending beyond the damaged area. This provides overall support.
- Lining: In severe cases, the entire canvas might be lined with a new piece of fabric using a strong, reversible adhesive. This is a major undertaking typically performed by professional artwork restoration specialists.
When to Call a Professional Conservator
While minor tears on stable paintings can often be tackled by a dedicated amateur, certain situations warrant professional intervention.
Signs You Need a Professional Conservator
- Extensive or Deep Tears: Tears that are large, ragged, or go through multiple layers of canvas.
- Extremely Fragile Canvas: If the canvas feels brittle, powdery, or is disintegrating.
- Significant Paint Loss or Flaking: If the paint layer is unstable, cracking, or lifting.
- Mold or Water Damage: Any signs of biological growth or water damage require specialized treatment.
- Valuable or Historically Significant Artwork: For paintings with high monetary or historical value, professional painting conservation is always recommended.
- Uncertainty: If you are unsure about any step or the best approach for your specific artwork.
What Professionals Do
Professional conservators have specialized training and access to advanced materials and techniques. They can:
- Conduct thorough condition assessments.
- Perform delicate consolidations of paint layers.
- Use sophisticated archival adhesives and backing materials.
- Execute complex lining or relining procedures.
- Provide detailed documentation of the work performed.
Frequently Asked Questions About Canvas Repair
Q1: Can I use regular glue to fix a tear in my painting?
A1: Absolutely not. Regular glues, like white school glue or super glue, are not archival. They can degrade over time, yellow, become brittle, and cause irreversible damage to the canvas and paint. Always use specialized archival textile adhesives.
Q2: Will the repair be visible?
A2: The goal of professional artwork restoration is to make repairs as invisible as possible. If the tear is minor and the paint is stable, a skilled repair can be very discreet. However, for larger or more complex tears, some slight evidence of the repair might remain, especially on close inspection.
Q3: How do I know if my painting is valuable enough to warrant professional repair?
A3: If the painting has significant monetary value, is an heirloom, or holds historical importance, professional consultation is always a wise decision. Even if you believe it has low monetary value, if it’s important to you, consider professional advice for its longevity.
Q4: Is it safe to clean a painting before repairing it?
A4: Gentle dusting with a soft, dry brush is generally safe. However, any form of wet cleaning or aggressive dusting can be risky. If you are unsure, it’s best to leave cleaning to a professional conservator.
Q5: What is the difference between canvas repair and painting conservation?
A5: Canvas repair specifically refers to fixing tears or damage to the fabric support. Painting conservation is a broader term that encompasses all aspects of preserving a painting, including stabilizing the paint layer, cleaning, repairing tears, and addressing issues like flaking paint or discoloration. A canvas repair is often a part of a larger conservation effort.
Repairing a tear in a canvas painting is a rewarding process when approached with care and the right knowledge. By following these expert tips, you can help preserve your artwork for years to come. Remember, when in doubt, always seek the expertise of a professional art conservator.