
Can you paint a door without prepping it first? While technically you can, the results will likely be poor, with paint peeling, uneven coverage, and a generally unprofessional finish. Proper door prep for paint is essential for a durable and beautiful result. This guide will walk you through every step of door painting preparation, ensuring your doors look their best.
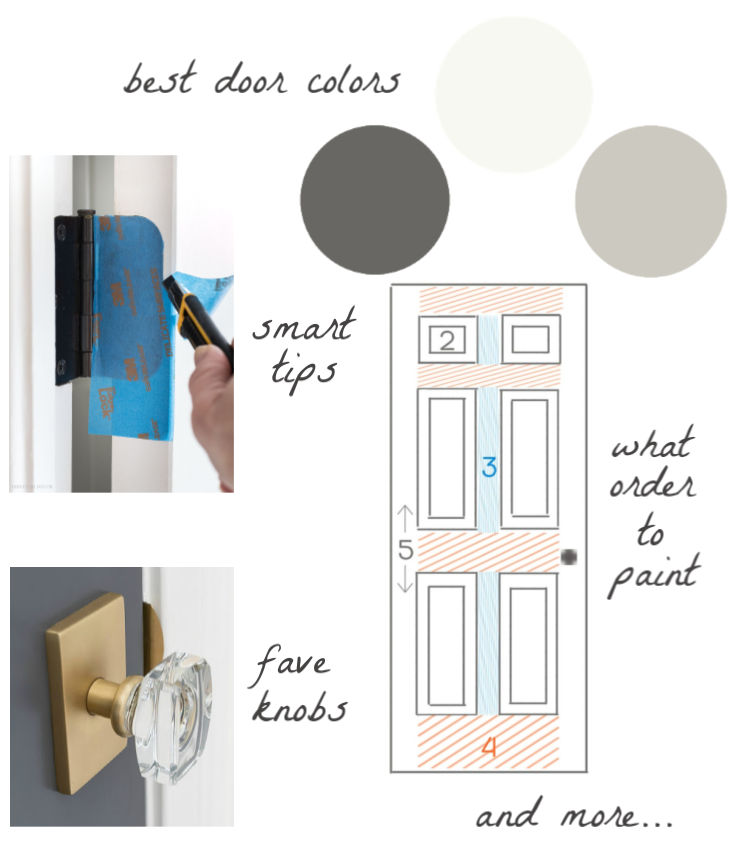
Image Source: www.drivenbydecor.com
Why Proper Door Preparation Matters
Painting a door might seem like a straightforward task, but the quality of the final coat heavily relies on the groundwork. Think of it like building a house: a strong foundation is crucial. Similarly, preparing your doors correctly creates the perfect surface for paint to adhere to, leading to a smoother, longer-lasting finish. This meticulous approach to preparing interior doors for paint and preparing exterior doors for paint is what separates a DIY job from a professional look.
Step 1: Assess the Door’s Condition
Before you grab any supplies, take a good look at the door you plan to paint. Is it an interior or exterior door? What is its current condition? This assessment will guide your preparation process.
Interior Doors: What to Look For
- Material: Most interior doors are hollow-core or solid wood.
- Existing Finish: Is it painted, stained, or varnished? Is the current paint peeling or chipping?
- Damage: Are there any dents, scratches, or holes?
Exterior Doors: What to Look For
- Material: Exterior doors are often wood, metal, or fiberglass.
- Weather Exposure: How much direct sunlight, rain, or wind does the door face?
- Existing Finish: Similar to interior doors, check for peeling, chipping, or fading.
- Rot or Rust: Wood doors can rot, and metal doors can rust, especially at the bottom.
Step 2: Remove the Door from Its Hinges
This is a crucial step for achieving a professional finish. Painting a door while it’s still hanging can lead to drips on the frame and uneven coverage on the door’s edges.
How to Safely Remove a Door
- Gather Tools: You’ll need a hammer and a flathead screwdriver or a putty knife.
- Support the Door: Have someone help you hold the door, or place wedges or blocks underneath it to support its weight.
- Pry Out the Pins: Insert the flathead screwdriver or putty knife into the bottom of the hinge pin. Gently tap it upwards with the hammer. Work your way around all the hinges.
- Lift the Door: Once the pins are removed, carefully lift the door off its hinges. It’s best to do this with a helper.
Tip: If the hinge pins are stuck, a bit of WD-40 can help loosen them.
Step 3: Remove Hardware
Any hardware left on the door while painting will get covered in paint, making it difficult to remove later and creating an unprofessional look.
What Hardware to Remove
- Doorknobs and Latches: Most doorknobs can be removed by unscrewing a set screw or by finding a small release button on the side.
- Hinges: If you’re painting the hinges, remove them completely. If you’re painting them in place, ensure you mask them thoroughly.
- Strike Plates: These are the metal plates on the door frame that the latch goes into.
- Door Knockers, Peepholes, and Mail Slots: Remove anything else attached to the door’s surface.
Storage: Keep all hardware in a labeled bag or container so you don’t lose any pieces.
Step 4: Clean the Doors for Painting
This step is vital for ensuring paint adheres properly. Dust, grease, and grime will prevent the paint from sticking, leading to peeling.
Effective Cleaning Methods
- Mild Soap and Water: For most interior doors, a solution of mild dish soap and warm water is sufficient. Use a sponge or soft cloth.
- Degreaser: For exterior doors or doors with stubborn grease marks, a dedicated degreaser might be necessary.
- TSP (Trisodium Phosphate): For heavily soiled or greasy surfaces, TSP is a powerful cleaner. Use it with caution and wear protective gear. Always rinse thoroughly.
- Rinsing: After cleaning, wipe the door down with a clean, damp cloth to remove any soap residue.
- Drying: Allow the doors to dry completely before proceeding. You can speed this up with a fan or a clean, dry cloth.
Step 5: Address Any Damage: Filling Holes and Cracks
Even the best-looking doors can have small imperfections that need attention before painting. This is where filling holes in doors for painting comes in.
How to Fill Holes and Cracks
- Small Holes and Dents: Use a lightweight spackling compound or wood filler.
- Apply the filler with a putty knife, pressing it into the hole or dent.
- Smooth the surface, slightly overfilling to account for shrinkage as it dries.
- Let it dry completely according to the product instructions.
- Larger Holes: For larger holes or gouges, you might need a wood filler that dries harder. Follow the same application process.
- Cracks: Fill cracks with wood filler or a paintable caulk. For exterior doors, use an exterior-grade caulk.
Important: Ensure the filler is completely dry and hardened before sanding.
Step 6: Sanding Doors Before Painting
Sanding creates a smooth, uniform surface for the paint to adhere to. This is arguably the most critical step in the door prep for paint process.
Sanding Techniques for Different Surfaces
- Sanding Old Paint: If the existing paint is in good condition, you just need to scuff it up.
- Use medium-grit sandpaper (100-150 grit) to create a surface for the new paint to grip.
- For doors with glossy finishes, a finer grit (180-220 grit) might be sufficient after the initial scuff.
- Sanding Filler: After the filler has dried, sand it smooth with the surrounding surface.
- Start with medium-grit sandpaper (120-150 grit) to shape the filler.
- Finish with fine-grit sandpaper (180-220 grit) for a smooth finish.
- Sanding Bare Wood: If you have stripped paint or are painting raw wood, start with a coarser grit (80-100 grit) and work your way up to finer grits (150-180 grit) for a smooth finish.
Tools for Sanding:
- Sanding Blocks: These provide a firm surface for even sanding.
- Electric Sanders (Orbital or Detail Sanders): These can speed up the process, especially for larger doors. Be careful not to over-sand and create divots.
- Fine-grit Sanding Sponges: These are great for getting into corners and details.
Dust Removal: After sanding, thoroughly wipe down the door with a tack cloth or a damp microfiber cloth to remove all sanding dust. This is crucial for a smooth paint finish.
Step 7: Stripping Paint from Doors (If Necessary)
If the existing paint is severely damaged, peeling, or you want to reveal the natural wood, stripping paint from doors is a necessary step.
Methods for Stripping Paint
- Chemical Paint Strippers: These are effective but require good ventilation and protective gear (gloves, goggles, respirator).
- Apply the stripper according to the manufacturer’s instructions.
- Let it sit for the recommended time to soften the paint.
- Scrape away the softened paint with a putty knife or scraper.
- Use fine-grit sandpaper or steel wool to remove any remaining residue.
- Clean the door thoroughly with mineral spirits or denatured alcohol to remove stripper residue.
- Heat Gun: A heat gun softens paint, allowing you to scrape it off. This method is less messy than chemical strippers but requires care to avoid scorching the wood.
- Sanding (Aggressive): For very thin layers of paint or minor imperfections, aggressive sanding with a coarser grit sandpaper can remove the paint. However, this can be labor-intensive.
Important: Always test a small, inconspicuous area first to see how the stripper or heat gun affects the door material.
Step 8: Priming Doors for Painting
Priming is a critical step in door painting preparation, especially if you’re painting over a dark color, bare wood, or a glossy finish. Primer helps the paint adhere better, provides a uniform base color, and can block stains.
Choosing the Right Primer
- Oil-Based Primer: Best for blocking stains, sealing knots in wood, and adhering to glossy surfaces. It generally offers superior adhesion but has a stronger odor and requires mineral spirits for cleanup.
- Water-Based (Latex) Primer: Easy to use, low odor, and quick drying. Good for general-purpose priming and most surfaces. Modern latex primers offer excellent adhesion and durability.
- Stain-Blocking Primer: Essential if you have wood doors with knots that might bleed through the paint.
Application of Primer
- Stir the Primer: Thoroughly stir the primer before and during use.
- Apply Thin, Even Coats: Use a high-quality paintbrush or a fine-nap roller.
- Paint Edges First: Use a brush to paint the edges and any details of the door.
- Use a Roller for Flat Surfaces: Roll the larger, flat areas for a smoother finish.
- Allow to Dry: Let the primer dry completely according to the manufacturer’s instructions.
- Light Sanding (Optional but Recommended): Once dry, lightly sand the primed surface with fine-grit sandpaper (220 grit) to further smooth it and remove any minor imperfections or raised grain. Wipe away dust with a tack cloth.
Step 9: Filling Nail Holes and Imperfections (Post-Sanding)
After priming, you might notice new imperfections that weren’t visible before, such as filled nail holes that have shrunk slightly.
Touch-Up Filling
- Use a small amount of spackling compound or wood filler to fill any small gaps or holes that have appeared.
- Allow the filler to dry completely.
- Lightly sand the filled areas with fine-grit sandpaper.
- Wipe away any dust with a tack cloth.
Step 10: Final Cleaning Before Painting
Before applying the topcoat, one last clean is essential. Even the slightest bit of dust can ruin a smooth finish.
The Final Wipe-Down
- Use a clean, dry microfiber cloth or a tack cloth to gently wipe down the entire door surface.
- Pay attention to any crevices or edges where dust might have settled.
Painting the Door: The Final Touches
With all the preparation done, you’re ready for the actual painting. The key to painting door surfaces well is patience and applying multiple thin coats.
Tips for a Flawless Paint Job
- Choose the Right Paint: For doors, an enamel paint (oil-based or water-based) is recommended for its durability and resistance to scuffing.
- Apply Thin Coats: This is more important than the type of paint. Thin coats dry faster, are less prone to drips, and build a stronger finish.
- Use a High-Quality Brush: For doors with panels or intricate details, a good quality angled brush is best.
- Use a Roller for Flat Surfaces: A foam roller or a short-nap roller will give you a smooth, factory-like finish on the main parts of the door.
- Paint in a Well-Ventilated Area: Ensure good airflow to help with drying and to dissipate fumes.
- Let Coats Dry Completely: Allow each coat of paint to dry thoroughly before applying the next. Check the paint can for specific drying times.
- Sand Lightly Between Coats (Optional): For an ultra-smooth finish, you can lightly sand between coats with very fine-grit sandpaper (320-400 grit) and wipe with a tack cloth.
Preparing Interior Doors vs. Exterior Doors
While the general steps are similar, there are some nuances when preparing interior doors for paint versus preparing exterior doors for paint.
Key Differences in Preparation
| Feature | Interior Doors | Exterior Doors |
|---|---|---|
| Cleaning | Mild soap and water, perhaps a degreaser. | TSP, degreaser, or specific exterior cleaners. |
| Damage Repair | Spackle, wood filler for dents and scratches. | Wood filler, exterior-grade caulk for cracks, potential epoxy for rot repair. |
| Primer | All-purpose primer, stain-blocking if needed. | Exterior-grade primer, UV-resistant primer if exposed to sun. |
| Paint Type | Enamel paint (water or oil-based). | Exterior-grade enamel paint, high-durability finish. |
| Environmental Factors | Less exposed to elements, so preparation can be slightly less intensive. | Must withstand UV rays, moisture, temperature changes; requires more robust prep and durable finishes. |
Rehanging the Door
Once the paint is completely dry and cured (this can take a few days), you can rehang the door.
Reassembly Steps
- Reattach Hardware: Screw all the hardware back onto the door.
- Align the Door: With help, lift the door back onto its hinges.
- Insert Hinge Pins: Carefully tap the hinge pins back into place.
- Test the Door: Open and close the door to ensure it swings smoothly and the latch engages correctly.
Frequently Asked Questions About Door Preparation
Q1: How many coats of primer do I need?
A1: Generally, one coat of primer is sufficient. However, if you’re painting over a very dark color with a light paint, or if the door has significant stains, two thin coats of primer might be necessary.
Q2: Can I skip sanding if the door is already painted?
A2: No, sanding is crucial. Even if the paint looks good, sanding creates a rougher surface for the new paint to adhere to, preventing peeling and ensuring a smooth finish.
Q3: How long should I wait between paint coats?
A3: Always follow the paint manufacturer’s recommendations. Typically, you’ll need to wait at least 4-8 hours for water-based paints and 24 hours for oil-based paints before applying the next coat.
Q4: What’s the best way to paint a door with panels?
A4: Use a high-quality angled paintbrush to get into the corners and edges of the panels first. Then, use a foam roller or a sash brush to paint the flat surfaces of the panels. Finally, paint the stiles (vertical parts) and rails (horizontal parts) of the door.
Q5: Do I need to remove the door to paint it?
A5: While you can paint a door while it’s hanging, removing it makes the process much easier and leads to a far better finish. You can get to all the edges and avoid drips on the frame.
Q6: What grit sandpaper should I use for the final sanding before painting?
A6: For a smooth finish, use fine-grit sandpaper, typically 220 grit, after priming. If you’re doing very fine sanding between coats, 320-400 grit is appropriate.
By following these detailed steps, you can ensure your doors are perfectly prepared for painting, leading to a beautiful and lasting finish that enhances your home.