
What is digital art labeling? Labeling digital art is the process of adding important information to your artwork files. This information helps identify your work, protect your rights, and make it easy for others to find and use it. It includes details like who created it, when it was made, and how it can be used.
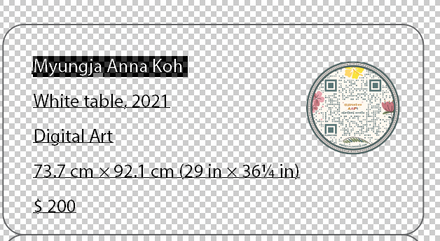
Image Source: www.annakoh.com
Why Labeling Your Digital Art Matters
Imagine creating a beautiful piece of digital art. You pour your heart and soul into it, spending hours perfecting every pixel. Now, what happens next? If you simply save it as “MyArtwork.jpg,” it’s like a ship without a name or a destination. Proper labeling is crucial for several key reasons:
- Identification and Organization: It helps you and others know exactly what the file is. This is especially important when you have many files.
- Rights Protection: It clearly states that you own the work and sets the terms for its use. This is vital for preventing unauthorized use and theft.
- Discoverability: It makes your art easier to find through searches, whether on your own computer or on online platforms.
- Professionalism: Well-labeled art projects a professional image and shows you care about your creations.
- Future Use: It ensures that you, or someone else in the future, can easily recall the context and purpose of the artwork.
Without proper labeling, your digital art can easily get lost, misused, or its origins forgotten.
Core Components of Digital Art Labeling
When we talk about labeling digital art, we’re referring to a few key areas that work together. Let’s break them down:
File Naming Conventions: The First Line of Defense
Your file names are the most immediate way to identify your artwork. Think of them as the title on a book cover. Good file names are descriptive, consistent, and easy to sort.
Crafting Effective File Names
- Be Descriptive: Include what the art is about. Instead of “image1.png,” try “Sunset_Over_Mountains_V3.png.”
- Use Dates: Add the date of creation or last modification. This helps track versions. Example: “Portrait_Alice_20231027.psd.”
- Include Your Name/Studio: This immediately links the work to its creator. Example: “JohnDoe_FantasyLandscape_v1.jpg.”
- Use Version Numbers: If you create multiple versions, number them clearly. “LogoDesign_v1.ai,” “LogoDesign_v2_Final.ai.”
- Keep it Concise: While descriptive, avoid overly long names that get cut off.
- Use Underscores or Hyphens: Avoid spaces and special characters as they can cause issues with some software or web platforms.
- Consistent Format: Decide on a format and stick to it for all your work.
Example of a Good File Naming System:
| Original File Name | Improved File Name | Reason for Improvement |
|---|---|---|
| DSC00123.jpg | Maria_Portrait_20231115.jpg | Adds subject, creator, and date. |
| Artwork Final.psd | Alex_Abstract_V2_20231115.psd | Adds creator, subject, version, and date. |
| Untitled_1.png | Cityscape_Night_BySarah_20231115.png | Adds subject, creator, and date. |
Common Pitfalls in File Naming
- Using generic names like “Untitled” or “New Document.”
- Including personal details in file names that shouldn’t be public.
- Using too many special characters or spaces.
- Not having a consistent naming structure.
Incorporating Metadata: The Hidden Information
Metadata is data that describes other data. For digital art, this means embedding information directly into the file itself. This is incredibly powerful because the information travels with the artwork, even if the file name changes.
Types of Metadata
- EXIF Data (Exchangeable Image File Format): Commonly found in photos, this includes camera settings, date, time, and location. For digital art created in software, some of this can still be relevant or can be augmented.
- IPTC Data (International Press Telecommunications Council): This is a more robust standard for describing images, including creator, caption, keywords, and copyright.
- XMP Data (Extensible Metadata Platform): Adobe’s standard, which can store a wide range of metadata, including IPTC and custom data.
Embedding Metadata into Your Art
Most creative software allows you to add metadata:
- Adobe Photoshop/Illustrator: Go to
File > File Info. Here you can enter author, description, copyright status, keywords, and more. - Other Creative Software: Explore the “File Info,” “Properties,” or “Metadata” sections within your chosen software.
- Dedicated Metadata Editors: For batch editing or more advanced control, consider specialized software.
Key Metadata Fields to Populate:
- Creator/Artist Name: Your full name or studio name.
- Title: The official title of your artwork.
- Description/Caption: A brief yet informative summary of the artwork.
- Keywords: Terms that describe the content, style, and themes of your art.
- Copyright Notice: State your copyright ownership.
- Contact Information: How people can reach you.
Copyright Protection: Safeguarding Your Creations
Copyright is a legal right granted to the creator of original works of authorship, including literary, dramatic, musical, and certain other intellectual works. For digital art, this means you automatically own the copyright the moment you create it. However, explicitly stating it is crucial.
Asserting Your Copyright
- Copyright Symbol (©): Always include the copyright symbol, your name, and the year of creation. Example: © Jane Doe 2023.
- Statement: A clear statement like “All rights reserved” or “Copyright © [Your Name/Studio Name] [Year].”
- Embedding in Metadata: Crucially, include this information within the file’s metadata.
Registration: The Next Level of Protection
While copyright exists automatically, registering your work with your country’s copyright office provides significant legal advantages if you ever need to enforce your rights. It creates a public record of your ownership and can be a prerequisite for filing an infringement lawsuit.
Watermarking: Visual Deterrents and Branding
Watermarking is the process of overlaying a visible or invisible mark onto your artwork. This can serve as both a deterrent against unauthorized use and a branding tool.
Visible Watermarks
- Purpose: To clearly indicate ownership and discourage casual theft.
- Best Practices:
- Place them in a location that doesn’t obstruct key parts of the artwork.
- Make them semi-transparent.
- Use your logo or name.
- Avoid making them too intrusive, which can detract from the viewing experience.
Invisible Watermarks (Digital Signatures)
- Purpose: Embedded within the image data, these are not visible to the naked eye but can be detected by specialized software. They can prove ownership and authenticity.
- Implementation: Some software or services offer invisible watermarking capabilities.
Considerations for Watermarking:
- Balance: Find a balance between protection and presentation. An overly aggressive watermark can ruin the viewer’s experience.
- Subtlety: For professional portfolios, subtle or invisible watermarks are often preferred.
- Platform: The best watermarking strategy might differ depending on where you display your art (e.g., your website vs. a marketplace).
Licensing: Defining Usage Rights
Licensing is how you grant permission for others to use your copyrighted work under specific terms. This is critical for commercial use or for allowing others to share your art.
Types of Licenses
- Exclusive Licenses: Only one party is granted the right to use the work.
- Non-Exclusive Licenses: Multiple parties can be granted the right to use the work.
- Royalty-Free Licenses: The licensee pays a one-time fee for usage rights without further payments.
- Rights-Managed Licenses: Usage is restricted to specific terms (e.g., duration, territory, media).
- Creative Commons Licenses: A popular set of licenses that allow creators to share their work with specific permissions (e.g., attribution, non-commercial, no derivatives).
Clearly Stating Licensing Terms
- On Your Website: Have a dedicated “Licensing” or “Terms of Use” page.
- In Metadata: You can sometimes include licensing information in the metadata fields.
- In Descriptions: When sharing your art, clearly state how it can be used and any required attribution.
Attribution: Giving Credit Where It’s Due
Attribution is the act of acknowledging the creator of a work. It’s a fundamental aspect of respecting intellectual property.
How to Ensure Proper Attribution
- Request it: If you license your work, explicitly state that attribution is required.
- Provide Details: When you create art, ensure your creator information (name, website) is readily available and associated with the work.
- Follow License Terms: If using Creative Commons, ensure you adhere to its attribution requirements.
Creator Information: Who Made This?
This is straightforward: making sure your name, brand, or studio name is clearly associated with the artwork. This helps build your reputation and allows interested parties to find more of your work.
Keywords and Descriptions: Enhancing Discoverability
Keywords and descriptions are vital for search engines and art platforms to understand and categorize your work.
Crafting Effective Keywords
- Be Specific: Think about what someone would search for to find your art.
- Use Synonyms: Include related terms.
- Consider Style and Subject: “Fantasy landscape,” “sci-fi character,” “abstract expressionism,” “digital painting.”
- Think about Mood: “Serene,” “dark,” “vibrant,” “melancholy.”
Writing Compelling Descriptions
- Tell a Story: What inspired the piece? What is the subject matter?
- Highlight Techniques: Mention the software or style used if relevant.
- Include Important Details: Dimensions, year of creation, any licensing information.
Digital Asset Management (DAM): A System for Your Art
As your collection of digital art grows, managing it efficiently becomes a challenge. This is where Digital Asset Management (DAM) systems come in. A DAM system is a centralized place to store, organize, find, and share all your digital files.
Benefits of a DAM System
- Centralized Storage: All your artwork in one accessible location.
- Easy Retrieval: Powerful search capabilities using metadata, keywords, and file names.
- Version Control: Keep track of different iterations of your artwork.
- Rights Management: Track licensing and usage permissions for your assets.
- Collaboration: Facilitate sharing and working with others.
Implementing a Simple DAM Strategy
You don’t need a fancy enterprise system to start. A well-organized folder structure and consistent metadata application can act as a basic DAM.
- Folder Structure: Create logical folders (e.g., by year, by project, by style).
- Consistent Naming: Adhere to your chosen file naming conventions.
- Metadata Application: Regularly add metadata to your files.
- Backup Strategy: Crucially, have a robust backup system to prevent data loss.
Practical Steps: Putting It All Together
Let’s walk through a scenario of creating and labeling a new piece of digital art.
Step 1: Create Your Artwork
You’ve just finished a digital painting titled “Crimson Dawn.”
Step 2: Save with a Proper File Name
- Original Idea: “CrimsonDawnFinal.psd”
- Improved Name:
YourName_CrimsonDawn_DigitalPainting_20231115_v1.psd- This includes your name, title, type of art, date, and version.
Step 3: Embed Metadata
Open your art file in your creative software.
- Go to
File > File Info(or equivalent). - Title: Crimson Dawn
- Author: [Your Name]
- Description: A vibrant digital painting depicting a fiery sunrise over a mystical landscape, evoking a sense of wonder and new beginnings.
- Keywords: Crimson Dawn, sunrise, digital painting, fantasy art, landscape, mystical, vibrant, art by [Your Name]
- Copyright Status: Copyrighted
- Copyright Notice: © [Your Name] 2023. All rights reserved.
- Contact Info: [Your Website/Email]
- Licensing: This piece is available for [mention any specific licenses or “All rights reserved”].
Step 4: Apply Watermarking (If Desired)
If you’re sharing this online, consider adding a subtle watermark of your name or logo.
Step 5: Export for Different Uses
- For Web/Portfolio (JPEG): Save a compressed version. Ensure metadata is preserved if the platform allows. You might use a less prominent watermark here.
- File name:
YourName_CrimsonDawn_DigitalPainting_20231115_web.jpg
- File name:
- For High-Quality Print (TIFF/PNG): Save a higher-resolution version, often without watermarks, especially if it’s for sale. Ensure metadata is still included.
- File name:
YourName_CrimsonDawn_DigitalPainting_20231115_print.tiff
- File name:
Step 6: Organize and Backup
- Place the file in your organized folder structure.
- Ensure your backup system includes this new file.
Frequently Asked Questions (FAQ)
Q1: Do I need to register my copyright with the government?
While copyright protection exists automatically upon creation, registering your work provides stronger legal standing and is often necessary if you need to take legal action against infringement. It’s highly recommended for important works.
Q2: Can I put my copyright notice on my website without embedding it in the file?
Yes, you should have a copyright notice on your website and in your terms of service. However, embedding it in the file’s metadata is a more direct and persistent way to claim ownership.
Q3: What’s the difference between a visible and invisible watermark?
A visible watermark is seen directly on the artwork, often acting as a deterrent. An invisible watermark is embedded in the image data and requires special software to detect, typically used for authentication and tracking.
Q4: How do I choose the right keywords for my art?
Think like a potential buyer or admirer. What terms would they use to search for art like yours? Consider the subject, style, mood, colors, and any specific themes or concepts.
Q5: Is it important to use specific file formats for labeling?
While you can embed metadata in various formats (like JPG, PNG, TIFF, PSD), ensure the format you use supports metadata embedding and is appropriate for your intended use (e.g., JPG for web, TIFF for print).
Q6: How can I manage labeling for a large collection of existing art?
You’ll need to prioritize and tackle it systematically. Start with your most important or most frequently used pieces. You can use batch processing tools or metadata editors to help apply information more quickly to multiple files. Consider digitizing older physical works with proper labeling from the start.
Q7: What happens if someone uses my art without permission?
If your copyright is infringed upon, you have legal recourse. The steps you can take depend on whether your copyright is registered and the specific laws in your jurisdiction. Having clear labeling and metadata makes proving ownership much easier.
By diligently applying these labeling strategies, you empower yourself to protect your digital art, manage your creative assets effectively, and ensure your work is correctly identified and credited for years to come.