
Can you frame acrylic paintings without glass? Yes, many acrylic paintings, especially those on canvas, can be framed without glass. This is a popular and often preferred method for acrylics, as the medium is generally durable and doesn’t require the same protection against smudging as pastels or watercolors.
Framing your acrylic paintings is an essential step in preserving them and presenting them beautifully. It’s not just about aesthetics; proper framing protects your artwork from dust, damage, and the elements. Whether you’re a seasoned artist or just starting out, this guide will walk you through the best ways to frame your acrylic creations, from DIY approaches to professional techniques.
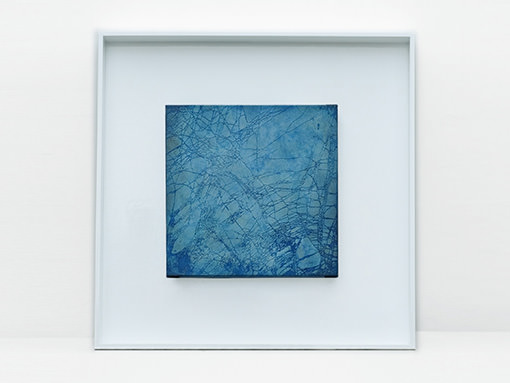
Image Source: www.annabregmanportraits.co.uk
The Art of Display: Why Framing Matters for Acrylics
Framing goes beyond simply adding a border. It’s about creating a harmonious relationship between the artwork and its environment. For acrylic paintings, which can range from glossy to matte finishes, the right frame enhances their visual appeal and longevity. Think of it as the final polish that brings your artistic vision to life.
Protecting Your Acrylic Masterpieces
Acrylics are known for their durability and resistance to yellowing. However, they are not impervious to damage. Dust, moisture, and physical contact can still harm your artwork. Framing provides a crucial protective barrier.
- Physical Protection: A frame prevents direct contact with hands or objects, reducing the risk of scuffs, scratches, or accidental damage.
- Environmental Shielding: While glass isn’t always necessary for acrylics, a frame can help create a micro-environment that protects against dust accumulation and extreme humidity fluctuations.
- UV Protection: For artwork displayed in bright areas, UV-filtering glass or acrylic can be incorporated into the framing to prevent colors from fading over time.
Enhancing Visual Appeal
The right frame can make a world of difference. It can:
- Complement the Artwork: The frame’s color, style, and material should harmonize with the painting’s subject, colors, and overall mood.
- Create a Focal Point: A well-chosen frame draws the viewer’s eye to the artwork, enhancing its impact.
- Define the Space: The frame helps integrate the artwork into the surrounding decor, making it a cohesive part of the room.
Framing Techniques: Your Options
There are several ways to frame acrylic paintings, each with its own advantages. Let’s explore the most common and effective methods.
Canvas Framing: The Popular Choice
Acrylics are frequently applied to canvas, making canvas framing a very popular option. This typically involves framing the canvas itself, rather than the entire canvas board or paper.
- Gallery Wraps: For a modern, minimalist look, canvases can be stretched tightly around a wooden stretcher bar and the sides painted or left white. These don’t require a traditional frame but can be enhanced with a floater frame.
- Traditional Stretched Canvas: If your acrylic painting is on a stretched canvas, you have a few options:
- Framing the Canvas: This involves fitting the stretched canvas within a rabbet (a groove) in a traditional picture frame.
- Canvas Float Frame: These frames create the illusion that the canvas is floating within the frame, with a small gap around all sides. This is particularly effective for gallery-wrapped canvases.
Mounting Acrylics: Preparing Your Artwork
Before you can frame, you often need to mount your acrylic artwork, especially if it’s on paper, board, or a thin support. Mounting ensures the artwork is flat, secure, and ready for framing.
- Adhesive Mounting: Using acid-free, archival spray adhesives or dry-mount tissues to adhere the artwork to a rigid backing board like foam core or mat board.
- Hinging: For delicate works on paper, archival hinges (made from acid-free tape or linen thread) are used to attach the artwork to a backing board without permanently adhering the entire surface. This allows for expansion and contraction of the paper.
Matting Acrylic Art: Adding Depth and Space
Matting is the process of using a thick cardboard-like material (the mat board) between the artwork and the frame. This serves several purposes:
- Visual Breathing Room: The mat creates space between the artwork and the frame, allowing the viewer’s eye to focus on the painting without being overwhelmed.
- Protection: A well-fitted mat keeps the artwork from touching the glass or acrylic, preventing condensation and potential damage.
- Aesthetic Appeal: Matting can significantly enhance the presentation of smaller works or those on paper.
Choosing the Right Mat
- Mat Board Types:
- Alpha Cellulose: Good quality, acid-free, suitable for most applications.
- Rag Mat (Cotton Rag): Archival quality, 100% cotton, the best choice for valuable or long-term preservation.
- Mat Colors: Choose a color that complements your artwork. Whites, off-whites, creams, and grays are classic choices. Sometimes a colored mat can be used to highlight specific colors in the painting.
- Mat Width: Wider mats tend to give a more formal and classic look, while narrower mats can feel more modern.
Shadow Box Framing: For Dimension
Shadow box framing is perfect for artworks that have a bit of depth or for incorporating 3D elements alongside a painting. This involves a deeper frame that creates a space between the artwork and the glazing.
- How it Works: The artwork is typically mounted on a backing board, and then the entire assembly is placed within the deep frame, leaving a gap. This gap can be filled with spacers or kept open for a dramatic effect.
- Ideal for: Textured acrylics, mixed media pieces, or if you want to add small embellishments.
Floating Acrylic: The Modern Illusion
Floating acrylic frames are a contemporary way to display artwork, especially stretched canvases. The canvas appears to be suspended in mid-air within the frame, with a small gap around all sides.
- How it’s Achieved: Special mounting hardware is attached to the back of the canvas, which then slots into the frame. This creates the signature “floating” effect.
- Benefits: It offers a clean, modern look and allows the viewer to appreciate the edges of the canvas.
Framing Without Glass: A Common Practice for Acrylics
As mentioned, framing acrylic paintings without glass is often the preferred method. Acrylic paint, once dry, is relatively durable and resistant to smudging.
- When to Avoid Glass:
- When the painting has a significant texture that would be disrupted by glass.
- When the artwork is very large and glass would add too much weight and risk of breakage.
- For a more direct, tactile viewing experience.
- Considerations: If you frame without glass, ensuring the surface is protected from dust and physical touch is even more important. A clear acrylic spray sealant can offer an additional layer of protection.
Ready-Made Acrylic Frames vs. Custom Framing Acrylics
You have two primary routes for acquiring frames:
Ready-Made Acrylic Frames
These are frames that are pre-manufactured and come in standard sizes.
- Pros:
- Cost-Effective: Generally much cheaper than custom framing.
- Convenient: Available in many art supply stores and online retailers.
- Quick: You can frame your artwork immediately.
- Cons:
- Limited Sizes: May not fit your artwork perfectly, requiring trimming or matting adjustments.
- Limited Styles: Choices of materials, colors, and finishes can be restricted.
- Quality Concerns: Some ready-made frames may not use archival materials, potentially harming your artwork over time.
Custom Framing Acrylics
This involves designing and building a frame specifically for your artwork with a professional framer.
- Pros:
- Perfect Fit: Tailored to your exact artwork dimensions.
- Archival Quality: Professional framers use acid-free materials to protect your artwork.
- Unlimited Choices: Select from a vast array of materials, colors, styles, and glazing options.
- Expert Advice: Framers can offer valuable guidance on the best presentation for your piece.
- Cons:
- Costly: Significantly more expensive than ready-made options.
- Time-Consuming: Can take several weeks to complete.
DIY Framing Your Acrylic Painting
You can achieve professional-looking results with a DIY approach. Here’s how to get started.
Step 1: Measure Your Artwork
Accuracy is key. Measure the height, width, and depth of your painting. If it’s on canvas, measure the stretcher bars. If it’s on paper or board, measure the outer dimensions of the mounted piece.
Step 2: Choose Your Frame Style
Based on your artwork and desired look, decide on the type of frame:
- Simple Wood Frame: A classic choice that works with many styles.
- Floater Frame: Ideal for gallery-wrapped canvases.
- Shadow Box: If your painting has texture or you want to create depth.
Step 3: Select Materials (If DIYing the Frame or Matting)
- Frame Material: Wood, metal, or even a decorative resin. For DIY, wood is usually the most accessible.
- Mat Board: Acid-free, archival quality.
- Backing Board: Foam core or mat board for support.
- Adhesives: Archival spray adhesive or reversible mounting tissue.
- Glazing (Optional): If you decide to use glass or acrylic, opt for UV-filtering and anti-reflective options.
Step 4: The Framing Process
Method 1: Using a Ready-Made Frame
- Check the Fit: See if your painting fits snugly into the frame. If it’s too large, you may need to consider matting or a custom frame. If it’s too small, you can use matting or spacers to fill the gap.
- Prepare the Artwork:
- If your acrylic is on canvas and you’re framing it directly (without glass), ensure the surface is clean and free of debris.
- If it’s on paper or board, mount it securely to a backing board using archival methods (hinging or adhesive mounting).
- Assemble:
- If matting, place the mat board over your artwork.
- Carefully place the artwork (with mat, if used) into the frame rabbet.
- Secure the backing board and artwork in place using the frame’s backing clips or staples.
- Attach hanging hardware to the frame.
Method 2: DIY Canvas Floater Frame
- Build or Buy Floater Frame Components: You can buy pre-made “U” channel floater frames or build your own using wood strips.
- Mount the Canvas: Attach mounting brackets or small wooden blocks to the back of your stretched canvas, recessed slightly from the edges. These will connect to the frame.
- Assemble the Frame: Construct the four sides of the floater frame, ensuring the inner dimensions are slightly larger than your canvas.
- Attach Frame to Canvas: Screw the frame pieces into the mounting brackets on the back of the canvas. Ensure the canvas sits evenly within the frame with a consistent gap.
- Add Hanging Hardware: Attach wire or D-rings to the back of the frame.
Method 3: DIY Wood Frame with Mat and Glass/Acrylic (If Desired)
- Measure and Cut Frame Pieces: If building your own frame, measure and cut four pieces of molding to the correct length, mitering the corners at 45 degrees.
- Assemble the Frame: Glue and clamp the corners together. Reinforce with nails or framing points.
- Prepare the Mat and Artwork: Mount your acrylic artwork to a backing board. Cut a window in your mat board to reveal the artwork. Place the artwork on the backing board, then place the mat on top.
- Add Glazing (Optional): If using glass or acrylic, place it on top of the mat.
- Insert Artwork Assembly: Carefully place the mat, artwork, and glazing into the frame rabbet.
- Secure the Backing: Place the backing board over the assembly and secure it with glazier’s points or staples.
- Attach Hanging Hardware: Install wire or D-rings.
Display Methods for Acrylics: Beyond the Frame
Once framed, how you hang your acrylic painting is just as important as the framing itself.
Wall Hanging Techniques
- Picture Wire and Hooks: The most common method. Ensure the wire is strong enough for the frame’s weight and use appropriate wall hooks (e.g., drywall anchors, stud finders).
- D-Rings and Screws: Directly attach D-rings to the frame and use screws in the wall. This provides a very secure mount.
- French Cleats: For heavier pieces, French cleats offer superior stability and make hanging easier. One cleat attaches to the frame, the other to the wall, and they interlock.
Shelf Display
Smaller framed acrylics can be placed on shelves, mantels, or furniture. Consider leaning them or using small display easels for added visual interest.
Gallery Walls
Arrange multiple framed acrylic paintings together to create a cohesive gallery wall. Mix sizes, orientations, and frame styles for a dynamic display.
Considerations for Lighting
- Natural Light: Avoid placing artwork in direct sunlight, which can cause fading over time.
- Artificial Light: Use diffused lighting that highlights the artwork without creating glare. Spotlights can be effective but should be positioned carefully.
Frequently Asked Questions (FAQ)
Q1: Do I need to varnish my acrylic painting before framing?
While not always mandatory for framing itself, varnishing is highly recommended for protecting the acrylic paint layer. A varnish adds a layer of protection against dust, UV rays (if using a UV-resistant varnish), and minor scratches. It can also even out the sheen of the painting.
Q2: Can I use regular cardboard as a backing for my acrylic painting?
It’s best to avoid regular cardboard. Most cardboard is acidic and will degrade over time, potentially damaging your artwork. Always use acid-free, archival-quality mat board or foam core for backing.
Q3: How do I clean a framed acrylic painting?
If framed without glass, gently dust the surface with a soft, dry brush or a microfiber cloth. If you used glass or acrylic glazing, clean it with a glass cleaner and a soft cloth, being careful not to spray cleaner directly onto the artwork or frame.
Q4: What’s the difference between a shadow box and a floating frame for acrylics?
A shadow box frame creates a deep recess around the artwork, often used for textured pieces or to incorporate 3D elements. A floating frame gives the illusion that the artwork is suspended within the frame with a visible gap all around, typically used for canvas pieces.
Q5: Where can I find ready-made acrylic frames?
Ready-made frames for acrylic paintings (especially for canvases) can be found at art supply stores (like Michaels, Hobby Lobby), online retailers (Amazon, Blick Art Materials, Frame Destination), and home decor stores. Look for frames specifically designed for canvases or those that offer sufficient depth for your painting.
By following these guidelines, you can effectively frame your acrylic paintings, ensuring they are both protected and beautifully displayed for years to come.