
What is encaustic painting? Encaustic painting is a hot wax painting technique that uses heated beeswax mixed with resin as a binder for pigments. Can I do encaustic painting at home? Yes, with the right encaustic supplies and safety precautions, you can create beautiful encaustic artwork in your home studio. Who is encaustic painting for? It’s suitable for artists of all levels, from beginners to seasoned professionals, looking for a unique and versatile medium.
This comprehensive guide will walk you through the exciting world of encaustic painting, from its ancient origins to modern applications. We’ll cover the essential encaustic supplies, wax painting techniques, and the fundamental principles of this vibrant art form. Get ready to explore the luminous qualities and textural possibilities of hot wax painting!
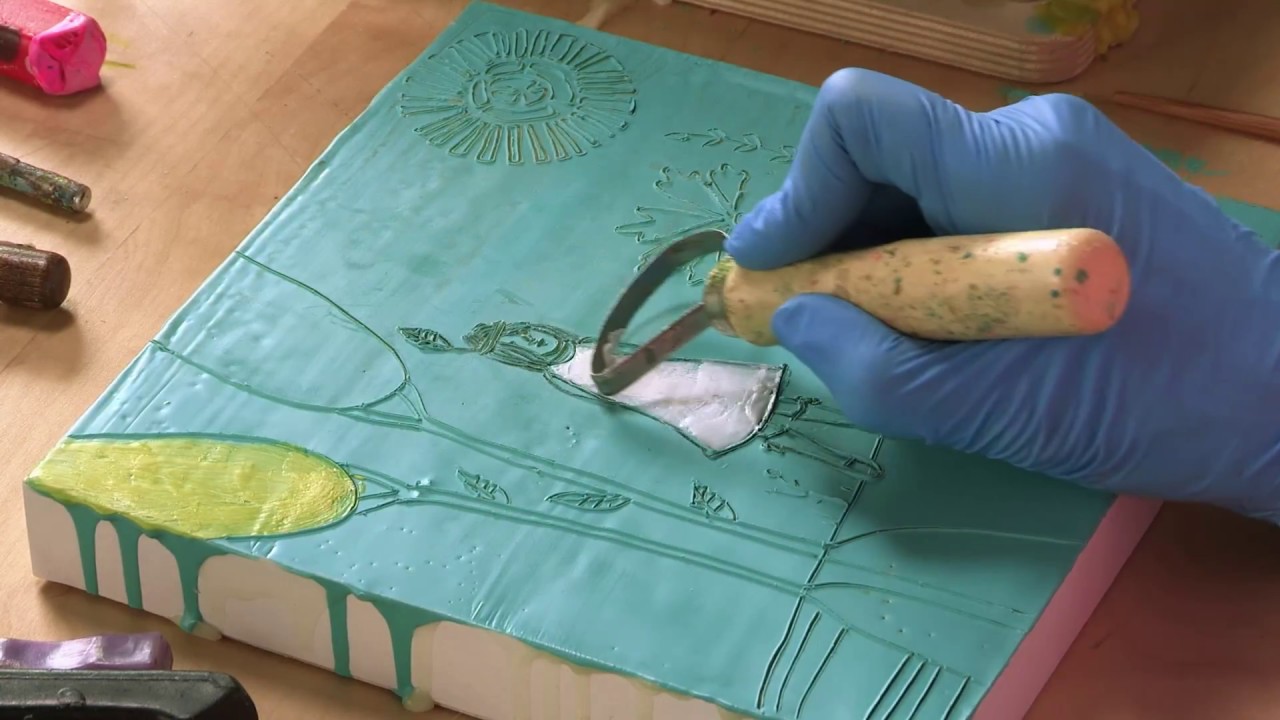
Image Source: i.ytimg.com
The Luminous Appeal of Encaustic
Encaustic art has captivated artists and viewers for millennia. Its origins can be traced back to ancient Greece and Egypt, where it was used to decorate sarcophagi and create striking portraits. The word “encaustic” itself comes from the Greek word “enkaustikos,” meaning “to burn in.” This refers to the crucial step of fusing encaustic layers with heat, which permanently bonds the pigment-infused wax to the surface.
The appeal of encaustic lies in its inherent luminosity and depth. The translucent layers of beeswax allow light to penetrate and reflect, creating a unique glow that is difficult to achieve with other mediums. The ability to build up thick, sculptural textures, embed objects, and create a variety of surface finishes makes encaustic a truly versatile and expressive art form.
Essential Encaustic Supplies: Getting Started
Embarking on your encaustic journey requires a specific set of tools and materials. Investing in quality encaustic supplies will ensure a smoother learning curve and more satisfying results. Here’s a breakdown of what you’ll need:
The Heart of the Matter: Encaustic Medium
The core component of encaustic painting is the encaustic medium. This is essentially a mixture of refined beeswax and damar resin. The damar resin is crucial as it hardens the beeswax, making it more durable and less prone to cracking or becoming brittle over time.
- Beeswax: Use cosmetic-grade or filtered beeswax. It should be a pale yellow and have a pleasant honey scent. Avoid raw beeswax as it may contain impurities that can affect the quality of your painting.
- Damar Resin Crystals: These are small, brittle crystals derived from the damar tree. They need to be melted and mixed with the beeswax.
Making Your Own Encaustic Medium Recipe
While you can purchase pre-mixed encaustic medium, many artists enjoy making their own. This allows for greater control over the consistency and properties of the medium. Here’s a basic encaustic medium recipe:
Ratio: A common starting point is a 10:1 ratio of beeswax to damar resin by weight.
Materials:
* Refined beeswax (pellets or blocks)
* Damar resin crystals
* Double boiler (or two pots, one smaller fitting inside a larger one)
* Stirring utensil (metal or heat-resistant)
* Scale for weighing
* Heat-resistant container for storing the medium
Process:
1. Weigh out your beeswax and damar resin.
2. In the double boiler, melt the beeswax first. Keep the heat on low to medium.
3. Once the beeswax is fully melted, gradually add the damar resin crystals.
4. Stir gently and continuously until the damar resin is completely dissolved. Do not overheat.
5. Once dissolved, remove from heat.
6. Carefully pour the molten encaustic medium into a heat-resistant container for storage. It will solidify as it cools.
Safety Note: Always work in a well-ventilated area when melting beeswax and damar resin. Never leave melting wax unattended.
Heat Source: The Encaustic Hot Plate
A stable and consistent heat source is paramount in encaustic painting. The most common and recommended tool is an encaustic hot plate or a heated palette. These devices maintain a consistent temperature, allowing you to melt and apply the wax smoothly.
- Electric Hot Plate: Specifically designed for encaustic painting, these offer precise temperature control.
- Heated Palette: A smaller, portable option that heats small pans of wax.
Temperature Considerations: The ideal temperature for encaustic work is typically between 180°F and 200°F (82°C and 93°C). This range keeps the wax molten without scorching it.
Application Tools
Applying the molten wax requires specialized tools to achieve different effects.
- Encaustic Brushes: These brushes are designed to withstand the heat and the waxy medium. They typically have natural bristles and sturdy wooden handles. Different sizes and shapes allow for various mark-making and layering.
- Rigs: These are metal tools with interchangeable heads used for scraping, incising, and creating textured marks in the wax.
- Palette Knives: Sturdy metal palette knives can be used to apply and manipulate the wax, especially for creating thicker impasto effects.
- Trowels and Stylus Tools: These offer more specialized ways to move and manipulate the wax.
The Encaustic Palette
Your encaustic palette is where you will mix and hold your colors.
- Metal Pans: Small metal pans or tins that fit into a heated palette are ideal for holding small amounts of colored wax for detailed work.
- Encaustic Palette Cups: These are often ceramic or metal cups designed to be placed on a hot plate.
Pigments for Encaustic
The pigments you use must be suitable for encaustic.
- Pigment Sticks/Crayons: These are readily available and offer a convenient way to introduce color into the wax.
- Dry Pigments: For more control and a wider color range, you can mix dry pigments with your melted encaustic medium. Ensure the pigments are heat-stable and do not contain toxic materials.
- Pre-Mixed Encaustic Paints: Many art suppliers offer pre-mixed encaustic paints in various colors, which are a great starting point for beginners.
Substrates and Grounds
Encaustic can be applied to a variety of rigid surfaces. Porous surfaces need to be prepared with an encaustic ground.
- Rigid Panels: Wood panels (such as birch plywood or cradled panels), MDF, or specialized encaustic boards are excellent choices. Avoid flexible materials like canvas, as the wax can crack.
- Encaustic Grounds: These are primers that seal and prepare porous surfaces for encaustic. They create a slightly absorbent surface that helps the wax adhere. Common encaustic grounds include:
- Gesso: Specially formulated encaustic gesso.
- Adhesives: Some artists use clear acrylic medium as an adhesive layer before applying the wax.
Safety Equipment
Safety is paramount when working with hot wax.
- Ventilation: Ensure excellent ventilation in your workspace. An exhaust fan is highly recommended.
- Gloves: Heat-resistant gloves can protect your hands from accidental contact with hot surfaces.
- Protective Eyewear: Safety glasses are advisable to protect your eyes.
- Apron: Protect your clothing from wax drips.
Basic Encaustic Painting Techniques
Once you have your encaustic supplies and a safe workspace, you can begin exploring wax painting techniques. The key to encaustic is layering and fusing encaustic layers.
Layering and Fusing
Each layer of wax needs to be fused to the layer beneath it. Fusing ensures that the layers bond properly and create a stable painting.
- Applying Wax: Melt your encaustic medium (either plain or colored with pigments) on your hot plate or heated palette. Using an encaustic brush, apply thin, even layers of molten wax to your prepared surface.
- Fusing: After applying a layer of wax, you need to fuse it. This is done using a heat source to re-melt the surface of the applied wax and fuse it to the underlying layer. Common fusing tools include:
- Heat Gun: A heat gun is a versatile tool for fusing and melting wax. Move it constantly to avoid overheating or scorching the wax.
- Torch: A small butane torch can be used for more direct fusing and creating unique effects. Use with caution and in well-ventilated areas.
- Soldering Iron: Can be used for fusing and creating fine lines.
- Branders: Heated metal tools with various patterns used for fusing and adding texture.
The Fusing Process:
1. Apply a layer of wax.
2. Gently move your heat source (heat gun or torch) over the surface, about 6-12 inches away.
3. Observe the surface. The wax will become slightly molten and shiny.
4. Continue fusing until the layer is fully integrated with the one below it. Avoid overheating, which can cause the wax to become cloudy or scorch.
Building Color and Texture
Encaustic allows for a vast range of color and textural effects.
- Color Mixing:
- Pigment Sticks: Simply warm the pigment stick on your hot plate and apply directly or mix with clear melted encaustic medium.
- Dry Pigments: Add dry pigments to melted encaustic medium on your encaustic palette. Stir thoroughly to ensure even dispersion. You can experiment with different pigment loads for varying opacity and intensity.
- Creating Translucency: Apply thin layers of clear encaustic medium over colored layers to build depth and luminosity.
- Creating Opacity: Use a higher pigment load or apply thicker layers of pigmented wax.
- Textural Effects:
- Scraping: Use scraping tools while the wax is still slightly pliable or when it has cooled.
- Incising: Create lines and marks by scratching into the cooled wax with sharp tools.
- Adding Objects: Embed materials like paper, fabric, or small found objects into the molten wax. Ensure the embedded materials are heat-stable and don’t contain moisture.
- Building Impasto: Apply thicker layers of wax with palette knives or trowels.
- Using Rigs and Stylus Tools: Create patterns, lines, and textures by pressing heated tools into the wax.
Working with Multiple Layers
The beauty of encaustic lies in its ability to build up layers.
- Prepare Your Surface: Apply encaustic grounds to your rigid panel if it’s porous.
- Apply First Layer: Apply a thin layer of clear or colored wax and fuse it.
- Add Color and Texture: Apply subsequent layers of colored wax, incorporating different wax painting techniques like scraping, incising, or embedding objects. Remember to fuse each layer.
- Glazing: Apply thin, transparent layers of colored wax over existing layers to subtly alter the color and create depth.
- Burnishing: Once the painting is complete, you can polish the surface with a soft cloth or a heated tool to bring out the natural sheen of the wax.
Advanced Encaustic Techniques and Considerations
As you become more comfortable with the basics, you can explore more advanced wax painting techniques.
Encaustic Collage and Embedding
Encaustic is an excellent medium for collage and embedding.
- Paper and Collage Elements: Apply a layer of wax, place your paper or collage element onto it, and then fuse it with a heat gun. You can then apply more wax over the embedded elements.
- Transparency: Use thin layers of wax and translucent collage elements to create a sense of depth and mystery.
Working with Encaustic Medium Recipes
Experimenting with your own encaustic medium recipe can offer unique properties. You might adjust the ratio of beeswax to damar resin for different hardness or melting points. Some artists add other waxes like carnauba wax for added hardness or paraffin wax (in small amounts) for a different sheen.
Encaustic Starter Kit Considerations
If you’re just starting, an encaustic starter kit can be a great investment. These kits typically include a selection of essential encaustic supplies like a small hot plate, basic brushes, some encaustic medium, a few pigment sticks, and perhaps a heat gun. While convenient, be aware that starter kits often contain smaller quantities, and you’ll likely need to replenish supplies as you progress.
Finishing and Varnishing Encaustic
Encaustic paintings do not require varnishing in the traditional sense. The wax itself is a protective layer. However, you can achieve different surface finishes:
- Matte Finish: Achieved by simply not buffing the final layer.
- Satin or High Gloss Finish: Achieved by buffing the cooled surface with a soft, lint-free cloth or a heated buffing tool.
Maintaining Your Encaustic Tools
Proper maintenance of your encaustic supplies will prolong their lifespan.
- Cleaning Brushes: Clean brushes immediately after use by wiping off excess wax and then using a solvent like mineral spirits or turpentine. Rinse thoroughly and dry.
- Cleaning Hot Plates and Palettes: While still warm, wipe down your hot plate and palette pans with paper towels or clean cloths. For stubborn wax buildup, you can use a gentle scraper. Never use abrasive cleaners.
Encaustic Painting: Safety First!
Working with molten wax and heat requires a strong emphasis on safety.
Ventilation is Crucial
- Why it’s Important: When beeswax and damar resin are heated, they release fumes. While generally considered low-toxicity when heated to proper temperatures, prolonged exposure to these fumes without adequate ventilation can be harmful.
- Solutions:
- Work in a well-ventilated room with windows open.
- Use an exhaust fan that vents outside.
- Consider a small air purifier designed for fume extraction.
Temperature Control
- Scorching: Overheating the encaustic medium can cause it to scorch, leading to a burnt smell and potentially damaging the wax.
- Safety Precautions: Always use a reliable thermometer to monitor your encaustic palette temperature. Never leave melting wax unattended. Have a fire extinguisher or baking soda readily available.
Handling Hot Tools
- Burns: Hot plates, heat guns, torches, and molten wax can cause severe burns.
- Safety Precautions:
- Wear heat-resistant gloves when handling hot tools or surfaces.
- Keep a safe distance from molten wax and hot tools.
- Never touch heated surfaces directly.
- Use caution when working with torches, as they produce an open flame.
Material Safety
- Pigments: Ensure that any dry pigments you use are safe for art applications and are not toxic. Some pigments can be harmful if inhaled. Wear a dust mask when handling dry pigments.
- Substrates: Use rigid substrates that are sealed and do not off-gas when heated.
Frequently Asked Questions About Encaustic Painting
Here are some common questions about encaustic painting:
Q: Can I paint encaustic on canvas?
A: No, canvas is too flexible for encaustic painting. The wax can crack and peel away from the flexible surface. Always use rigid supports like wood panels.
Q: How do I store my encaustic paintings?
A: Encaustic paintings are quite durable but should be protected from extreme heat and direct sunlight, which can cause the wax to soften or melt. Avoid storing them in very cold environments, as the wax can become brittle.
Q: Is encaustic painting toxic?
A: When proper safety precautions are taken, especially regarding ventilation and avoiding overheating, encaustic painting is generally considered safe. However, always research the safety data of any pigments you use and ensure good ventilation.
Q: Can I add other mediums to my encaustic paint?
A: While you can experiment, it’s best to stick to materials that are compatible with wax. Adding water-based mediums or oils can cause adhesion problems. You can safely add dry pigments and some resins or oils designed for encaustic.
Q: How long does encaustic paint take to dry?
A: Encaustic paint dries to the touch almost immediately upon cooling. However, the wax continues to harden and cure over time. It’s recommended to let paintings cure for a few weeks before extensive handling or shipping.
Q: What is the best substrate for encaustic?
A: Rigid materials like birch plywood, cradled panels, MDF, or specialized encaustic boards are ideal. Ensure they are properly sealed with an encaustic ground if they are porous.
Q: Can I use an encaustic starter kit to learn?
A: Yes, an encaustic starter kit can be a good way to get a feel for the medium before investing in a full range of encaustic supplies.
Conclusion
Encaustic painting is a rewarding and ancient art form that offers a unique visual language. With its luminous qualities, textural possibilities, and the satisfying process of fusing encaustic layers, it’s an art form that continues to inspire. By gathering the right encaustic supplies, practicing your wax painting techniques, and prioritizing safety, you can embark on a creative journey filled with vibrant colors and enduring beauty. Happy painting!