
What is the best way to clean metal before painting? The best way to clean metal before painting involves a multi-step process tailored to the type of metal and its condition. Generally, it includes removing loose debris, degreasing, addressing rust or corrosion, and sometimes abrading the surface for better adhesion.
Getting a paint job to last is all about what you do before the brush or spray gun touches the metal. This crucial step, often called metal preparation for paint, is where many DIYers cut corners, leading to peeling, flaking, or bubbling paint down the line. A clean, properly prepared surface is the foundation for a strong, durable, and attractive finish.
Let’s dive into the best methods for cleaning metal before painting, ensuring your next project looks great and stands the test of time.
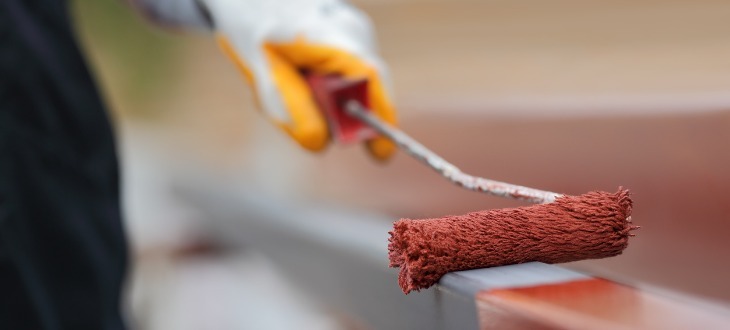
Image Source: tampasteel.com
Why Metal Preparation is Non-Negotiable
Imagine trying to build a house on a shaky foundation. The same principle applies to painting metal. Without thorough metal surface prep, your paint has nothing solid to stick to. Oils, dirt, rust, and old paint all act as barriers, preventing the new paint from bonding effectively.
Here’s why proper cleaning is so important:
- Adhesion: Paint needs a clean surface to grip. Contaminants create a slippery layer that paint can’t adhere to.
- Durability: A well-prepared surface resists chipping, peeling, and blistering.
- Corrosion Prevention: Properly removing rust and applying a suitable primer protects the metal from future damage.
- Aesthetics: A smooth, clean surface ensures a uniform and professional-looking paint finish.
The Core Steps of Metal Cleaning
While the specifics might vary, most metal preparation for paint follows a general sequence. We’ll break down each step in detail.
Step 1: Initial Cleaning and Debris Removal
Before you get into the serious cleaning, you need to remove any loose dirt, dust, cobwebs, or flaking paint.
- Wire Brushing: For larger pieces or areas with significant loose material, a stiff wire brush (manual or attached to a drill/grinder) is excellent for scraping away loose debris and flaking paint.
- Scraping: A putty knife or scraper can be used to lift stubborn flaking paint.
- Vacuuming/Blowing: Once loose material is removed, use a shop vacuum or compressed air to clear away dust and fine particles. This prevents them from being smeared around in later steps.
Step 2: Degreasing the Metal
This is arguably the most critical step in degrease metal for painting. Oils, grease, and even fingerprints can sabotage your paint job. You need a method that effectively cuts through these contaminants.
Common Degreasing Agents:
- Mineral Spirits or Naphtha: These are excellent solvents for cutting through grease and oil. They evaporate relatively quickly and leave little residue. Always use in a well-ventilated area and wear appropriate gloves.
- Commercial Metal Degreasers: Many automotive and hardware stores sell specific metal degreasers designed for this purpose. They are often formulated to be effective and safe for various metal types. Follow the product instructions carefully.
- Soap and Water (with caution): For light grease and grime, a good quality dish soap (like Dawn) can work. However, it’s crucial to rinse thoroughly and ensure the metal is completely dry afterward to prevent water spots or flash rust. This method is generally less effective for heavy industrial grease.
The Degreasing Process:
- Apply the Degreaser: Use a clean cloth or sponge soaked in your chosen degreaser.
- Wipe Thoroughly: Work in sections, wiping down the entire surface. For stubborn areas, you might need to let the degreaser sit for a minute or two (check product instructions).
- Rinse (if necessary): If using a water-based degreaser or if the solvent leaves a residue, wipe down with a clean cloth dampened with water or a suitable solvent.
- Dry Completely: This is vital. Use clean, lint-free cloths. For steel, any residual moisture can quickly lead to flash rust.
Important Note on Solvents: Always test solvents in an inconspicuous area first, especially on painted or coated surfaces you intend to keep. Some strong solvents can damage existing finishes or certain types of plastic components.
Step 3: Addressing Rust and Corrosion
If your metal has any signs of rust or corrosion, this must be addressed before painting. Painting over rust is like painting over a disease; it will continue to spread beneath the paint layer.
Methods to Remove Rust:
-
Mechanical Removal:
- Wire Brush/Wheel: As mentioned earlier, a wire brush or wheel on a drill or grinder is effective for surface rust and light scale.
- Sanding: Sandpaper (starting with a coarser grit like 80-120 and moving to finer grits like 220-320) is a common and effective method. You can do this by hand or with an orbital sander.
- Grinding: For heavy rust, a grinder with a flap disc or grinding wheel can quickly remove thick layers. Be careful not to remove too much of the base metal.
- Abrasive Blasting (Sandblasting): This is the most aggressive and effective method for heavy rust. It uses high-pressure air to propel abrasive media (sand, glass beads, etc.) at the surface, stripping away rust and old paint. This is often a professional service or requires specialized equipment.
-
Chemical Rust Removers:
- Rust Converters: These products don’t remove rust but chemically convert it into a stable, paintable surface (often black and hard). They are good for areas where complete rust removal is difficult. Follow product instructions precisely.
- Rust Dissolvers/Removers: These are acidic solutions that break down and dissolve rust. They require careful application, ventilation, and often a neutralizing rinse afterward. Always wear protective gear.
Specifics for Different Metals:
- Clean Steel Before Painting: Steel is prone to rust. Thorough mechanical removal is often the best approach. After removing rust, a quick wipe with a solvent like mineral spirits is recommended to remove any dust and oil residue. For very clean steel, a light abrasive treatment (like scuff sanding) can improve primer adhesion.
- Clean Aluminum Before Painting: Aluminum oxidizes, forming a dull gray layer. While not “rust” in the traditional sense, this oxide layer needs to be removed for paint to adhere well.
- Light Cleaning: For general cleaning and oxide removal, a good degreaser and a non-abrasive scouring pad or fine-grit sandpaper (320-400 grit) can work.
- Etching: To ensure the best adhesion on aluminum, etch metal for painting is often recommended. This can be done with a phosphoric acid-based cleaner (etching solution) or a mild abrasive like Scotch-Brite pads. This creates a microscopic rough surface for the primer to grip. Always follow etching product instructions and rinse thoroughly.
Step 4: Sanding and Surface Profiling
Even after degreasing and rust removal, the surface might be too smooth for optimal paint adhesion. This is where sanding plays a role beyond just rust removal.
- What is Sanding for Painting? It’s about creating a uniform surface texture and removing any remaining微小的 contaminants. It also helps to dull any existing gloss.
- Grit Recommendations:
- Bare Metal (after rust removal): Start with 80-120 grit to create a profile, then move to 220-320 grit for a smoother finish.
- Previously Painted Surfaces (sound): If the old paint is in good condition, scuff sanding with 220-320 grit is usually sufficient to provide a surface for the new paint to adhere to.
- Dry vs. Wet Sanding:
- Dry Sanding: Use with sandpaper alone or with a sanding block. It creates dust, so wear a mask.
- Wet Sanding: Use sandpaper with water or a soapy water mixture. This helps reduce dust and keeps the sandpaper from clogging as quickly. It often produces a smoother finish.
After sanding, it’s crucial to clean the surface again. Wipe down with a damp cloth (if wet sanding) or a tack cloth to remove all dust particles. A final wipe with a solvent or degreaser is often a good idea.
Step 5: Priming for Protection and Adhesion
This is the final, crucial step in metal preparation for paint. Primer acts as a bridge between the metal and the topcoat.
-
Why Prime Metal?
- Adhesion: Many primers are formulated to bond exceptionally well to metal surfaces.
- Corrosion Inhibition: Many metal primers contain rust inhibitors that protect the underlying metal.
- Surface Uniformity: Primer can help to hide minor imperfections and create a consistent surface for the topcoat.
- Topcoat Adhesion: The topcoat adheres better to primer than directly to bare metal.
-
Choosing the Right Primer:
- For Steel: Use a rust-inhibitive primer, often labeled as “direct-to-metal” (DTM) or containing zinc phosphate.
- For Aluminum: Use a primer specifically designed for aluminum or a good quality universal enamel primer. Etching primers are excellent for aluminum.
- For Galvanized Steel: Use a primer specifically formulated for galvanized metal, as standard primers can react with the zinc coating.
- For Previously Painted Surfaces: If the old paint is sound, you might use a bonding primer or primer compatible with the existing paint.
-
Applying Primer:
- Follow the manufacturer’s instructions for application (brush, roller, or spray).
- Ensure even coverage.
- Allow the primer to dry completely according to the product’s specifications before applying the topcoat.
Specialty Situations and Considerations
Cleaning Painted Metal
If you’re painting over an existing paint job, the process is slightly different.
- Wash: Start by washing the surface with soap and water to remove dirt and grime.
- Inspect: Check the existing paint. Is it peeling, flaking, or chalking?
- Peeling/Flaking: Scrape or sand away all loose paint until you reach a solid edge. Feather the edges of the remaining paint with sandpaper.
- Chalking: This is a powdery residue. You’ll need to wash it off thoroughly with a strong detergent or a TSP (trisodium phosphate) substitute. You may need to use a special “wash primer” or bonding primer over chalky surfaces after cleaning.
- Scuff Sand: Even if the old paint is sound, lightly sand the entire surface with 220-320 grit sandpaper. This “scuffs” the surface, providing a better grip for the new paint.
- Clean: Wipe down with a tack cloth or a damp cloth to remove all sanding dust. A final solvent wipe is often a good idea.
- Prime (if needed): If you’ve sanded down to bare metal, or if you’re painting over a problematic surface, apply an appropriate primer.
Cleaning Other Metal Types
- Brass/Copper: These metals tarnish. You can clean them with a mild abrasive cleaner or even ketchup (the mild acid helps). For painting, they usually need to be lightly sanded and primed with a metal primer.
- Stainless Steel: Generally resistant to corrosion, stainless steel can still get dirty or oily. Degreasing and a light scuff sand are usually sufficient.
Tools and Materials Checklist
Here’s a handy list of items you might need for metal preparation for paint:
| Tool/Material | Purpose |
|---|---|
| Wire Brush | Remove loose paint, rust, and debris. |
| Scraper/Putty Knife | Lift peeling paint. |
| Shop Vacuum/Compressed Air | Remove dust and debris. |
| Degreaser (Solvent/Aqueous) | Remove oil, grease, and grime. |
| Clean Rags (Lint-Free) | Wiping and drying. |
| Sandpaper (various grits) | Remove rust, smooth surfaces, create profile. |
| Orbital Sander (optional) | Faster sanding. |
| Tack Cloth | Remove fine dust particles. |
| Gloves (Nitrile/Chemical Resistant) | Protect hands from chemicals and abrasives. |
| Safety Glasses | Protect eyes from dust and debris. |
| Dust Mask/Respirator | Protect lungs from dust and solvent fumes. |
| Rust Converter/Remover | Treat and remove rust. |
| Etching Solution | Create a profile on aluminum. |
| Metal Primer | Promote adhesion and corrosion resistance. |
| Paint Thinner/Solvent | Cleaning brushes and equipment. |
Frequently Asked Questions (FAQ)
Can I skip degreasing if the metal looks clean?
No, it is strongly recommended not to skip the degreasing step, even if the metal appears clean. Invisible contaminants like oils, fingerprints, and waxes can still be present and will prevent paint from adhering properly, leading to premature failure of the paint job.
How long should I wait between cleaning and priming?
Generally, you should prime the metal as soon as possible after the final cleaning step. This minimizes the chance of new contaminants settling on the surface or, in the case of steel, flash rust forming. If you must wait, consider covering the cleaned area.
Do I need to prime bare metal?
Yes, priming bare metal is essential. Primer provides adhesion, corrosion resistance, and a uniform surface for the topcoat, which bare metal alone cannot offer.
Is it okay to paint over rust?
No, it is never okay to paint over rust. Paint applied over rust will not adhere well and will eventually peel or bubble as the rust continues to spread underneath. Rust must be removed or converted before painting.
What grit sandpaper should I use for general metal preparation?
For general surface preparation and scuff sanding, a grit between 220 and 320 is typically recommended. For removing rust or old paint, start with coarser grits (like 80 or 120) and gradually move to finer grits.
Conclusion
Achieving a long-lasting, beautiful paint finish on metal is entirely dependent on meticulous metal preparation for paint. By thoroughly cleaning, degreasing, removing all traces of rust, and creating a suitable surface profile, you lay the groundwork for a professional and durable outcome. Remember that each type of metal and its condition may require slight variations in the process, but the core principles of a clean, sound surface remain the same. Invest the time in proper metal surface prep, and your painted metal will look better and last much longer.