
When to remove painter’s tape is a common question for anyone tackling a painting project. The ideal time to pull off painter’s tape for crisp, clean lines is when the paint is dry to the touch but not fully cured. This usually means waiting anywhere from 30 minutes to a couple of hours, depending on the paint type and environmental conditions. Removing it too soon can lead to smudging and uneven edges, while removing tape after paint dries completely can result in paint peeling off with the tape, creating a messy finish and damaging your hard work.
Achieving those flawless, razor-sharp lines between colors or around trim is a goal many DIY painters strive for. The secret to this perfection often lies not just in the quality of the paint or the brush, but in the precise timing of masking tape removal painting. It’s a delicate dance between allowing the paint enough time to set but not so much that it bonds too strongly to the tape. Let’s dive deep into the art and science of tape removal painting for beautiful results.
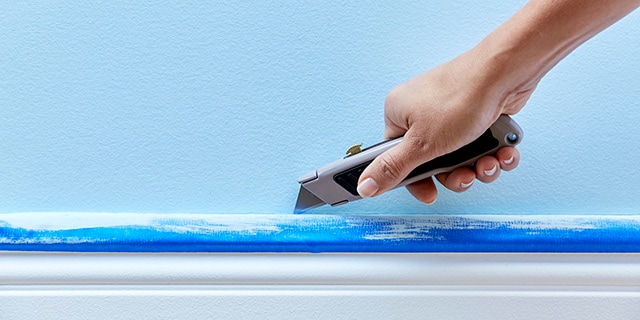
Image Source: www.scotchblue.com
The Crucial Timing: When to Pull the Tape
The question of best time to pull tape after painting is central to avoiding common painting pitfalls. Many factors influence this timing, from the type of paint you’re using to the humidity and temperature in the room.
Understanding Paint Types and Their Drying Times
Different paints have vastly different drying characteristics. This is the most significant factor in determining when to remove painter’s tape.
- Latex (Water-Based) Paints: These are the most common types of paint for interior walls. Latex paints dry to the touch relatively quickly. Generally, you can aim to remove the tape once the paint feels dry and firm under a gentle touch. This can be anywhere from 30 minutes to 2 hours after application. If you leave latex tape on for too long, the paint can cure, making it more brittle and prone to chipping or peeling with the tape.
- Oil-Based (Alkyd) Paints: These paints take longer to dry and cure. While they might feel dry to the touch within a few hours, they remain softer for a longer period. For oil-based paints, it’s often best to wait until the paint is thoroughly dry to the touch, which could be several hours. However, leaving oil-based tape on for days can be problematic as it can cure around the tape edge, leading to lifting and chipping when removed.
Environmental Factors Impacting Drying
Beyond the paint itself, the environment plays a crucial role:
- Humidity: High humidity slows down drying times. If the air is damp, your paint will take longer to set.
- Temperature: Warmer temperatures generally speed up drying, while cooler temperatures slow it down.
- Ventilation: Good airflow helps dissipate moisture and speeds up drying. Poor ventilation can leave paint tacky for longer.
The “Dry to the Touch” Test
This is your primary indicator. Gently touch an unmasked area of the painted surface with a clean finger. If the paint doesn’t transfer to your finger or feel tacky, it’s likely dry enough.
Common Mistakes and Their Consequences
The timing of tape removal is where many DIY painting projects can go wrong. Understanding these common errors will help you avoid them.
The Dreaded Paint Bleed Under Tape
One of the most frustrating issues is paint bleed under tape. This happens when liquid paint seeps through the edge of the tape and onto the area you were trying to protect.
- Causes of Paint Bleed:
- Improper Tape Application: If the tape isn’t pressed down firmly and evenly along the entire edge, tiny gaps can form, allowing paint to seep in.
- Over-Application of Paint: Applying paint too thickly, especially over the tape edge, can increase the chances of bleeding.
- Using the Wrong Tape: Standard masking tape isn’t ideal for painting. Painter’s tape, especially the purple or blue varieties, is designed with a low-tack adhesive and a special edge that helps prevent bleed.
- Painting Against the Tape Edge: Applying paint perpendicular to the tape edge can push paint under it. It’s better to paint with the brush strokes moving away from the tape.
Peeling Paint with the Tape
This is the consequence of leaving tape on too long painting. When paint cures fully, it can bond strongly with the tape’s adhesive. When you pull the tape, the cured paint can lift away from the wall, creating jagged, uneven lines and requiring touch-ups. This is a significant problem with dry tape removal painting if it’s left for too many days.
Smudged or Uneven Lines
This typically occurs when you remove the tape too early, while the paint is still wet. The tape can drag through the wet paint, smearing the edge and creating a less-than-perfect line. This is the risk associated with wet tape removal painting.
The Art of Peeling: How to Remove Tape for Best Results
The method of peeling tape from painted surfaces is as important as the timing. A careful, controlled removal process is key.
The “Score and Pull” Technique
For some paints or if you’re concerned about a strong bond, a gentle score along the tape line can help.
- Wait for Dry to the Touch: Ensure the paint is set, but not fully cured.
- Score the Edge: Use a sharp utility knife or a specialized tape scorer to make a shallow cut along the edge where the paint meets the tape. Be careful not to cut into the surface underneath. This breaks any minor adhesion between the paint and the tape.
- Pull at an Angle: Slowly and steadily pull the tape away from the wall at a sharp angle, ideally 45 degrees. Pulling parallel to the surface can increase the risk of lifting paint.
The “Pull While Wet” Method (with caution)
This method is sometimes recommended for latex paints and can yield very clean lines, but it requires extreme care.
- Wait for the Paint to Set: The paint should be dry to the touch, but still slightly pliable.
- Gently Pull: Slowly and steadily pull the tape away at a 45-degree angle. If you notice any smudging, stop and reassess. You might need to let it dry a little longer. This method is very effective but carries a higher risk if the paint isn’t quite ready.
Dry Tape Removal Painting vs. Wet Tape Removal Painting
The distinction between these two is critical.
- Dry Tape Removal Painting: This is when the paint is fully dry, or even cured. While it minimizes the risk of smudging, it significantly increases the risk of paint peeling with the tape. It’s generally less ideal unless the paint has been on for a very short time and you’re confident it won’t bond too strongly.
- Wet Tape Removal Painting: This is removing the tape when the paint is still wet or very tacky. It can create very clean lines, but the risk of smudging, dragging, and the tape lifting wet paint is high. This is best reserved for specific scenarios and requires a very light touch.
Leaving tape on too long painting is a far more common mistake than removing it too soon, but both can lead to less-than-perfect results.
Choosing the Right Painter’s Tape
Not all tapes are created equal when it comes to painting. Investing in good quality painter’s tape is essential for achieving clean lines and preventing paint bleed under tape.
Types of Painter’s Tape:
| Tape Type | Color | Adhesive Level | Best For | Notes |
|---|---|---|---|---|
| Delicate Surface | Blue/Green | Low Tack | Freshly painted walls (less than 24 hours), delicate surfaces, wallpaper. | Designed to remove cleanly without damaging fragile finishes. |
| Multi-Surface | Blue/Purple | Medium Tack | Most interior painting jobs, trim, windows, walls, glass, metal, and wood. | The go-to for most DIYers; a good balance of adhesion and clean removal. |
| Exterior/Rough | Green | High Tack | Rough surfaces like brick, stucco, concrete, or heavily textured walls. | Stronger adhesive for uneven surfaces, but can damage delicate paint. |
| Trim/Hardwood | Yellow | Medium-Low Tack | Fine detail work, trim, cabinets, floors. | Offers a very clean line and is less likely to leave residue. |
Tips for Effective Tape Application:
- Clean the Surface: Ensure the surface where the tape will be applied is clean, dry, and free of dust or grease.
- Press Firmly: Use a putty knife, credit card, or your fingernail to press down the tape edge firmly. This creates a seal that prevents paint from seeping underneath. Pay extra attention to the edge that will meet the freshly painted area.
- Overlap Ends: Overlap the tape ends at corners to create a continuous barrier.
- Avoid Stretching: Don’t stretch the tape taut as you apply it, as it can contract later and lift away from the surface.
Advanced Tape Removal Tips Painting
Here are some extra tricks to ensure a smooth tape removal process:
The “Cut and Pull” Strategy
If you’ve painted a large area and are worried about the tape sticking too much, consider this:
- Apply Tape: Apply painter’s tape to the dry, already-painted surface where you want a clean line.
- Paint the Second Color: Apply your second paint color, ensuring you paint away from the tape edge.
- Remove Tape While Wet (Optional but recommended): As soon as the second color is dry to the touch (but still slightly soft), carefully remove the tape. If it feels stuck, use the scoring method mentioned earlier.
Dealing with Stubborn Tape
Sometimes, tape can be difficult to remove, especially if it’s been left on for too long or the adhesive has become very strong.
- Heat Gun (Low Setting): Gently warm the tape with a heat gun on a low setting. The heat can soften the adhesive, making it easier to peel. Move the gun constantly to avoid overheating or damaging the paint.
- Hair Dryer: Similar to a heat gun, a hair dryer on a warm setting can help.
- Adhesive Remover: For any residual sticky residue, a citrus-based adhesive remover can be effective. Test it on an inconspicuous area first.
What If You Make a Mistake?
Don’t despair if you encounter paint bleed under tape or a small snag.
- Small Bleeds: Use a fine-tipped artist’s brush dipped in the original base color to carefully touch up the bleed.
- Paint Lifting: If a small section of paint lifts with the tape, let the newly painted area dry completely. Then, use a small brush to carefully touch up the affected area.
Frequently Asked Questions (FAQ)
Can I remove painter’s tape immediately after painting?
No, it’s generally not recommended. The paint needs to set to the touch to avoid smudging. Removing it too soon is a common cause of imperfect lines.
What happens if I leave painter’s tape on too long painting?
If you leave tape on until the paint is fully cured, the paint can bond strongly to the tape. This often leads to the paint peeling off with the tape when you eventually remove it, creating ragged edges and requiring touch-ups.
How do I prevent paint bleed under tape?
Ensure the tape is pressed down firmly and evenly along all edges to create a good seal. Use high-quality painter’s tape, apply paint in thin coats, and paint away from the tape edge.
What is the best time to pull tape after painting?
The best time is when the paint is dry to the touch but not fully cured. This typically ranges from 30 minutes to a couple of hours for latex paints, and longer for oil-based paints. Always test a small section first.
My paint bled under the tape. What can I do?
Let the paint dry completely, then use a small artist’s brush to carefully touch up the bled areas with the original wall color.
Can I use any tape for painting?
No, it’s best to use painter’s tape. Regular masking tape has a stronger adhesive that can damage painted surfaces and may not create as clean a line.
What’s the difference between wet tape removal painting and dry tape removal painting?
Wet tape removal painting involves taking off the tape while the paint is still wet or very tacky. Dry tape removal painting is when the paint is fully dried. While wet removal can give cleaner lines if done carefully, dry removal carries a higher risk of paint peeling.
By paying close attention to timing, using the right materials, and employing careful techniques, you can master the art of tape removal and achieve those beautifully crisp, professional-looking lines in your painting projects.