
Have you ever stared at your guitar, wishing it looked a little more… you? That plain finish just doesn’t capture your rockstar spirit, does it? Choosing the right paint for your guitar can feel like a maze. You worry about getting a color that truly pops, or worse, picking a paint that chips away after just a few gigs. It’s frustrating when you want your instrument to look amazing but you don’t know where to start.
Don’t let confusing paint names and complicated instructions hold you back from creating the guitar of your dreams. This post cuts through the noise. We will explore the best types of guitar paint, what makes them work, and how to apply them like a pro. Get ready to transform your axe from dull to dazzling!
Top Guitar Paint Recommendations

- FENDER-INSPIRED TRANSLUCENT FINISH: Candy Apple Red delivers a deep transparent red over metallic for a brilliant vintage effect just like iconic 1963 guitars
- NITROCELLULOSE FORMULA: Delivers clarity and tonal transparency while aging naturally like original vintage guitars
- PROFESSIONAL QUALITY: Trusted by luthiers, builders, and serious players for consistent results on both new builds and refinishing work
- LAYERABLE & REPAIRABLE: Buildable coating allows sanding between coats for a flawless final result and easy refinishing later
- EASY TO APPLY: Smooth even spray pattern works over wood filler sealer or stain with professional-grade control

- TRADITIONAL GLOSS FINISH: A classic high-gloss nitrocellulose lacquer finish trusted by luthiers and guitar techs
- FAST DRYING & BUILDABLE: Dries quickly for multiple coats in a day. Resistant to alcohol and moisture
- USER FRIENDLY AEROSOL CAN: Convenient and ready to spray, this 13oz aerosol can delivers consistent coverage without professional spray equipment
- ADJUSTABLE SPRAY PATTERN: Rotating spray tip nozzle allows for vertical and horizontal application & even coverage
- PROFESSIONAL INSTRUMENT LACQUER: Formulated specifically for guitars, basses, mandolins, ukuleles, and other wood instruments

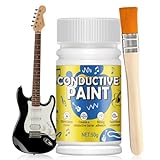
- 𝐂𝐨𝐧𝐝𝐮𝐜𝐭𝐢𝐯𝐞 𝐏𝐫𝐨𝐩𝐞𝐫𝐭𝐢𝐞𝐬: Made of graphene material with electrical conductivity, forms a stable conductive layer after curing (resistivity: 10-90 ohms/cm), ensuring long-lasting shielding performance for your guitar
- 𝐖𝐚𝐭𝐞𝐫-𝐁𝐚𝐬𝐞𝐝 𝐅𝐨𝐫𝐦𝐮𝐥𝐚: Guitar shielding paint easily washes clean when wet and dries quickly, eliminating concerns about difficult cleanup during application
- 𝐍𝐨𝐢𝐬𝐞 𝐑𝐞𝐝𝐮𝐜𝐭𝐢𝐨𝐧:Forms a conductive barrier that effectively isolates interference, eliminating low-frequency humming and high-frequency hissing sounds in your guitar circuit
- 𝐄𝐱𝐜𝐞𝐥𝐥𝐞𝐧𝐭 𝐀𝐝𝐡𝐞𝐬𝐢𝐨𝐧:Highly durable and flexible conductive paint with excellent adhesion to various surfaces including glass, ceramics, metals, and cement
- 𝐀𝐩𝐩𝐥𝐢𝐜𝐚𝐛𝐥𝐞 𝐔𝐬𝐞𝐫𝐬:Graphite conductive paint designed for electroforming and electroplating enthusiasts, professionals, artists and DIY creators working on guitar modifications

- BLACK GLOSS FINISH: A classic high-gloss black nitrocellulose lacquer finish trusted by luthiers and guitar techs
- FAST DRYING & BUILDABLE: Dries quickly for multiple coats in a day. Resistant to alcohol and moisture
- USER FRIENDLY AEROSOL CAN: Convenient and ready to spray, this 13oz aerosol can delivers consistent coverage without professional spray equipment
- ADJUSTABLE SPRAY PATTERN: Rotating spray tip nozzle allows for vertical and horizontal application & even coverage
- PROFESSIONAL INSTRUMENT LACQUER: Formulated specifically for guitars, basses, mandolins, ukuleles, and other wood instruments

- Ideal for use on interior/exterior surfaces including plaster, masonry, wood, metal and unglazed ceramic
- Acrylic formula offers an ultra-hard, high luster finish with fast cure and hardening time compared to regular paint
- Dries to the touch in 20 minutes, covers up to 7 sq. ft. per can
- Durable coating can sanded and recoated for a higher gloss finish
- Provides a smooth, ultra gloss coating for a professional, factory finish look

- Say Goodbye To Electrical Noise: Our conductive paint effectively isolates interference, eliminating low-frequency hum and high-frequency hiss from guitar circuitry, leaving your tone pure and clear.Resistivity: 10-90 Ohms/Cm
- Precision Application: Guitar shielding paint can be precisely applied to delicate areas like pickup slots and potentiometer compartments, solving the problem of curved surfaces where conductive tape can be difficult to adhere.
- Conductive properties: Application tools can be easily cleaned with water, and after curing, a stable conductive layer is formed, balancing ease of application with long-lasting shielding performance.
- Use: Stir the conductive coating thoroughly before use. Apply evenly to all corners with a brush. After the first coat is completely dry, apply the second coat, roughly perpendicular to the first. Ensure each coat is completely dry before reinstalling all electronic components.A reliable electrical connection must be established between the fully dried and cured conductive coating and the grounding terminal in the circuit; otherwise, the shielding effect will be compromised.
- Grounding Is Essential: After application, securely connecting the coating to the circuit ground is a crucial final step in achieving effective noise reduction.
- Say Goodbye to Buzzing Noise and Lock in Pure Tone: This kuailaya guitar shielding paint significantly reduces background noise with single-coil pickups and high-gain settings, resulting in cleaner performance and recording signals, and improving overall sound quality and playing experience
- A Nemesis of Irregular Grooves: This conductive shielding paint easily penetrates the complex corners of pickup slots and circuit chambers. A simple brush application forms a tightly adhered, continuously conductive protective layer
- Easy to Use: Ensure the area to be coated is clean and dry. Stir or shake well before use, then apply conductive paint evenly. Multiple coats can be applied for a more complete shielding layer. Allow to dry. Shielding is complete after successful grounding
- Highly Performance: Shielding paint for electric guitar utilizing high-concentration graphite microparticles,Once grounded, it quickly conducts stray signals to the ground, significantly reducing AC hum
- Enhancing the Internal Texture of the Instrument: Unlike messy metal stickers, the matte black shielding paint gives the circuit chamber a clean and sophisticated look, reminiscent of the original craftsmanship of a top-quality handcrafted instrument

- Professional-grade electromagnetic shielding: The high conductivity of graphene causes electromagnetic waves to be reflected at its surface. Within the graphene layer, electromagnetic waves are absorbed and converted into thermal energy. These waves undergo multiple reflections within the coating, causing their energy to gradually diminish. This effectively reduces the impact of external electromagnetic interference on guitar pickups, enhancing the purity of the sound quality
- Innovative graphene formulation delivers exceptional conductivity and lasting protection: Utilizing graphene material with high electrical conductivity, it forms an effective conductive network. Simultaneously, graphene's layered structure creates a dense barrier, endowing the coating with outstanding rustproofing and corrosion resistance. Not only does it shield signals, but it also protects the instrument's base material, keeping it looking like new for years to come
- Heat dissipation performance:Graphene's high thermal conductivity enables it to dissipate heat effectively in guitar coatings.When heat is generated by the guitar's electronic components during operation, it can be rapidly conducted and dispersed through the graphene coating, preventing localized overheating
- Water-based formula: Guitar shielding paint is easily washable when wet and forms a durable protective layer after drying.Low VOC (low volatile organic compounds), minimal odor, safer and more environmentally friendly to use
- Multi-purpose Conductive Coating: Beyond guitars, this coating can be applied in other scenarios requiring electromagnetic shielding, such as protecting residential spaces from electromagnetic radiation emitted by communication base stations, or creating a “clean” electromagnetic environment for university research and corporate R&D
The Ultimate Buying Guide to Guitar Paint
Giving your guitar a fresh look is exciting! Good paint makes your instrument look amazing. This guide helps you choose the best paint for your project. We cover what to look for and how to get a great finish.
Key Features to Look For in Guitar Paint
Not all paints work well on guitars. You need paint that sticks well and looks professional. Here are the main features to consider:
- Durability: The paint must last a long time. It should resist scratches from playing or from gig bags. A durable coat protects the wood underneath.
- Adhesion: This means how well the paint sticks to the guitar body. Poor adhesion leads to chipping and peeling later. Good adhesion is crucial for a lasting finish.
- Finish Type: Do you want a super shiny look (gloss) or a flat, non-reflective look (matte)? Some paints offer metallic flakes or burst patterns too. Choose the look you want before you buy.
- Cure Time: How fast does the paint dry hard? Fast-drying paints save you time. However, slow-drying paints sometimes offer a smoother final coat.
Important Materials: What Your Paint Is Made Of
The ingredients matter a lot for guitar finishes. Most professional guitar paints fall into a few main categories:
Nitrocellulose Lacquer (The Classic Choice)
This is the traditional paint used on vintage guitars. It dries hard and looks fantastic over time. It often develops a nice, aged look. However, nitro is tricky to work with. It requires many thin coats and needs careful ventilation because the fumes are strong. Only experienced painters usually use true nitro.
Polyurethane (The Modern Workhorse)
Polyurethane paints are very tough and durable. They resist chemicals and scratches better than nitro. Poly dries faster and is easier for beginners to apply. It provides a thick, hard shell finish. Most modern guitars use some form of poly finish.
Acrylics and Enamels (Good for Beginners)
These paints are often easier to find and clean up. They are great for practice projects or solid colors. They do not offer the same depth as lacquer or poly, but they are a good starting point for DIY guitar painting.
Factors That Improve or Reduce Quality
The quality of your final paint job depends on more than just the can of paint.
Factors That Improve Quality:
- Proper Surface Prep: This is the most important step! You must sand the old finish off completely, or sand it down until it is perfectly smooth. Clean the surface thoroughly before applying any primer or paint.
- Primer Use: Always use a high-quality primer designed for your paint type. Primer helps the color coat stick better and hides small imperfections in the wood.
- Thin Coats: Applying several thin coats is always better than one thick coat. Thick coats run, drip, and take forever to dry hard. Thin coats build up a strong, smooth layer.
Factors That Reduce Quality:
- Humidity and Temperature: Painting in a very humid or very cold environment causes problems. The paint might stay sticky or dry with a dull, cloudy look (called blushing).
- Contamination: Dust, oil from your fingers, or old wax left on the guitar surface will ruin the adhesion. The paint will lift off later.
- Incompatible Layers: You cannot mix oil-based paint with water-based paint, for example. Always check that your primer, color coat, and clear coat work together.
User Experience and Use Cases
How you plan to use the paint affects your choice.
For the Beginner/Hobbyist:
If this is your first time, look for **spray-can polyurethane or high-quality acrylics**. These are forgiving. You can practice on scrap wood first. Focus on sanding the body until it feels like glass before you start spraying.
For the Vintage Restoration:
If you are restoring a classic guitar, you should choose **Nitrocellulose Lacquer**. Be prepared to wait longer for drying times and invest in good safety gear (respirator). The reward is an authentic, beautiful vintage look.
For Heavy Gigging Musicians:
If your guitar sees a lot of action on stage, choose a **two-part Polyurethane**. This finish offers the best protection against sweat, beer splashes, and accidental bumps. It keeps the color looking new longer.
Guitar Paint Buying FAQ
Q: Do I have to remove the old finish completely?
A: Yes, for the best results, you should remove the old finish. If you paint over an old finish, the new paint might peel off later because it cannot stick to the slick surface underneath.
Q: How much paint do I actually need for a whole guitar body?
A: For a standard solid-body guitar, one or two cans of spray paint (12 oz size) for the color, plus one can for clear coat, is usually enough, assuming you apply thin coats.
Q: Is it safe to paint the guitar neck?
A: Many people paint the back of the neck for color or protection. If you do, make sure the paint dries perfectly hard where your hand touches it. Soft paint feels sticky and slows down your playing.
Q: What is “blushing” and how do I avoid it?
A: Blushing happens when moisture gets trapped in the paint as it dries, making the finish look cloudy or milky white. Avoid it by painting when humidity is low and the temperature is stable (usually above 65°F).
Q: Should I use a clear coat over the color?
A: Yes, almost always. A clear coat protects the color layer, adds depth, and allows you to polish the guitar to a high gloss shine.
Q: What is the safest way to clean up wet paint?
A: Always read the label! Polyurethane cleans up with specific thinners. Lacquer usually cleans up with lacquer thinner. Acrylics often clean up with water or mineral spirits when wet.
Q: Can I use regular hardware store spray paint?
A: You can, but it won’t last as long or look as deep as dedicated guitar paint. Hardware store paints often lack the strong UV resistance needed for long-term color stability.
Q: How long should I wait between coats?
A: This depends on the paint. For lacquer, wait until the coat is “tacky” but not wet—often 30 minutes to an hour. Always check the can instructions. Rushing this step causes drips.
Q: Does the wood type (mahogany vs. ash) affect paint choice?
A: Yes. Open-pore woods like ash or mahogany need grain filler before painting. If you skip the filler, the paint will look bumpy, showing the wood’s texture.
Q: Is sanding between coats necessary?
A: Light sanding (wet sanding with very fine sandpaper, like 600 grit) between clear coats helps knock down dust nibs and creates a smoother surface for the next layer. Do not sand the final clear coat until it has fully cured.