
What is the most crucial step in painting steel? The most crucial step in painting steel is proper surface preparation. Can I paint over rust? No, you cannot paint directly over rust; it must be removed first. Who is responsible for proper surface preparation? The person or team undertaking the painting project is responsible for ensuring proper surface preparation.
Getting steel ready to paint is super important. It’s like making sure a foundation is strong before building a house. If you skip this step, your paint job won’t last long. It might peel, bubble, or even start to rust again quickly. This guide will walk you through everything you need to know to get steel ready for a great paint job. We’ll cover cleaning, dealing with rust, and making sure the paint sticks well.
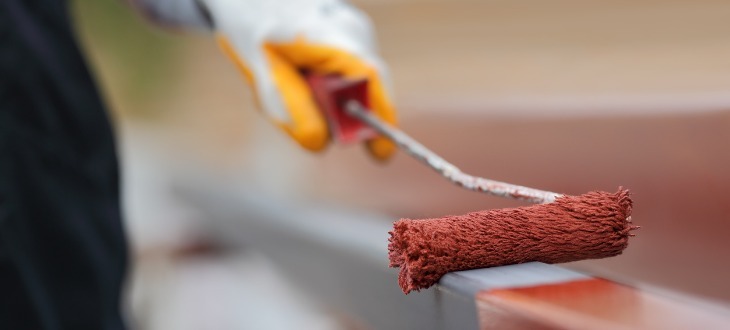
Image Source: tampasteel.com
Why Surface Preparation Matters for Steel
Painting steel isn’t just about slapping on a coat of color. It’s a process that ensures the paint protects the metal and looks good for a long time. Good surface preparation is the bedrock of any successful paint application on steel. Without it, you’re setting yourself up for disappointment.
Here’s why it’s so vital:
- Paint Adhesion: Paint sticks best to a clean, properly prepared surface. Any oil, grease, dirt, or rust acts as a barrier, preventing the paint from bonding securely to the steel. This means the paint can easily chip or peel.
- Corrosion Prevention: Steel is prone to rust. If you paint over existing rust or don’t remove contaminants that can cause corrosion, the rust will continue to spread underneath the paint. Eventually, it will break through the paint film, ruining the finish and compromising the steel’s integrity.
- Durability and Longevity: A well-prepared surface leads to a paint job that lasts. It resists wear and tear, weathering, and environmental damage much better than paint applied to an unprepared surface.
- Aesthetic Appeal: Proper preparation ensures a smooth, even finish. Without it, you might see bumps, imperfections, or the underlying rust showing through, making the final product look unprofessional.
The Essential Steps of Metal Prep for Steel
Metal prep for painting steel involves a series of cleaning and conditioning steps. Each step builds upon the last, creating a surface that is ready to receive paint. Think of it as a journey, moving from a dirty, potentially damaged surface to a clean, smooth canvas.
Step 1: Initial Cleaning and Degreasing Metal
Before you tackle anything else, you need to get rid of any loose debris, dirt, and especially grease or oil. Grease is a major enemy of good paint adhesion.
Removing Surface Contaminants
- Sweep or Brush: Start by using a stiff brush or broom to remove any loose dirt, dust, sand, or debris.
- Wipe Down: Use a clean, lint-free cloth to wipe down the surface.
Degreasing Metal Properly
This is a critical part of surface cleaning. You want to remove all traces of oil, grease, and other organic residues.
- Choose the Right Cleaner:
- Solvent-Based Degreasers: These are very effective for removing heavy grease and oil. Common options include mineral spirits, lacquer thinner, or specialized industrial degreasers. Always use these in a well-ventilated area and wear appropriate personal protective equipment (PPE), like gloves and safety glasses.
- Water-Based Degreasers: These are often more environmentally friendly and safer to use. They work by emulsifying the grease, allowing it to be rinsed away with water.
- Application:
- Apply the degreaser using a clean cloth, sponge, or spray bottle.
- Allow the degreaser to sit for a few minutes to break down the contaminants, but don’t let it dry on the surface.
- Wipe or scrub the area thoroughly.
- Rinse and Dry: This is crucial, especially with water-based cleaners. Rinse the surface thoroughly with clean water to remove all traces of the degreaser. Then, dry the steel immediately with clean cloths or by allowing it to air dry in a warm, dry environment. Any remaining moisture can lead to flash rust.
Table 1: Degreasing Methods and Their Applications
| Degreasing Method | Pros | Cons | Best For |
|---|---|---|---|
| Solvent-Based Degreasers | Excellent for heavy grease/oil, fast evaporation | Flammable, strong fumes, requires good ventilation & PPE | Automotive parts, machinery, very greasy surfaces |
| Water-Based Degreasers | Safer, less fumes, environmentally friendlier | May require rinsing, can promote flash rust if not dried | General cleaning, light to moderate grease |
| Simple Soap and Water | Readily available, inexpensive | Less effective on heavy grease, requires thorough rinsing | Very light grime, dust, after sanding |
Step 2: Rust Removal
This is arguably the most challenging but essential part of metal prep. You cannot paint over rust if you want a lasting finish.
Dealing with Rust
There are several effective methods for rust removal. The best method depends on the severity of the rust and the size/shape of the steel object.
-
Mechanical Removal:
- Wire Brushing: For light to moderate rust, a wire brush (manual or attached to a drill) can be very effective. It physically scrapes the rust off the surface.
- Sanding: Using sandpaper or abrasive pads is another common method. Start with a coarser grit (e.g., 60-80 grit) to remove the bulk of the rust and then move to finer grits (e.g., 120-220 grit) to smooth the surface. Sanding metal is crucial for creating a profile for the paint to adhere to.
- Grinding/Sanding Discs: For heavy rust or pitted steel, angle grinders with wire wheels or grinding discs can be used. Be careful not to remove too much metal.
- Sandblasting (Media Blasting): This is the most efficient method for removing heavy rust and creating an excellent surface profile. It uses compressed air to propel abrasive media (like sand, grit, or beads) at high speed, stripping away rust, old paint, and contaminants. This method requires specialized equipment and protective gear.
-
Chemical Rust Removers:
- These products contain acids that dissolve rust. They come in liquid, gel, or aerosol forms.
- Follow the manufacturer’s instructions precisely. Typically, you apply the remover, let it sit for a specified time, and then wipe or rinse it off.
- Many chemical removers require a neutralizer (like baking soda solution) and thorough rinsing afterward to stop the chemical action.
- These are good for intricate shapes or areas that are hard to reach with mechanical methods.
Table 2: Rust Removal Methods Compared
| Method | Effectiveness (Light Rust) | Effectiveness (Heavy Rust) | Surface Profile Created | Time/Effort Required | Equipment Needed |
|---|---|---|---|---|---|
| Wire Brushing | Good | Moderate | Rough | Moderate | Wire brush, drill (opt) |
| Sanding | Very Good | Good | Smooth to Rough | Moderate to High | Sandpaper, sander |
| Grinding | Excellent | Excellent | Rough | High | Angle grinder |
| Sandblasting | Excellent | Excellent | Excellent (profiled) | Low (if professional) | Sandblaster |
| Chemical Removers | Very Good | Good | Smooth (may etch) | Low to Moderate | Chemical remover |
Post-Rust Removal Cleaning
After removing the rust, the surface will likely be dusty or have residues from the rust remover.
- Wipe Down: Use a clean, dry cloth to wipe away all dust and debris.
- Rinse (if chemical remover used): If you used a chemical rust remover, ensure you neutralize and rinse the surface thoroughly according to the product’s instructions. Dry immediately.
Step 3: Surface Cleaning Again (Final Wash)
After rust removal and any initial degreasing, it’s good practice to do a final cleaning pass. This removes any dust generated during sanding or any remaining contaminants you might have missed.
- Wipe with Solvent: A final wipe-down with a solvent (like mineral spirits or a wax and grease remover) is highly recommended. This ensures the surface is completely free of any oils, fingerprints, or residues that could interfere with paint adhesion. Use a clean, lint-free cloth and work in sections, wiping with one cloth and immediately drying with another clean, dry cloth.
Step 4: Creating a Surface Profile (Etching or Priming)
Simply cleaning isn’t always enough. For the best paint adhesion, the surface needs a slight “tooth” for the paint to grip onto. This is where metal etching or proper priming comes in.
Metal Etching
- Purpose: Etching creates a microscopic roughness on the steel surface, providing a better key for the primer and subsequent paint coats.
- Methods:
- Acid Etching: Acid-based metal conditioners or etchers are available. These are typically phosphoric acid-based solutions that lightly etch the metal surface. They are often used for galvanised steel or aluminium but can also be used on bare steel.
- Mechanical Etching: Sanding metal with a medium-grit sandpaper (like 120-180 grit) after cleaning also creates a profile. This is often combined with the rust removal process.
- Important Considerations:
- Always follow the manufacturer’s instructions for etching solutions.
- Rinse thoroughly after etching and dry immediately.
- Etching solutions can be corrosive, so wear appropriate PPE.
Priming Steel
Applying a primer is a crucial step in metal treatment and is often considered part of the preparation process itself. A good primer does several things:
- Enhances Adhesion: Primers are formulated to bond strongly to the metal surface and provide an excellent base for the topcoat.
- Corrosion Resistance: Many primers contain anti-corrosive pigments that further protect the steel from rust.
- Fills Minor Imperfections: Some primers can help fill minor scratches or imperfections, leading to a smoother finish.
- Uniformity: A primer provides a uniform color base, ensuring the topcoat has consistent coverage.
Types of Primers for Steel:
- Epoxy Primers: These are high-performance primers known for their excellent adhesion, durability, and corrosion resistance. They are often two-part (catalyst and resin) and require careful mixing.
- Zinc-Rich Primers (Galvanizing Primers): These primers contain a high percentage of zinc dust. When applied correctly, they provide sacrificial galvanic protection to the steel, meaning the zinc corrodes instead of the steel. They are excellent for areas where the paint might get scratched.
- Alkyd Primers (Oil-Based): These are more traditional and generally less expensive. They offer good adhesion and corrosion resistance for general-purpose applications but are not as durable as epoxies.
- Acrylic/Latex Primers: Water-based primers are available and are easier to clean up. Some are specifically formulated for metal and offer good adhesion and rust inhibition.
Choosing the Right Primer:
Consider the environment the steel will be in (indoors, outdoors, corrosive atmosphere) and the type of topcoat you will be using. Always check the primer manufacturer’s recommendations for compatibility.
Applying Primer:
- Application Methods: Primers can be applied by brush, roller, or spray gun. Spraying often provides the smoothest and most even finish.
- Coverage: Ensure you apply a thin, even coat. Avoid drips or runs.
- Drying Time: Allow the primer to dry completely according to the manufacturer’s instructions before applying the topcoat. Rushing this step can compromise adhesion.
- Sanding the Primer (Optional but Recommended): For a perfectly smooth finish, you can lightly sand the dried primer coat with fine-grit sandpaper (e.g., 220-400 grit). This removes any dust nibs or imperfections, creating an even smoother surface for the topcoat. Wipe down again after sanding.
Tools and Materials You’ll Need
Gathering the right tools and materials beforehand makes the process much smoother.
Essential Tools:
- Wire brushes (handheld and drill attachments)
- Sandpaper (various grits: 60-80, 120-180, 220-320)
- Sanding block or orbital sander
- Scrapers
- Clean, lint-free cloths or rags
- Buckets for cleaning solutions
- Gloves (nitrile or chemical-resistant)
- Safety glasses or goggles
- Respirator mask (especially when sanding or using strong solvents/paints)
- Drop cloths or tarps to protect surrounding areas
- Screwdrivers or pliers (for disassembly if needed)
- Optional: Angle grinder with wire wheel or flap disc, sandblaster
Essential Materials:
- Degreaser (solvent or water-based)
- Rust remover (if needed)
- Metal conditioner or etcher (optional, depending on system)
- Primer (appropriate for steel and topcoat)
- Topcoat paint
- Mineral spirits or wax and grease remover for final wipe-down
- Masking tape and paper (if masking off areas)
Specific Considerations for Different Steel Types and Conditions
The preparation process might vary slightly depending on the type of steel and its current condition.
New Steel
New steel often comes with a mill scale, which is a dark, flaky coating formed during the manufacturing process. This mill scale can be prone to rusting.
- Mill Scale Removal: Mill scale must be removed before painting. This can be done through abrasive blasting (ideal) or by sanding/grinding. Once removed, new steel needs to be cleaned and degreased.
- Surface Treatment: For new, bare steel, a primer is essential immediately after preparation to prevent flash rusting.
Previously Painted Steel
If you’re painting over existing paint, the condition of that paint is key.
- Sound Paint: If the old paint is firmly adhered and in good condition, you may only need to clean the surface thoroughly, degrease it, and then lightly scuff sand it to provide a key for the new paint.
- Peeling or Damaged Paint: If the old paint is peeling, flaking, or damaged, you’ll need to remove it. This can be done by scraping, sanding, or chemical strippers. Once the old paint is removed, you’ll treat the exposed steel as bare metal, addressing any rust present.
Galvanized Steel
Galvanized steel has a zinc coating that protects it from rust. However, this zinc coating can also be tricky to paint.
- Cleaning: Thorough cleaning and degreasing are essential.
- Etching: Galvanized steel often benefits from etching to ensure good paint adhesion. Special primers for galvanized metal are also available.
- Weathering: New galvanized steel often develops a “patina” over time, which can improve paint adhesion. It’s sometimes recommended to let new galvanized surfaces weather for a few months before painting, or to use a wash primer.
Final Touches and Best Practices
After the main preparation steps, a few extra checks and actions can ensure the best outcome.
Inspection Before Painting
Before you even think about opening the paint can, do a thorough inspection:
- Surface Smoothness: Run your hand over the surface. Does it feel smooth? Are there any rough patches or residues?
- Absence of Contaminants: Visually inspect for any remaining dirt, oil, or dust.
- Rust Check: Ensure all rust has been completely removed. Look closely in corners and seams.
- Primer Adhesion: If you applied primer, check that it adheres well and is free from defects.
Masking
If you don’t want paint on certain areas (like other building materials, hardware, or specific sections of the steel), use painter’s tape and paper or plastic sheeting to mask them off carefully.
Environmental Conditions
The environment where you are painting plays a big role.
- Temperature: Most paints have an ideal temperature range for application and drying. Avoid painting in extreme heat or cold.
- Humidity: High humidity can slow down drying times and, in some cases, affect paint performance.
- Wind: Painting outdoors in windy conditions can cause dust and debris to settle on the wet paint, ruining the finish.
- Ventilation: Good ventilation is crucial, especially when using solvent-based products.
Frequently Asked Questions (FAQ)
Q1: How long should I wait between preparation steps?
A1: This depends on the products used. Always follow the manufacturer’s recommended drying times. For degreasers, you usually want to rinse and dry immediately. For primers, ensure they are fully dry to the touch and for the recommended recoat window before applying the topcoat.
Q2: Can I use a power washer for cleaning steel?
A2: A power washer can be effective for removing loose dirt and debris, but be cautious. High pressure can damage the steel surface or drive contaminants deeper into pores. Always use a lower pressure setting and a fan nozzle, and avoid spraying directly at seams or welds. Ensure the steel is dried completely afterward to prevent flash rust.
Q3: What is the best way to prep steel for spray painting?
A3: For spray painting, achieving a very smooth and clean surface is paramount. This usually involves a combination of chemical degreasing, thorough rust removal (often mechanical or blasting), followed by a light sanding and a final solvent wipe. Applying a high-quality primer is also critical for a smooth, durable finish when spraying.
Q4: Do I need to prime every time I paint steel?
A4: Yes, for best results and long-term protection, priming steel is almost always recommended. Primers are specifically designed to bond to metal and provide a foundation for topcoats, while also offering corrosion resistance.
Q5: How do I know if my surface preparation is good enough?
A5: Your preparation is good enough when the surface is free of all rust, dirt, oil, grease, and loose paint. It should feel smooth to the touch (unless a specific texture is desired) and may have a slight “tooth” from sanding or etching, which helps with paint adhesion. A final solvent wipe should leave no residue on a clean cloth.
By following these detailed steps, you can ensure that your steel surfaces are perfectly prepared for painting, leading to a professional-looking finish that lasts for years to come. Proper surface preparation is the key to unlocking the full potential of your paint job and protecting your steel from the elements.