
Can you paint directly over steel? While you might be tempted to skip the prep work, painting directly over unprepared steel will lead to a poor finish and premature failure. The best way to prep steel for painting involves a multi-step process ensuring adhesion, durability, and a beautiful, long-lasting result. This guide will walk you through everything you need to know for perfect steel surface preparation.
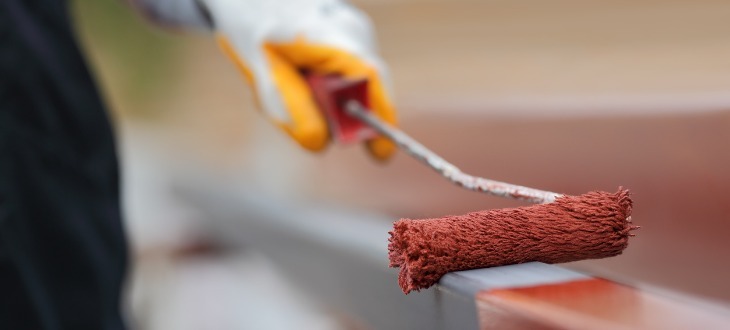
Image Source: tampasteel.com
Why Surface Preparation for Steel Matters
Think of painting steel like building a house. You wouldn’t build on shaky foundations, and you shouldn’t paint on a dirty, rusty surface. Proper surface preparation for steel is the bedrock of any successful paint job. It ensures:
- Adhesion: Paint needs something to grip onto. Without the right prep, the paint can easily peel or flake off.
- Durability: A well-prepared surface resists corrosion, impacts, and environmental damage.
- Aesthetics: Smooth, clean steel allows the paint to lay evenly, creating a flawless finish.
- Longevity: Investing time in prep now saves you from costly repairs and repainting later.
The Essential Steps in Steel Painting Preparation
Let’s break down the process. Preparing steel for painting isn’t a single action, but a series of deliberate steps.
Step 1: Cleaning Metal Before Painting – The Foundation of Adhesion
This is where it all begins. You must remove any contaminants that will prevent paint from sticking. This includes oils, grease, dirt, and any other debris.
Degreasing Steel: Wiping Away the Grime
Degreasing steel is the crucial first step in cleaning. Even invisible films of oil or grease can ruin your paint job.
Methods for Degreasing:
- Solvent Degreasers: These are highly effective at breaking down oils and greases. Common options include mineral spirits, denatured alcohol, or specialized industrial degreasers.
- How to use: Apply the degreaser to a clean cloth or sponge. Wipe down the steel surface thoroughly. Use multiple cloths, changing them frequently to avoid spreading the grease around.
- Safety: Always use these in a well-ventilated area and wear appropriate gloves and eye protection.
- Water-Based Cleaners: For lighter grease and dirt, some heavy-duty alkaline cleaners can be effective. These are often less hazardous than solvent-based options.
- How to use: Dilute according to the manufacturer’s instructions. Apply with a sponge or brush, scrub the surface, and rinse thoroughly with clean water. Ensure all cleaner residue is removed.
- Steam Cleaning: For large industrial applications or heavily soiled items, steam cleaning can be very effective at removing grease and grime.
Important Considerations for Degreasing:
- Wipe and Dry: After degreasing with a solvent, allow the surface to dry completely. For water-based cleaners, ensure all moisture is removed before proceeding.
- Avoid Touching: Once the surface is clean, avoid touching it with bare hands. Skin oils can reintroduce contaminants. Wear clean gloves.
Step 2: Rust Removal for Painting – Erasing the Enemy
Rust is steel’s worst enemy. If you don’t address it, the rust will continue to spread under your new paint, causing it to lift and fail. Rust removal for painting is non-negotiable.
Methods for Rust Removal:
- Mechanical Removal: This involves physically scraping or grinding away the rust.
- Wire Brushes: Effective for light surface rust. Available in hand-held and drill attachments.
- Scrapers: Putty knives or specialized rust scrapers can remove thicker rust.
- Sanding: Discussed in the next section, sanding is also a key rust removal tool.
- Grinding Wheels: For heavy rust, angle grinders with wire wheels or grinding discs are powerful tools. Use with extreme caution and wear safety gear.
- Chemical Rust Removers: These products dissolve rust.
- Phosphoric Acid Treatment Steel: Products containing phosphoric acid are excellent for phosphoric acid treatment steel surfaces. They convert rust into a stable, paintable phosphate layer.
- How to use: Apply the product according to instructions. Let it dwell for the recommended time. Scrub if necessary. Rinse thoroughly with water and allow the surface to dry completely. This method also provides some metal etching before painting.
- Other Acid-Based Removers: Oxalic acid and citric acid are also used in rust removers. Always follow product instructions carefully.
- Phosphoric Acid Treatment Steel: Products containing phosphoric acid are excellent for phosphoric acid treatment steel surfaces. They convert rust into a stable, paintable phosphate layer.
- Abrasive Blasting Steel: This is the most thorough method for rust removal for painting and general surface preparation. It involves propelling abrasive media at high speed against the steel surface.
- Types of Blasting:
- Sandblasting: Uses sand or silica. Very effective but can be dusty and hazardous.
- Grit Blasting: Uses angular abrasive materials like steel grit or aluminum oxide. Creates a rougher profile for better adhesion.
- Shot Blasting: Uses small, round steel shot to peen the surface, which can strengthen the steel and create a profile.
- When to use: Ideal for large projects, heavily rusted items, or when a superior finish is required. It’s a professional technique, often requiring specialized equipment. Abrasive blasting steel can achieve various surface profiles (e.g., NACE or SSPC standards).
- Types of Blasting:
Post-Rust Removal:
After removing rust, it’s essential to clean the surface again. Wipe down with a degreaser or solvent to remove any dust or residue left from the rust removal process.
Step 3: Sanding Steel for Paint – Creating a Profile
Sanding steel for paint serves multiple purposes: it removes lingering rust, smooths out rough patches, and creates a surface profile that paint can grip onto.
Choosing the Right Abrasive:
- Coarse Grit (e.g., 40-80 grit): Use for aggressive rust removal, smoothing rough welds, or creating a significant surface profile.
- Medium Grit (e.g., 100-180 grit): Good for general smoothing and removing imperfections after coarser sanding or rust removal.
- Fine Grit (e.g., 220-320 grit): Used for final smoothing before priming or between coats of paint.
Sanding Tools and Techniques:
- Sandpaper: Available in sheets, discs, and belts.
- Hand Sanding: Good for small areas and intricate shapes.
- Orbital Sanders: Provide consistent results for flat surfaces.
- Belt Sanders: For aggressive material removal on larger areas.
- Die Grinders with Sanding Discs: For detailed work.
- Wire Wheels/Brushes: As mentioned in rust removal, these also act as abrasives.
- Sanding Techniques:
- Wet Sanding: Using sandpaper with water or a lubricant can reduce dust and keep the abrasive sharp.
- Dry Sanding: More common for initial rust removal.
The Importance of the Surface Profile:
Sanding steel for paint creates a “tooth” or profile on the surface. This microscopic roughness provides more surface area for the primer and paint to adhere to, significantly improving the bond strength. If you’re using abrasive blasting, the media and pressure determine the profile. For sanding, the grit choice is key.
After Sanding:
Thoroughly clean the surface again. Wipe away all dust with a tack cloth or a clean, damp cloth followed by a dry cloth. For best results, follow up with a solvent wipe (degreaser).
Step 4: Priming Steel Surfaces – The Protective Barrier
Priming steel surfaces is a critical step that provides a foundation for the topcoat and offers essential protection against rust and corrosion. A good primer is designed to bond strongly to the steel and provide a uniform surface for the paint.
Types of Steel Primers:
- Zinc-Rich Primers: Contain a high percentage of zinc. They provide galvanic protection, meaning the zinc corrodes sacrificially to protect the steel, even if the paint layer is scratched. These are excellent for exposed steel.
- Epoxy Primers: Two-part primers known for their excellent adhesion, chemical resistance, and durability. They form a hard, protective film.
- Alkyd Primers (Enamel Primers): More common for general-purpose use and less demanding applications. They are typically oil-based and offer good adhesion but less protection than epoxies or zinc-rich primers.
- Wash Primers: Thin, acid-based primers (often containing phosphoric acid) used to etch the metal and promote adhesion, especially on difficult-to-paint surfaces like galvanized steel or aluminum, but also effective on bare steel. They are usually followed by a more robust primer.
Applying the Primer:
- Follow Manufacturer Instructions: Each primer has specific application requirements regarding temperature, humidity, mixing ratios (for two-part primers), and drying times.
- Even Application: Apply a thin, even coat. Avoid runs or drips.
- Coverage: Ensure complete coverage of all metal surfaces, especially edges and welds.
- Drying and Curing: Allow the primer to dry and cure completely according to the manufacturer’s recommendations before applying the topcoat. This is crucial for intercoat adhesion.
Step 5: Final Inspection and Cleaning – The Last Check
Before applying the topcoat, take a moment for a final inspection.
- Check for missed spots: Ensure all areas are primed.
- Inspect for imperfections: Lightly sand any rough spots or dust nibs with a fine-grit sandpaper (e.g., 320-400 grit) and wipe clean.
- Final Wipe Down: Use a clean cloth dampened with a suitable solvent (like denatured alcohol or a specific paint prep solvent) to remove any final dust or fingerprints. A tack cloth is excellent for picking up fine dust particles.
Advanced Preparation Techniques
For the most demanding applications or when seeking the absolute best longevity, consider these advanced methods.
Metal Etching Before Painting: Enhancing Adhesion
Metal etching before painting creates a microscopic roughness on the metal’s surface, making it more receptive to paint adhesion. While sanding and abrasive blasting achieve this, specific chemical treatments can also etch the metal.
- Phosphoric Acid Treatment: As mentioned earlier, phosphoric acid cleaners can simultaneously remove rust and etch the surface, providing a phosphate coating that promotes paint adhesion.
- Etch Primers (Wash Primers): These thin primers are designed to bite into the metal surface, creating a tenacious bond. They are often the first step on bare metal before applying a heavier primer or paint system.
Abrasive Blasting Steel: The Professional Standard
For industrial projects, automotive restorations, or any situation where extreme durability and adhesion are paramount, abrasive blasting steel is the gold standard.
Benefits of Abrasive Blasting:
- Superior Cleaning: Removes rust, scale, old paint, and other contaminants very effectively.
- Surface Profiling: Creates an ideal surface texture for maximum paint adhesion. Different abrasive media and pressures can create specific surface profiles (e.g., Sa 2.5 or Sa 3 for steel).
- Efficiency: For large areas, it’s much faster than manual methods.
Considerations for Abrasive Blasting:
- Equipment: Requires a compressor, blasting pot, hoses, and a blasting gun.
- Abrasive Media: Choosing the right media (sand, grit, glass beads, walnut shells) depends on the substrate and the desired finish.
- Safety: Requires extensive personal protective equipment (PPE), including a blast helmet, respirator, heavy-duty gloves, and protective clothing, due to dust and flying debris.
- Disposal: Proper disposal of used abrasive media and dust is necessary.
What is the Best Way to Prep Steel for Painting?
The best way to prep steel for painting depends on the condition of the steel, the type of paint being used, and the desired durability. However, a comprehensive approach generally involves:
- Thorough Degreasing: Removing all oils and grease.
- Complete Rust Removal: Eradicating all visible rust.
- Surface Profiling: Creating a suitable texture via sanding or blasting.
- Priming: Applying a high-quality primer suitable for steel.
For most DIY projects, a combination of degreasing, mechanical rust removal (wire brush, sanding), and a good quality primer (like an alkyd or epoxy primer) will yield excellent results. For critical applications or harsh environments, consider zinc-rich primers or professional abrasive blasting.
Summary Table: Steel Surface Preparation Steps
| Step | Key Actions | Purpose | Tools/Materials |
|---|---|---|---|
| 1. Cleaning/Degreasing | Remove grease, oil, dirt, and grime. | Ensure paint adhesion by removing contaminants. | Solvent degreasers, water-based cleaners, clean cloths, gloves. |
| 2. Rust Removal | Eliminate all traces of rust. | Prevent rust from spreading under the paint. | Wire brushes, scrapers, sandpaper, chemical rust removers, abrasive blasting. |
| 3. Sanding/Profiling | Smooth surface, remove minor imperfections, create a “tooth.” | Enhance adhesion by providing a textured surface for paint to grip. | Sandpaper (various grits), orbital sander, belt sander, wire wheels. |
| 4. Final Cleaning | Remove all dust and debris from previous steps. | Prevent dust from contaminating the paint layers. | Tack cloths, clean dry cloths, solvent wipe. |
| 5. Priming | Apply a protective primer coat. | Protect steel from corrosion, improve adhesion, provide uniform surface. | Zinc-rich primer, epoxy primer, alkyd primer, wash primer. |
| 6. Inspection | Visually check for missed spots or imperfections. | Ensure a perfect surface before topcoat application. | Eyes, good lighting, potentially fine-grit sandpaper for touch-ups. |
Frequently Asked Questions (FAQ)
Q1: Can I paint over light surface rust?
A1: No, it’s strongly discouraged. Even light surface rust needs to be removed completely to prevent it from spreading under the paint and causing failure.
Q2: What grit sandpaper should I use for steel?
A2: It depends on the task. Use coarser grits (40-80) for heavy rust removal and smoothing welds. Use medium grits (100-180) for general smoothing. Use fine grits (220-320) for final preparation before priming or between paint coats.
Q3: How important is degreasing steel before painting?
A3: It is extremely important. Oils and greases act as a barrier, preventing paint from adhering properly. Skipping this step is a common cause of paint failure.
Q4: Do I need to prime steel?
A4: Yes, always prime steel before painting. Primer provides crucial adhesion and corrosion protection that paint alone cannot offer.
Q5: What is the difference between a primer and a paint?
A5: Primer is designed to bond to the surface and provide a base for the topcoat, often offering corrosion resistance. Paint (topcoat) provides the color, aesthetics, and final protective layer against the environment.
Q6: Can I use a wire brush to clean metal before painting?
A6: A wire brush is good for removing loose rust and debris, but it usually doesn’t remove all contaminants like grease or fine rust particles. It’s often a step in the overall cleaning and rust removal process, usually followed by degreasing and finer sanding.
By following this comprehensive guide, you’ll be well-equipped to prep any steel surface for a professional-quality paint job that lasts. Remember, patience and thoroughness in preparation are key to achieving the best results.