
Can you start teaching art classes without a formal teaching degree? Yes, you can begin teaching art classes even without a formal teaching degree. Many successful art instructors have come from diverse backgrounds, sharing their passion and skills through their own unique teaching journeys. This guide will walk you through the essential steps to launch your own art classes, from planning to marketing, making the process accessible and enjoyable.
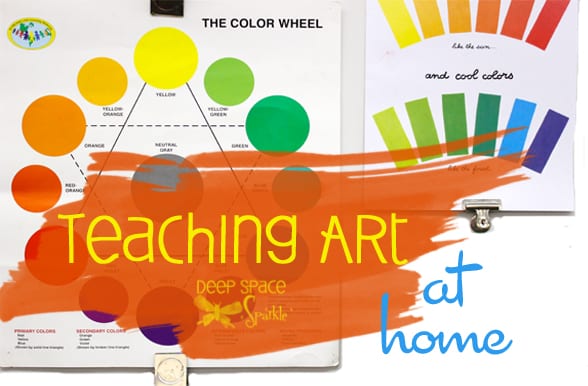
Image Source: www.deepspacesparkle.com
Laying the Groundwork: Your Art Class Vision
Before you gather a single brush, it’s crucial to define what kind of art classes you want to offer. This initial vision will guide all your subsequent decisions. Think about your passion, your expertise, and who you want to teach.
Identifying Your Niche
What kind of art do you love to create and teach? Your passion will be your greatest asset. Consider areas like:
- Drawing: Pencil, charcoal, pastels.
- Painting: Watercolor, acrylics, oils.
- Sculpture: Clay, mixed media.
- Digital Art: Photoshop, Procreate.
- Crafts: Pottery, jewelry making, fiber arts.
Defining Your Audience
Who are you teaching? This impacts everything from your art class curriculum to your art class marketing.
- Art class for children: Focus on fun, exploration, and basic techniques. Keep sessions short and engaging.
- Art class for adults: Can delve deeper into techniques, art history, and personal expression. Offer more flexibility in session length.
- Beginners: Start with fundamental skills and simple projects.
- Intermediate/Advanced: Introduce more complex concepts and advanced techniques.
Crafting Your Unique Selling Proposition (USP)
What makes your art classes special? Your USP could be:
- A unique teaching style.
- A specific artistic medium you specialize in.
- A focus on therapeutic art or mindfulness.
- A convenient location or flexible scheduling.
Developing Your Art Class Curriculum and Lesson Plans
A well-structured art class curriculum is the backbone of your teaching. It ensures a progressive learning experience for your students.
Building Your Art Class Curriculum
Your curriculum should outline the learning objectives and the progression of skills taught over a series of classes.
For Children’s Art Classes:
- Focus: Color mixing, basic shapes, different textures, animal drawings, landscape basics.
- Progression: Start with simple projects and gradually introduce more complexity.
- Example Curriculum Outline (4 Weeks):
- Week 1: Introduction to Colors & Simple Shapes (e.g., painting a rainbow, drawing a house with basic shapes).
- Week 2: Texture Exploration (e.g., creating textured collages, drawing furry animals).
- Week 3: Animals in Action (e.g., drawing pets, painting a bird).
- Week 4: Nature’s Beauty (e.g., painting a simple landscape, drawing flowers).
For Adult Art Classes:
- Focus: Advanced techniques, composition, perspective, art history context, developing personal style.
- Progression: Build upon foundational skills with more challenging concepts and projects.
- Example Curriculum Outline (6 Weeks – Watercolor Portraiture):
- Week 1: Watercolor Basics: Washes, blending, wet-on-wet techniques.
- Week 2: Understanding Value & Tone in Portraiture.
- Week 3: Capturing Facial Features: Eyes, Nose, Mouth.
- Week 4: Skin Tones and Complexion: Mixing realistic colors.
- Week 5: Hair and Fabric Textures.
- Week 6: Bringing it All Together: Completing a watercolor portrait.
Creating Effective Art Lesson Plans
Each lesson plan should detail what you’ll teach, how you’ll teach it, and what materials are needed.
Key Components of an Art Lesson Plan:
- Objective: What should students be able to do by the end of the lesson?
- Materials: List all necessary art supplies for beginners and advanced students.
- Introduction/Warm-up: Engage students and introduce the topic.
- Demonstration: Show the techniques you want to teach.
- Guided Practice: Students try the technique with your support.
- Independent Practice: Students work on their project.
- Critique/Sharing: Students share their work and receive feedback.
- Clean-up: A vital part of any art class!
Table: Sample Art Lesson Plan Snippet (Acrylic Painting – Sunset)
| Section | Details | Time Allotment |
|---|---|---|
| Objective | Students will learn to blend acrylic colors to create a smooth sunset gradient and paint a silhouette. | |
| Materials | Acrylic paints (red, orange, yellow, purple, black), canvas, brushes, water cups, paper towels, palettes. | |
| Warm-up | Quick “color swatching” exercise focusing on blending two colors. | 5 mins |
| Demonstration | Teacher shows how to blend sunset colors on canvas and how to paint a simple silhouette. | 10 mins |
| Guided Practice | Students practice blending sunset colors on a small section of their canvas with teacher guidance. | 15 mins |
| Independent Work | Students create their sunset scene and add a silhouette. | 30 mins |
| Sharing | Students hold up their artwork for a group “show and tell.” | 5 mins |
Setting Up Your Art Studio Space
Your teaching environment is key to a positive learning experience. Whether you have a dedicated art studio setup or use a shared space, consider these factors.
Choosing Your Location
- Home Studio: Offers convenience and control. Ensure good ventilation and lighting.
- Community Centers/Libraries: Often have affordable rental spaces.
- Schools/Daycares: Can partner for after-school programs.
- Outdoor Spaces: Parks, beaches for plein air painting.
Essential Art Studio Setup Elements
- Work Surfaces: Sturdy tables or easels that are easy to clean.
- Lighting: Natural light is ideal, supplemented by good artificial lighting to avoid glare.
- Storage: Shelves, cabinets, and bins for organizing art supplies for beginners and finished projects.
- Sink/Water Access: Crucial for cleaning brushes and hands.
- Comfortable Seating: Appropriate for the age group and duration of classes.
- Display Area: A place to showcase student work.
- Ventilation: Especially important when using paints, solvents, or glues.
Table: Art Studio Setup Checklist
| Area | Essential Items | Notes |
|---|---|---|
| Work Area | Tables, easels, drop cloths/protective coverings. | Ensure surfaces are easy to clean. |
| Lighting | Natural light source, adjustable task lighting, overhead lighting. | Avoid direct sunlight that can fade artwork. |
| Storage | Shelving units, bins, drawers, pegboards for tools, cabinets for paints and mediums. | Organize by type of material. |
| Cleaning | Sink, soap, rags, sponges, buckets, paper towels, cleaning solutions (e.g., for paint spills). | Have a designated cleaning station. |
| Comfort | Stools or chairs appropriate for the age group, fan or heater if needed. | Prioritize student comfort for longer sessions. |
| Display | Wall space, bulletin board, drying racks. | Celebrate student achievements by displaying their creations. |
| Safety | First-aid kit, fire extinguisher (if using flammable materials), non-slip mats. | Safety first! |
Sourcing Art Supplies for Beginners and Beyond
Knowing what art supplies for beginners to recommend or provide is crucial for a smooth start.
Essential Supplies for Various Mediums
- Drawing: Pencils (HB, 2B, 4B), erasers (kneaded and standard), drawing paper, sketchbooks.
- Painting:
- Acrylics: Basic color set (red, blue, yellow, black, white), variety of brushes (round, flat), canvas boards or paper, palette knife.
- Watercolors: Basic color set, watercolor paper, round brushes (sizes 4, 8, 12).
- Sculpture/Clay: Air-dry clay, basic sculpting tools, water bowl.
- Mixed Media: Glue sticks, scissors, magazines, construction paper, various found objects.
Budget-Friendly Supply Strategies
- Buy in Bulk: For common items like paper and basic paints.
- Artist-Grade vs. Student-Grade: Student-grade supplies are more affordable and perfectly adequate for beginners.
- Local Art Stores: Often offer discounts or special programs.
- Online Retailers: Can provide competitive pricing.
- Recycled Materials: Encourage students to bring in clean, interesting materials for mixed media projects.
Choosing Your Art Teaching Methods
Effective art teaching methods cater to different learning styles and keep students engaged.
Diverse Approaches to Teaching Art
- Demonstration-Based: Teacher shows techniques, students replicate. Excellent for learning specific skills.
- Project-Based: Students work on a specific project, learning techniques as they go. Fosters problem-solving.
- Inquiry-Based: Students explore materials and ideas with guidance, leading their own discovery. Encourages creativity.
- Process-Oriented: Focuses on the journey of creation rather than just the final product. Great for young children.
Adapting Methods for Different Age Groups
- Young Children: Use play-based learning, sensory exploration, and simple, repetitive tasks. Keep instructions clear and concise.
- Older Children/Teens: Introduce more complex concepts, allow for more individual expression, and encourage peer feedback.
- Adults: Offer a balance of technical instruction and opportunities for personal exploration and discussion.
Setting Art Class Fees and Business Practices
Determining art class fees is a crucial business decision. It needs to reflect your value while being accessible to your target audience.
Pricing Your Art Classes
- Consider Your Costs: Materials, studio rental, your time, marketing.
- Research Competitors: What are other local art classes charging?
- Value-Based Pricing: What is the perceived value of your unique skills and curriculum?
- Pricing Models:
- Per Session: Flat fee for each class meeting.
- Package Deals: Discount for booking a series of classes.
- Drop-in Rates: Higher price for single sessions.
Table: Sample Art Class Fee Structure
| Class Type | Duration | Materials Included | Fee Per Session | Package (4 Sessions) |
|---|---|---|---|---|
| Kids’ Fun Art | 1 hour | Yes | $20 | $70 |
| Adult Watercolor | 2 hours | Yes | $35 | $120 |
| Teen Sketching | 1.5 hours | No | $25 | $90 |
Note: “Materials Included” typically refers to basic supplies. Specialty materials might incur an additional charge.
Essential Business Practices
- Registration System: How will students sign up? Online forms, email, phone.
- Payment Policies: When is payment due? What is your refund policy?
- Waivers/Consent Forms: Especially important for children’s classes (photo release, medical information).
- Insurance: Consider liability insurance.
Marketing Your Art Classes Effectively
Even the best art classes need good art class marketing to reach students.
Reaching Your Target Audience
- Social Media: Instagram and Facebook are visual platforms perfect for showcasing art and class activities. Use relevant hashtags (#artclass, #kidart, #watercolor, #localart).
- Local Partnerships: Collaborate with schools, libraries, community centers, and local businesses.
- Flyers & Posters: Distribute in community hubs, coffee shops, libraries.
- Website/Blog: A professional online presence builds credibility. Showcase your work and class details.
- Email Marketing: Build a list of interested individuals.
- Word-of-Mouth: Encourage satisfied students to spread the word. Offer referral discounts.
Creating Compelling Marketing Content
- High-Quality Photos/Videos: Show your art, your studio, and happy students (with permission!).
- Clear Class Descriptions: Highlight what students will learn and create.
- Testimonials: Positive feedback from students is powerful.
- Special Offers: Introductory discounts, multi-class packages.
Mastering Art Class Management
Good art class management ensures smooth operations and a positive learning environment for everyone.
Structuring Your Class Time
- Punctuality: Start and end classes on time.
- Clear Instructions: Be concise and demonstrate visually.
- Individual Attention: While teaching the group, be aware of individual student needs. Circulate and offer assistance.
- Managing Behavior: Especially important for art class for children. Set clear expectations and have a simple reward/consequence system.
- Clean-up Routine: Make it a consistent part of every class. Assign tasks if appropriate.
Providing Constructive Feedback
- Focus on Process: Praise effort, experimentation, and problem-solving.
- Specific Praise: Instead of “good job,” say “I like how you blended those colors.”
- Constructive Criticism: Frame suggestions positively. “Have you tried using a darker shade here to create more depth?”
- Peer Feedback: Encourage students to offer kind and helpful feedback to each other.
Frequently Asked Questions (FAQ)
Q1: What if I don’t have a dedicated art studio?
You can start teaching from home, in a community space, or even outdoors. Adapt your art studio setup to the available space. For example, use a foldable table for home use or clear instructions for communal areas.
Q2: How do I choose the right art supplies for beginners?
Start with versatile, affordable materials. For painting, a basic set of acrylics or watercolors with a few brushes and good quality paper is ideal. For drawing, pencils, erasers, and sketch paper are essential.
Q3: Should I offer classes for both children and adults?
You can, but it’s often easier to start with one group. Their needs and learning styles are very different, impacting your art class curriculum, art lesson plans, and art teaching methods. Once you’re comfortable, you can expand.
Q4: How much should I charge for my art classes?
Research local rates, consider your costs (materials, rent, your time), and factor in your unique offerings. Start with a reasonable price and adjust as you gain experience.
Q5: How do I get my first students?
Focus on local art class marketing. Tell friends and family, post on social media, and distribute flyers in your community. Offer an introductory discount to attract initial sign-ups.
Starting to teach art classes is a rewarding journey that allows you to share your creativity and passion with others. By carefully planning your curriculum, setting up your space, sourcing the right supplies, and employing effective teaching and marketing strategies, you can make the process surprisingly easy and fulfilling. Embrace the process, stay organized, and most importantly, enjoy sharing the wonderful world of art!