
Can you make prints of your paintings? Yes, you absolutely can! Turning your original paintings into prints allows you to share your art with a wider audience, create merchandise, and generate additional income streams. This guide will walk you through the entire process, from capturing your artwork digitally to delivering finished prints to your customers.
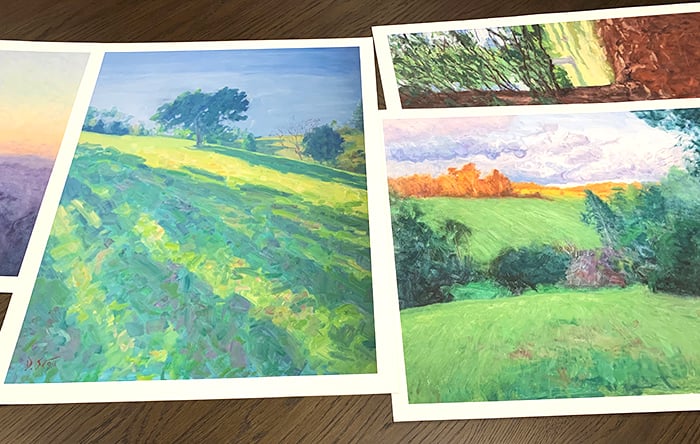
Image Source: drawpaintacademy.com
The Foundation: Capturing Your Artwork
Before you can create beautiful art prints, you need a high-quality digital file of your painting. This is the most crucial step, as the final print quality directly depends on the accuracy and detail of your original capture. There are two primary methods for achieving this: scanning paintings and professional photography.
Scanning Paintings: Precision for Smaller Works
For smaller to medium-sized original paintings, especially those with flatter surfaces and fine details, scanning can offer exceptional accuracy.
Types of Scanners for Art
- Flatbed Scanners: These are the most common type of scanner. You place your artwork directly onto the glass surface.
- Pros: Excellent for detailed work, relatively affordable, easy to use.
- Cons: Limited by the size of the scanner bed, can create slight distortions if the artwork is thicker than the glass.
- Drum Scanners: These are high-end scanners used by professionals for the highest quality art reproduction. The artwork is wrapped around a cylinder, which then rotates.
- Pros: Unparalleled detail and color accuracy, handles a wide range of materials.
- Cons: Very expensive, often require professional operation, typically only available through specialized print shops.
What to Look for in a Scanner for Art
- Optical Resolution: This is measured in dots per inch (DPI). For art prints, you want a scanner with a high optical resolution, at least 600 DPI, and ideally 1200 DPI or higher, especially for smaller originals. Higher DPI means more detail.
- Color Depth: Look for scanners that offer 48-bit color depth. This allows for a wider range of colors and smoother gradients, leading to more accurate art reproduction.
- Scanner Bed Size: Ensure the scanner bed is large enough to accommodate your artwork without needing to stitch multiple scans, which can introduce alignment issues.
Scanning Best Practices
- Clean the Scanner Bed: Dust and smudges on the scanner glass will appear in your digital file. Clean it thoroughly with a lint-free cloth and glass cleaner.
- Calibrate Your Scanner: Most scanner software has a calibration feature. Run this regularly to ensure accurate color representation.
- Scan at the Highest Resolution: Always scan at the maximum resolution your scanner can handle, even if you plan to downsize the file later. You can always reduce file size, but you can’t add detail that wasn’t captured.
- Scan in a Lossless Format: Save your scans in formats like TIFF or PNG. JPEG is a lossy format, meaning it compresses the file by discarding some data, which can degrade image quality over time and with repeated saves.
Professional Photography: For Larger and Textured Works
For larger paintings, artworks with significant texture (like impasto), or if your original is too large for a scanner, professional photography is the way to go. This method requires specialized equipment and lighting to capture your artwork accurately.
Essential Photography Equipment
- High-Resolution Camera: A DSLR or mirrorless camera with a good sensor and the ability to shoot in RAW format is essential.
- Tripod: A sturdy tripod is crucial for keeping the camera perfectly still, preventing blur and ensuring consistent framing.
- Lighting: Even, diffused lighting is key.
- Natural Daylight: A bright, overcast day is ideal. Position your artwork near a window, but avoid direct sunlight, which can cause glare and uneven lighting.
- Artificial Lighting: Two identical light sources (like softboxes or professional art lights) placed at 45-degree angles to the artwork on either side will provide even illumination and minimize shadows. Avoid using a single overhead flash, which will create harsh shadows and glare.
- Color Calibration Tools: A color checker chart (like a X-Rite ColorChecker Passport) is vital. You’ll photograph this chart alongside your artwork, and then use the data to correct the colors in your editing software.
Photography Setup and Techniques
- Mount Your Artwork: Securely mount your painting on a wall or easel at a consistent height.
- Position the Camera: Mount your camera on the tripod directly in front of the artwork, ensuring it is perfectly perpendicular to the surface. This prevents keystone distortion (where the top or bottom of the image appears wider or narrower than it should).
- Achieve Even Lighting: Set up your lights as described above, ensuring there are no hot spots or dark shadows on the artwork. Turn off any ambient room lights that might interfere.
- Shoot in RAW: RAW files contain all the unprocessed data from the camera’s sensor, giving you the most flexibility during editing to adjust exposure, white balance, and color.
- Include a Color Checker: Place a color checker chart in the frame, near the artwork, for every shot.
- Take Multiple Shots: Bracket your shots by taking several exposures at different settings (e.g., one standard, one brighter, one darker). This ensures you capture the full dynamic range of your artwork.
Post-Capture Editing: Perfecting Your Digital File
Once you have your scanned or photographed image, the editing process begins. This is where you refine the colors, contrast, and sharpness to match your original painting as closely as possible.
Software for Editing
- Adobe Photoshop: The industry standard for image editing, offering powerful tools for color correction, retouching, and file preparation.
- Adobe Lightroom: Excellent for organizing and batch editing your images, especially if you shot in RAW format.
- GIMP: A free and open-source alternative to Photoshop, offering many of the same capabilities.
Key Editing Steps
- Color Correction and White Balance: Use your color checker reference and the editing software’s tools to ensure the colors in your digital file accurately represent your original painting. Adjust the white balance to remove any color casts from your lighting setup.
- Cropping and Straightening: Crop the image to the exact edges of your artwork. Ensure the image is perfectly straight, aligning with the edges of the canvas or paper.
- Adjusting Brightness and Contrast: Fine-tune the brightness and contrast to bring out the full depth and detail of your painting. Be careful not to clip highlights (lose detail in the brightest areas) or crush blacks (lose detail in the darkest areas).
- Sharpening: Apply subtle sharpening to enhance details. Over-sharpening can create unnatural artifacts, so use this sparingly and zoom in to check the results.
- Retouching: Remove any dust, scratches, or imperfections that may have been captured during the scanning or photography process.
-
Resizing and Resolution:
- Print Resolution: For high-quality prints, the standard resolution is 300 DPI (dots per inch) at the desired print size. If you plan to sell large prints, you’ll need a digital file with enough pixels to support that size at 300 DPI.
- Calculating File Size: If your original painting is 20 inches wide, and you want to print it at 300 DPI, your digital file needs to be at least 20 inches * 300 DPI = 6000 pixels wide.
- Upscaling: If your captured file isn’t large enough, some software can “upscale” the image, adding pixels. However, this doesn’t create new detail and can sometimes soften the image. It’s always best to start with the largest, highest-resolution capture possible.
-
File Format for Printing: Save your final edited file as a high-quality TIFF or a high-resolution JPEG. TIFF is generally preferred for printing as it’s lossless.
Choosing the Right Printing Method
Once your digital file is perfected, it’s time to decide how to bring your artwork to life as prints. The most popular and highest quality methods for art reproduction involve digital printing.
Giclée Printing: The Gold Standard
Giclée printing is a sophisticated digital printing process that uses a specialized inkjet printer and archival pigment inks to produce incredibly detailed and long-lasting prints. The term “Giclée” comes from the French word for “to spray.”
What Makes Giclée Special?
- Archival Quality: Giclée prints use pigment-based inks that are designed to resist fading from UV light and environmental factors. When printed on acid-free, archival papers or canvases, Giclée prints can last for 100 years or more.
- Exceptional Detail and Color Accuracy: Giclée printers use multiple ink cartridges (often 10 or more colors) to achieve a wider color gamut and smoother tonal transitions than standard printers. This results in prints that are incredibly faithful to the original artwork.
- Vast Range of Media: Giclée printing can be done on a variety of substrates, including fine art papers (matte, satin, glossy), canvas, and even some metal or acrylic surfaces.
When to Choose Giclée
- You want the highest possible quality for your art prints.
- You are selling limited edition prints where accuracy and longevity are paramount.
- You are printing on canvas and want the rich texture and depth of canvas prints.
Other Digital Printing Options
While Giclée is the top tier, other digital printing methods can also produce good results for selling art prints.
- Large-Format Inkjet Printing: Many professional print shops use high-quality inkjet printers that, while not always marketed as “Giclée,” can produce excellent results, especially when using quality inks and papers.
- Fine Art Paper Prints: Printing on high-quality, acid-free papers like cotton rag or alpha-cellulose can produce beautiful matte or satin finish prints that are very popular.
Selecting Your Print Media
The material you choose for your prints will significantly impact their look, feel, and longevity.
Fine Art Papers
These are typically acid-free and archival, designed to hold ink beautifully.
- Cotton Rag Paper: Made from 100% cotton, this paper is very durable, has a luxurious feel, and offers exceptional color depth. It often has a matte finish.
- Alpha-Cellulose Paper: This paper is made from wood pulp that has been purified to remove lignin, making it acid-free and archival. It’s a more affordable option than cotton rag but still offers excellent print quality.
- Luster/Satin Paper: These papers have a slight sheen, offering a balance between the matte finish of some fine art papers and the high gloss of photo papers. They can make colors pop without being overly reflective.
- Glossy Paper: Offers a high-shine finish that can make colors appear very vibrant and punchy. However, it can also be prone to glare and may show fingerprints more easily.
Canvas Prints
Printing your artwork directly onto stretched canvas offers a classic, gallery-ready look.
- Canvas Material: Artist-grade canvas is typically cotton or a poly-cotton blend. For archival quality, look for canvas that is acid-free and coated for inkjet printing.
- Stretching: Canvas prints are usually stretched over wooden stretcher bars. The “gallery wrap” style, where the image wraps around the edges of the canvas, is very popular.
- Finishes: Canvas prints can be left as is, or a protective varnish (matte, satin, or gloss) can be applied to further protect the print and enhance its appearance.
Finding a Printing Partner
Choosing the right printing service is crucial for achieving high-quality art prints from paintings.
What to Look For in a Print Shop
- Quality of Materials: Do they use archival inks and acid-free papers/canvas?
- Print Technology: Do they specialize in Giclée or high-quality digital printing?
- Color Matching Capabilities: Can they match your digital file’s colors to the printed output? Request a proof if possible.
- Turnaround Time: How long will it take to get your prints?
- Pricing: Compare prices from different reputable printers.
- Customer Service: Are they helpful and knowledgeable?
- Shipping and Packaging: How will they package and ship your prints to ensure they arrive safely?
Local vs. Online Printers
- Local Print Shops:
- Pros: You can often visit in person to see samples, discuss your needs directly, and pick up your prints. This can be helpful for color matching and quality control.
- Cons: May have a more limited range of media options or higher prices than online services.
- Online Print Services:
- Pros: Often offer competitive pricing, a wide variety of media options, and convenient ordering. Many specialize in art printing.
- Cons: You rely on shipping for delivery, and it can be harder to judge color and texture quality without seeing samples first. Many offer print on demand services, which can be a great option for selling art prints without holding inventory.
Preparing for Print On Demand (POD)
Print on demand services allow artists to upload their artwork and have it printed and shipped directly to customers when an order is placed. This is an excellent way to sell art prints without the upfront cost of inventory.
How Print On Demand Works
- Upload Your Artwork: You upload your high-resolution digital file to the POD platform.
- Choose Products: Select the products you want to offer, such as prints on paper, canvas prints, mugs, t-shirts, etc.
- Set Your Pricing: You determine your retail price, and the POD service charges you their base production cost. Your profit is the difference.
- Integrate with Sales Channels: Connect your POD account to your online store (e.g., Etsy, Shopify, your own website).
- Customer Orders: When a customer buys your artwork, the order is automatically sent to the POD provider.
- Production and Shipping: The POD company prints, packages, and ships the order directly to your customer.
Popular POD Platforms for Artists
- Printful: Offers a wide range of print products, including Giclée prints, canvas prints, framed prints, and more. Integrates with many e-commerce platforms.
- Gooten: Similar to Printful, providing a broad selection of high-quality print products and integrations.
- Society6: Focuses specifically on artist-designed products, including art prints and home decor.
- Redbubble: Another popular platform for artists to sell their designs on various products, including art prints.
Packaging and Shipping Your Prints
Once you have your prints, proper packaging and shipping are vital to ensure they reach their destination in perfect condition.
Packaging Prints on Paper
- Flat Packaging: For single or small quantities of prints, place them between two rigid pieces of cardboard (chipboard or mat board) and then slide into a protective mailer envelope.
- Roll Packaging: For larger prints or multiple prints, you can gently roll them (image side out) with acid-free tissue paper and place them inside a sturdy cardboard tube. Ensure the ends are well-secured.
- Protection: Use acid-free tissue paper or glassine paper to protect the print surface from abrasion. Avoid bubble wrap directly touching the print surface, as it can leave imprints.
Packaging Canvas Prints
- Corner Protectors: Use cardboard corner protectors to prevent damage to the corners of the canvas.
- Bubble Wrap: Wrap the entire canvas print securely in bubble wrap.
- Outer Box: Place the bubble-wrapped canvas inside a sturdy cardboard box that is appropriately sized. Fill any voids with packing material to prevent movement.
Shipping Considerations
- Shipping Carrier: Choose a reliable shipping carrier (USPS, FedEx, UPS, etc.) that offers tracking.
- Insurance: For valuable prints, consider purchasing shipping insurance.
- Tracking Information: Always provide tracking information to your customers so they can monitor their package.
- International Shipping: If you offer international shipping, be aware of customs regulations and potential import duties that your customers may have to pay.
Pricing Your Art Prints
Pricing your prints involves considering several factors to ensure you are profitable and competitive.
Factors to Consider
- Production Costs: This includes the cost of printing, paper, ink, stretching (for canvas), framing (if applicable), packaging materials, and shipping.
- Artist’s Time: Factor in the time spent on editing, preparing files, packaging, and shipping.
- Market Value: Research what similar artists are charging for comparable prints.
- Perceived Value: The quality of your artwork, the printing method (Giclée vs. standard inkjet), and the presentation (e.g., framing art prints) can all influence perceived value.
- Edition Size: Limited edition prints (e.g., prints numbered 1/50, 2/50, etc.) can command higher prices than open edition prints.
Pricing Strategies
- Cost-Plus Pricing: Calculate your total costs and add a desired profit margin.
- Value-Based Pricing: Price based on the perceived value of your artwork and the benefits it offers to the customer.
- Tiered Pricing: Offer different price points based on size, edition type (limited vs. open), or additional features like framing.
Selling Your Art Prints
Once you have your prints ready, it’s time to get them in front of potential buyers.
Online Sales Channels
- Your Own Website: Building your own e-commerce website (using platforms like Shopify, Squarespace, or WordPress with WooCommerce) gives you the most control over your brand and customer experience.
- Online Marketplaces: Platforms like Etsy, Saatchi Art, and Artfinder are popular places for artists to sell their work. They provide built-in audiences but also take a commission on sales.
- Social Media: Use platforms like Instagram, Facebook, and Pinterest to showcase your artwork and drive traffic to your online store.
Offline Sales Channels
- Art Fairs and Festivals: A great way to connect directly with customers, showcase your prints, and make sales.
- Local Galleries and Boutiques: Consignment agreements with local businesses can expand your reach.
- Open Studio Events: Invite people to your studio to see your work in person.
Framing Art Prints: Adding Value and Appeal
Framing art prints can significantly enhance their presentation and appeal, making them more attractive to buyers and protecting them for the long term.
Framing Options
- Professional Custom Framing: This offers the highest quality and a wide range of frame styles, matting options, and glass types (including UV-protective glass). It’s the most expensive option but provides the most professional finish.
- DIY Framing: You can purchase pre-made frames and mats from craft stores or online retailers. This is a more budget-friendly option.
- Canvas Floater Frames: These frames are designed to sit around a stretched canvas, giving the appearance that the canvas is “floating” within the frame.
Matting and Glass
- Matting: A mat board is a thick paper or cardboard that sits between the print and the frame. It creates a border around the artwork, making it appear larger and more prominent. Use acid-free mat boards to protect your prints.
- Glass/Acrylic:
- Regular Glass: Standard framing glass.
- UV-Protective Glass/Acrylic: This is highly recommended for art prints, as it blocks harmful UV rays that can cause fading over time. Acrylic is lighter and less prone to breakage than glass, but can scratch more easily.
Understanding Art Licensing
Beyond selling physical prints, you can also generate income through art licensing. This involves granting permission to other companies or individuals to use your artwork for their products or projects in exchange for royalties or a licensing fee.
How Art Licensing Works
- Licensing Agreements: You create a contract that outlines how your artwork can be used, for how long, in what territories, and the payment terms.
- Common Licensing Products: Book covers, greeting cards, home decor items, apparel, stationery, and digital media.
- Benefits: Allows your art to reach a much wider audience and create a passive income stream without the need for production and shipping of physical products.
Frequently Asked Questions (FAQ)
Q1: What is the difference between a Giclée print and a regular inkjet print?
A1: Giclée printing is a specific type of inkjet printing that uses archival pigment inks and is printed on high-quality archival media. It is known for its exceptional detail, color accuracy, and longevity, often lasting 100+ years. Regular inkjet prints often use dye-based inks, which are less fade-resistant and may not be printed on archival substrates, resulting in a shorter lifespan.
Q2: Can I make prints of my digital artwork as well?
A2: Yes, the process for digital art is similar, but you skip the scanning or photography stage. You will still need to ensure your digital file is high-resolution and properly formatted for printing.
Q3: How do I know if my original painting is too textured for scanning?
A3: If your painting has significant texture (like thick impasto paint), a flatbed scanner may not be able to capture the entire surface evenly, leading to uneven focus or color. Professional photography is generally better for highly textured artwork.
Q4: What is the best resolution for art prints?
A4: The industry standard for high-quality art prints is 300 DPI (dots per inch) at the intended print size.
Q5: How much should I charge for my art prints?
A5: Pricing depends on many factors including production costs, your time, market value, edition size, and the quality of the printing and materials. Research competitors and consider a cost-plus pricing model.
Q6: What are the benefits of using print on demand services?
A6: Print on demand (POD) services eliminate the need for you to hold inventory, manage printing, or handle shipping. You upload your artwork, and the POD provider produces and ships the product directly to your customer when an order is placed, making it a low-risk way to sell prints.
Q7: How can I protect my original paintings from fading?
A7: When displaying your original paintings, keep them out of direct sunlight. For prints, using UV-protective glass or acrylic in frames is crucial for preventing fading.
By following these steps, you can successfully transform your original paintings into beautiful, high-quality art prints that can be enjoyed and cherished for years to come, while also opening up new avenues for sharing and selling your artistic creations.