
Can you seal a diamond painting? Yes, absolutely! Sealing a diamond art painting is a crucial step to protect your sparkling creation from damage, dust, and fading, ensuring its longevity and beauty for years to come. This guide will walk you through everything you need to know about how to seal diamond art, including the best sealants, application methods, and tips to achieve a professional finish.
Diamond painting is a wonderfully therapeutic and rewarding craft. You meticulously place tiny, sparkling resin “diamonds” onto a pre-printed adhesive canvas to create stunning mosaic-like artwork. Once you’ve poured your heart and soul into completing a piece, the thought of preserving it is paramount. This is where the magic of a diamond painting sealer comes in.
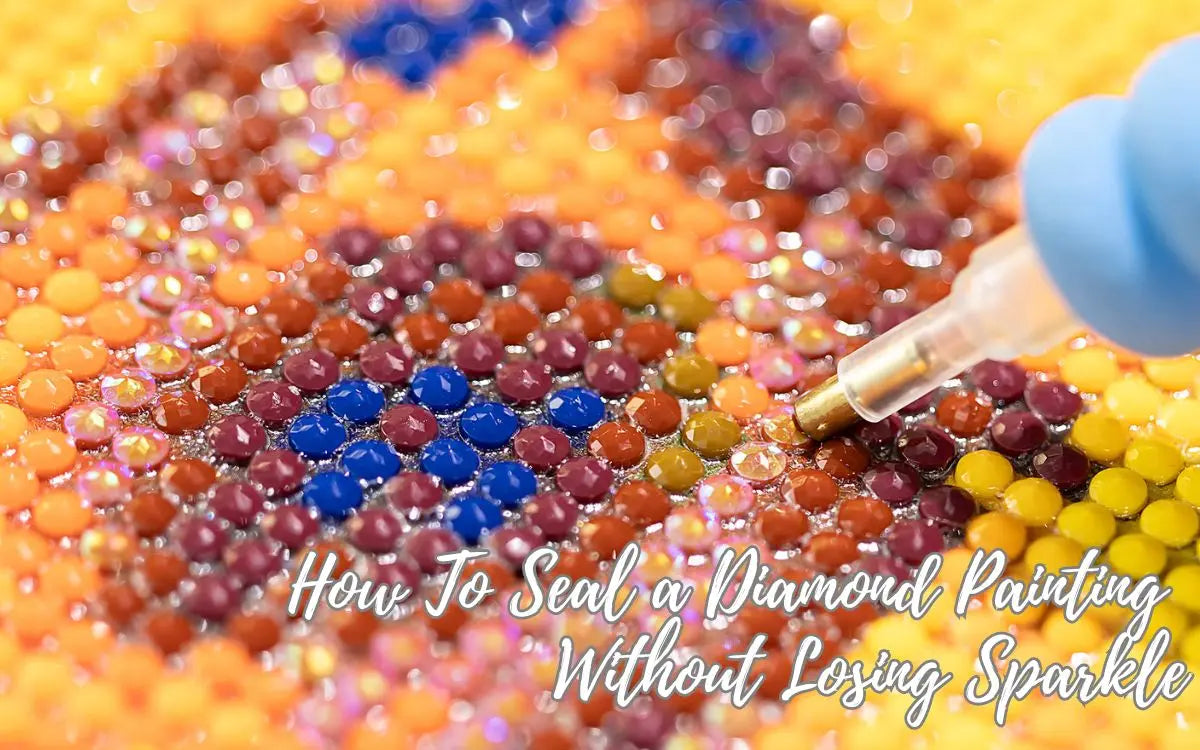
Image Source: www.artdot.com
Why Seal Your Diamond Art Painting?
Imagine spending hours, days, or even weeks bringing a vibrant diamond painting to life. You’ve carefully placed each drill, ensuring perfect alignment. Now, what’s the best way to protect diamond painting creations from the elements and accidental damage? Sealing is your answer.
Here are the key reasons why you should seal your diamond art:
- Preservation of Diamonds: The adhesive on the canvas can weaken over time, especially when exposed to heat or humidity. A sealant acts as a second adhesive layer, helping to keep those precious drills firmly in place.
- Dust and Dirt Repellent: A sealed surface is smoother, making it easier to wipe away dust and grime without dislodging the diamonds. This keeps your artwork looking pristine.
- UV Protection: Some sealants offer UV resistance, which helps prevent the colors of your diamonds and the canvas from fading due to prolonged exposure to sunlight.
- Enhanced Durability: Sealing adds a protective barrier that guards against scratches, scuffs, and minor damage that can occur during handling or display.
- Improved Aesthetic: Depending on the sealant you choose, it can add a beautiful sheen or a subtle matte finish, enhancing the overall visual appeal of your artwork.
- Fix Diamond Painting Diamonds: If you notice any loose diamonds before sealing, the sealant can act as a final adhesive to secure them properly.
Choosing the Best Sealant for Diamond Painting
The market offers a variety of sealants, each with its own advantages. Deciding on the best sealant for diamond painting depends on your desired finish and how you plan to display your artwork. We’ll explore the most popular types:
Gloss Sealant Diamond Art
A gloss sealant diamond art finish offers a high-shine, reflective surface. This can make your diamonds sparkle even more intensely, giving your artwork a vibrant, almost wet look.
- Pros: Enhances sparkle, makes colors appear more vibrant, provides a professional, high-quality finish.
- Cons: Can sometimes cause glare, making it harder to see the artwork from certain angles. Fingerprints might be more noticeable.
Matte Sealant Diamond Art
A matte sealant diamond art finish provides a non-reflective, natural look. This is ideal if you prefer a subtler finish that doesn’t compete with the sparkle of the diamonds themselves.
- Pros: Reduces glare, offers a sophisticated and understated appearance, less prone to showing fingerprints.
- Cons: May slightly mute the vibrancy of the colors compared to a gloss finish.
Spray Sealant Diamond Painting
Spray sealant diamond painting options are popular for their ease and speed of application. They typically come in aerosol cans and are sprayed evenly over the surface.
- Pros: Quick and easy to apply, covers large areas efficiently, minimal mess if applied correctly.
- Cons: Requires good ventilation, potential for overspray onto other surfaces, can sometimes be tricky to achieve an even coat without runs or patches if not careful.
Brush-On Sealant Diamond Painting
Brush-on sealant diamond painting products, often Mod Podge or specialized art sealers, are applied with a brush or foam applicator.
- Pros: Offers more control over application, can be applied precisely to specific areas, less risk of overspray.
- Cons: Can be more time-consuming, risk of brush strokes showing if not applied carefully, requires more manual effort.
Popular Sealant Options and Brands
Here are some commonly recommended sealants that work well for diamond art paintings:
| Sealant Type | Brand Recommendation | Finish | Application Method | Key Features |
|---|---|---|---|---|
| Gloss | Mod Podge Ultra Gloss | Glossy | Brush-on | Excellent shine, durable, water-based. |
| Krylon Crystal Clear Acrylic Coating | Glossy | Spray | Fast-drying, weather-resistant, high gloss. | |
| DecoArt Triple Thick Gloss Glaze | Glossy | Brush-on | Very thick, adds dimension, high gloss. | |
| Matte | Mod Podge Matte | Matte | Brush-on | Non-reflective, protects artwork, water-based. |
| Krylon Matte Finish | Matte | Spray | Smooth matte look, quick drying. | |
| Americana Matte Decoupage | Matte | Brush-on | Good for a subtle, non-shiny finish. | |
| General | Aleene’s Spray Tacks | N/A | Spray | Repositionable adhesive, can be used as a light sealer. |
| Mod Podge Hard Coat | N/A | Brush-on | Extra durable, scratch-resistant. |
Important Note: Always test your chosen sealant on a small, inconspicuous area of your diamond painting (or a scrap canvas with leftover diamonds) before applying it to the entire piece. This ensures it doesn’t react with the canvas or diamonds in an undesirable way.
How to Preserve Diamond Art: A Step-by-Step Sealing Guide
Now that you know why and what to use, let’s dive into how to preserve diamond art with a step-by-step guide. This process is crucial for ensuring your artwork stays beautiful and intact.
Step 1: Prepare Your Workspace
- Ventilation is Key: If using a spray sealant, work in a well-ventilated area, preferably outdoors or near an open window. Wear a mask to avoid inhaling fumes.
- Protect Surfaces: Lay down old newspapers, a drop cloth, or a plastic sheet to protect your table or floor from any accidental drips or overspray.
- Gather Supplies: Have your sealant, applicator (brush, foam roller, or spray can), paper towels or clean cloths, and your completed diamond painting ready.
Step 2: Ensure Your Diamond Painting is Clean
- Gentle Dusting: Before applying any sealant, gently dust off your diamond painting. You can use a soft brush, a microfiber cloth, or even a can of compressed air held at a distance. Avoid using liquids, as they can activate the adhesive prematurely.
- Check for Loose Diamonds: Carefully inspect your painting for any diamonds that might not be fully adhered. Gently press them down. If a diamond feels very loose, you might consider a tiny dab of clear craft glue (like E6000 or a strong PVA glue) on the canvas before pressing the diamond back into place. Let any added glue dry completely before sealing.
Step 3: Apply the Sealant (Method 1: Spray Sealant)
Spray sealants are favored for their speed and even coverage.
- Hold the Can Correctly: Hold the spray can upright, about 10-12 inches away from your diamond painting.
- Apply in Light Coats: Begin spraying in a steady, sweeping motion. Aim for thin, even coats. Avoid holding the spray in one spot for too long, as this can cause drips or an uneven finish.
- Work in Sections: If your painting is large, you might want to work in sections. Overlap your spray passes slightly to ensure no gaps.
- Allow Drying Time: Let the first coat dry completely according to the manufacturer’s instructions. This usually takes 15-30 minutes.
- Apply Additional Coats (Optional): For extra protection and a more pronounced finish (especially with gloss), you can apply a second or even a third light coat after the previous one has dried.
Step 4: Apply the Sealant (Method 2: Brush-On Sealant)
Brush-on sealants offer more control and are excellent for detailed work.
- Prepare the Sealant: If using a product like Mod Podge, give it a good stir. Avoid shaking, as this can introduce air bubbles.
- Choose Your Applicator: Use a soft-bristled paintbrush, a foam brush, or a small foam roller. For smaller paintings or intricate areas, a smaller brush might be better.
- Apply Thin, Even Layers: Dip your applicator into the sealant and wipe off any excess. Apply a thin, even layer over the entire surface of the diamond painting. Work in one direction to minimize visible brush strokes.
- Work Systematically: Cover the entire canvas, ensuring you get sealant between the diamonds and over their tops. Be careful not to flood the canvas with too much product, which can cause the diamonds to clump or warp.
- Allow Drying Time: Let the first coat dry completely. This can take anywhere from 30 minutes to a few hours, depending on the product and humidity.
- Apply Additional Coats (Optional): For increased durability and a more pronounced gloss or matte effect, apply additional thin coats, allowing each to dry thoroughly.
Step 5: Drying and Curing
- Patience is a Virtue: Allow your diamond painting to dry completely. This might take several hours or even overnight, depending on the sealant. The surface should feel dry to the touch.
- Full Cure: Most sealants require a full curing period (often 24-72 hours) for maximum durability. During this time, handle the artwork as little as possible.
Step 6: Framing and Display
Once your diamond painting is fully dry and cured, it’s ready to be framed or displayed! A frame can add another layer of protection and enhance the presentation of your beautiful artwork.
Troubleshooting Common Sealing Issues
Even with careful application, you might encounter a few minor issues. Here’s how to address them:
Fixing Diamond Painting Diamonds That Came Loose
- Pre-Sealing: If you notice a few diamonds are loose before you seal, gently try to press them down. If they still feel wobbly, apply a tiny dot of clear craft glue to the canvas where the diamond belongs, then press the diamond back into place. Let it dry completely.
- Post-Sealing: If a diamond comes loose after sealing, you can carefully apply a tiny bit of clear craft glue to the back of the diamond and stick it back onto the canvas. For a more permanent fix, you might need to apply a small amount of sealant over the diamond and its surrounding area with a fine brush.
Dealing with Globs or Uneven Application
- For Brush-On: If you notice a glob or thick spot with a brush-on sealant while it’s still wet, gently use your brush or a clean paper towel to smooth it out.
- For Spray: If you have drips or uneven patches from spray sealant once it’s dry, you might be able to very carefully scrape off the excess with a craft knife. For a more drastic fix, you could try applying a second, even coat of sealant to blend the area, or in severe cases, gently buff the area with very fine-grit sandpaper and reapply sealant. Test this on a scrap first!
Avoiding Bubbles
- Gentle Application: Avoid shaking spray cans vigorously. When using brush-on sealants, apply them gently and avoid excessive brushing or “working” the product.
- Thin Coats: Applying thin coats is generally less prone to trapping air bubbles than thick ones.
- Check Applicator: Ensure your brush or roller is clean and free of debris.
Tips for Achieving the Perfect Seal
- Read Manufacturer Instructions: Always read and follow the specific instructions for your chosen sealant. Drying times, application techniques, and safety precautions can vary.
- Use a Soft Brush: If brushing on sealant, a soft, synthetic brush is best to avoid scratching the diamonds.
- Don’t Over-Apply: Less is often more. Thin, even coats are more effective and less likely to cause problems than thick, goopy layers.
- Work in Good Lighting: Ensure you have adequate lighting so you can see where you’re applying the sealant and spot any missed areas or imperfections.
- Consider the Display Environment: If your artwork will be in direct sunlight, opt for a sealant with UV protection. If it will be in a high-traffic area, a more durable sealant might be preferred.
Frequently Asked Questions (FAQ)
Q1: Do I have to seal my diamond art painting?
No, sealing is not strictly mandatory, but it is highly recommended to protect diamond painting artwork from dust, damage, and to ensure the longevity of the adhered diamonds.
Q2: Will sealant make my diamonds fall off?
When applied correctly, sealant helps to fix diamond painting diamonds by adding an extra layer of adhesion. Applying too much sealant, however, could potentially affect the adhesive underneath or cause diamonds to clump. It’s best to apply thin, even coats.
Q3: Can I use Mod Podge to seal my diamond painting?
Yes, Mod Podge is a very popular and effective sealant for diamond art. Both their gloss and matte finishes work well.
Q4: How long does it take for sealant to dry?
Drying times vary depending on the type of sealant and environmental conditions (humidity, temperature). Spray sealants typically dry to the touch in 15-30 minutes, while brush-on sealants might take 30 minutes to a few hours. Full curing can take 24-72 hours.
Q5: Can I put my diamond painting in a frame without sealing it?
You can frame an unsealed diamond painting, but it won’t have the added protection. If you decide to frame it, consider using a shadow box frame or ensuring the frame’s glass/acrylic doesn’t directly touch the diamonds, as this could cause them to stick or be dislodged.
Q6: What is the difference between a gloss and matte sealant for diamond art?
A gloss sealant provides a shiny, reflective finish that enhances the sparkle of the diamonds. A matte sealant offers a non-reflective, subtle finish that reduces glare and can make the colors appear more subdued and natural.
Q7: Can I seal a partially completed diamond painting?
It’s generally best to seal a completed diamond painting. Sealing a partial piece could make it difficult to add more diamonds later, as the sealant might interfere with the adhesive on the canvas. However, if you need to secure a section that’s already done and won’t be worked on for a while, a very light spray of sealant from a distance might be possible, but it’s a risk.
By following this comprehensive guide, you can confidently seal diamond art and ensure your beautiful creations remain protected and dazzling for years to come. Happy crafting!