
Can you paint over wallpaper? Generally, no. While some people attempt it, painting directly over wallpaper often leads to peeling, bubbling, and an uneven finish. The adhesive can fail, the wallpaper seams can show through, and the texture of the wallpaper can still be visible. For the best results, removing the wallpaper and properly preparing the walls is crucial. This guide will walk you through every step of wall surface preparation after wallpaper removal.
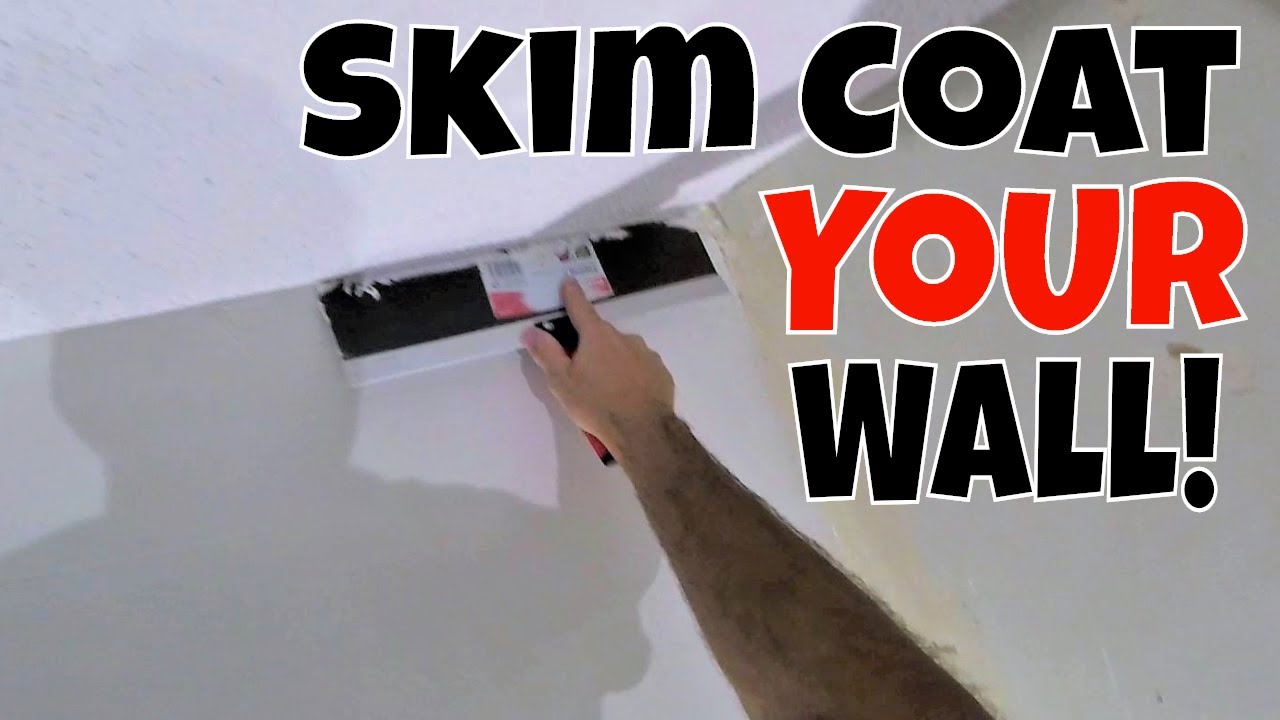
Image Source: i.ytimg.com
Why Proper Wall Preparation is Key
After spending time and effort removing wallpaper, it’s tempting to just slap on a coat of paint. However, skipping proper preparation is a common mistake that can ruin your freshly painted walls. Think of it as building a house – you wouldn’t start decorating before the foundation is solid, right? The same applies to your walls. Without thorough preparation, new paint can adhere poorly, peeling or bubbling down the line. You might also see imperfections from the old wallpaper, like glue residue or gouges, staring back at you through your new paint job. This guide will help you achieve a smooth, professional finish that lasts.
Step 1: The Thorough Wallpaper Removal Process
Before we get to painting prep, we need to talk about getting that wallpaper off.
Gathering Your Tools and Supplies
A successful wallpaper removal job requires the right equipment. Having everything ready will make the process smoother and less frustrating.
- Wallpaper Stripper: This can be a liquid solution you mix with water, or a steam stripper.
- Scrapers: A broad putty knife or a dedicated wallpaper scraper is essential for lifting the paper.
- Sponge and Buckets: For applying stripper solution and rinsing.
- Plastic Sheeting or Drop Cloths: To protect floors and furniture.
- Spray Bottle: Useful for applying stripper solution to smaller areas or touch-ups.
- Tack Cloth: For dusting surfaces.
- Gloves and Eye Protection: To keep yourself safe.
Tackling Different Wallpaper Types
Not all wallpaper is created equal, and this impacts how you remove it.
- Strippable Wallpaper: This is the easiest. It often peels off in large sheets. Start in a corner and pull slowly and steadily.
- Peelable Wallpaper: The top vinyl or paper layer might peel off, leaving a backing layer. You’ll need to score this backing layer to allow the stripper solution to penetrate.
- Traditional/Vinyl Wallpaper: This usually requires a stripping solution or steam. Score the walls first (using a scoring tool designed for wallpaper) to help the solution reach the adhesive.
The Removal Technique
- Protect the Area: Lay down drop cloths or plastic sheeting. Cover electrical outlets with painter’s tape.
- Score if Necessary: For non-strippable wallpaper, use a scoring tool to create tiny holes. Be gentle so you don’t damage the drywall underneath.
- Apply Stripper: Mix your wallpaper stripper solution according to the manufacturer’s instructions. Apply it generously to a section of the wall using a sponge or roller. Let it sit for the recommended time to soften the adhesive.
- Scrape Away: Use your scraper to gently lift the wallpaper. Start from a corner or seam and work your way down. If it’s stubborn, apply more stripper and let it soak.
- Repeat: Work in small sections, repeating the application and scraping process.
- Steam Stripping (Optional): For very stubborn wallpaper, a steam stripper can be effective. Hold the steam plate against the wall for a short time to loosen the adhesive, then scrape. Be careful not to over-steam, as excessive moisture can damage drywall.
Step 2: Dealing with Wallpaper Removal Residue
This is often the most challenging part of the prep work. Wallpaper removal residue is the sticky stuff left behind after the paper is gone.
Identifying the Residue
You’ll likely see a gummy, sticky film on the walls. This is the old wallpaper adhesive. Sometimes, it’s nearly invisible until you touch it, or it might show up as shiny patches.
Cleaning Wallpaper Adhesive: The Essential Step
Effective cleaning wallpaper adhesive is non-negotiable for a good paint job.
Table 1: Cleaning Solutions for Wallpaper Residue
| Solution Type | Ingredients | Best For | Cautions |
|---|---|---|---|
| Warm Water & Dish Soap | Warm water, a few drops of dish soap | Light adhesive residue, general cleaning | Rinse thoroughly to avoid soap film. |
| White Vinegar Solution | 1 part white vinegar to 4 parts warm water | Stubborn adhesive, mild mold/mildew | Vinegar has a strong smell; ensure good ventilation. Test in an inconspicuous area first. |
| Commercial Wallpaper Stripper/Remover | Follow product instructions | Very persistent adhesive, old paste | Always test in an inconspicuous area. Wear gloves and eye protection. Ensure good ventilation. |
| TSP (Trisodium Phosphate) | TSP substitute (safer than original TSP) | Heavy-duty cleaning, tough residue | Use TSP substitute only. Wear gloves and eye protection. Ensure excellent ventilation. Rinse extremely thoroughly. Very alkaline. |
The Cleaning Process:
- Choose Your Solution: Based on the type and amount of residue, select the appropriate cleaning solution. Start with the mildest option (warm water and soap) and move to stronger solutions if needed.
- Apply and Scrub: Dampen a sponge or cloth with your chosen solution. Don’t soak the walls. Gently scrub the residue away. For tough spots, you might need to let the solution sit for a few minutes.
- Rinse Thoroughly: This is crucial! Use a clean sponge with plain warm water to wipe down the walls. You need to remove all traces of the cleaning solution. Residue from the cleaner can also prevent paint from adhering properly.
- Dry the Walls: Allow the walls to dry completely. You can use a clean, dry cloth or a fan to speed this up. Inspect the walls again for any remaining sticky spots.
Step 3: Wall Scraping and Surface Inspection
Once the bulk of the wallpaper and residue is gone, it’s time for a detailed inspection.
The Importance of Wall Scraping
Even after removal, you might have small bits of paper or stubborn adhesive clinging to the wall. Wall scraping is about getting these tiny offenders off.
- What to Scrape: Small paper fragments, dried glue blobs, or any lifted paint from the original wall surface.
- How to Scrape: Use a clean, sharp putty knife or scraper. Hold it at a low angle to the wall to avoid gouging the drywall or plaster. Work gently and methodically.
Inspecting for Damage
This is your chance to identify any underlying problems that wallpaper may have been hiding.
- Holes and Gouges: Look for any nicks, dings, or larger holes caused by the wallpaper removal process or previous damage.
- Cracks: Check for hairline cracks in the drywall or plaster.
- Water Damage: Stains or bubbling might indicate past water leaks.
- Mold or Mildew: Any signs of dark spots or fuzzy growth need immediate attention.
Step 4: Repairing Wall Damage
Now you’ll fix all the imperfections you found during your inspection. This is where repairing wall damage comes in.
Minor Repairs: Filling Small Holes and Cracks
- Spackling Wall Imperfections: For small nail holes, minor dents, or hairline cracks, spackle is your best friend.
- Application: Apply a small amount of spackle with a putty knife. Press it into the hole or crack.
- Smoothing: Use the putty knife to scrape off any excess spackle, leaving the surface as smooth and flush as possible with the surrounding wall.
- Drying: Let the spackle dry completely according to the product’s instructions. It will usually shrink slightly as it dries.
- Second Coat (if needed): If the spackle shrinks significantly, apply a second thin coat.
More Significant Repairs: Cracks, Gouges, and Tears
- Drywall Patching: For larger holes or significant gouges, you might need a drywall patch or a piece of new drywall.
- Process: Cut out damaged areas. Fit a new piece of drywall. Use drywall tape and joint compound (mud) to secure and blend the new piece with the existing wall.
- Layering: Apply joint compound in thin layers, allowing each layer to dry before applying the next. This helps prevent cracking and ensures a smooth finish.
Wall Texture Repair
If your walls have a texture (like orange peel or knockdown), you’ll need to replicate that after repairs.
- Matching Texture: Use spray-on texture products or joint compound applied with a trowel to match the existing wall texture. Practice on cardboard first to get the technique right.
- Feathering: Blend the new texture into the surrounding area so the repaired spots are seamless.
Step 5: Sanding for a Smooth Finish
Sanding is a critical step to create a perfectly smooth surface for paint.
Sanding Wallpaper Glue and Spackle
This is where you’ll be sanding wallpaper glue residue that you might have missed or that has dried hard. It’s also for smoothing out your spackled repairs.
Table 2: Sandpaper Grits for Wall Prep
| Grit Number | Description | Use |
|---|---|---|
| 80-100 | Coarse | Removing heavy residue, significant imperfections, rough patches |
| 120-150 | Medium | Smoothing out repairs, general surface smoothing |
| 220 | Fine | Final smoothing, prepping for primer/paint, removing minor roughness |
The Sanding Technique
- Choose Your Sandpaper: Start with a medium grit (120-150) to smooth out repairs and any lingering rough spots. If you have very stubborn dried glue or uneven patches, you might need to start with a coarser grit (80-100).
- Use a Sanding Block or Pole Sander: This provides an even surface pressure and helps you achieve a flat finish. For large areas, a pole sander is more efficient.
- Sand Gently: Move the sandpaper with even pressure. You want to level the spackle or remove stubborn residue without creating new gouges.
- Feather the Edges: When sanding patches, feather the edges of the spackle or joint compound outwards to blend them seamlessly with the wall.
- Progress to Finer Grits: Once the major imperfections are gone, switch to a fine-grit sandpaper (220) for a final smooth touch. This removes any slight roughness left by the coarser grits.
- Dust Removal: After sanding, dust will be everywhere. Use a vacuum with a brush attachment to remove the bulk of the dust from the walls and floor. Then, wipe the walls down with a damp cloth or a tack cloth. Cleaning wallpaper adhesive might have left some dust, and sanding will create more.
Step 6: Skim Coating Walls (When Necessary)
Sometimes, even after scraping and sanding, your walls might still have minor imperfections. This is where skim coating walls becomes essential.
What is Skim Coating?
Skim coating involves applying a very thin layer of joint compound over the entire wall surface to create a perfectly smooth and uniform finish. It’s like giving your walls a new, flawless skin.
When to Skim Coat
- Stubborn Residue: If after extensive cleaning and sanding, you still have slight tackiness or marks from old adhesive.
- Uneven Surface: If the walls are generally uneven, bumpy, or have many small imperfections that are difficult to repair individually.
- Texture Removal: If you’ve removed textured wallpaper and the underlying wall surface is inconsistent.
- For a High-Quality Finish: If you’re aiming for a showroom-quality paint finish on a challenging surface.
The Skim Coating Process
- Apply the First Thin Coat: Use a wide drywall knife (10-12 inches) or a squeegee to apply a very thin, even layer of joint compound (mud) across the entire wall. The goal is to fill minor imperfections and create a uniform surface.
- Feather the Edges: Ensure the mud is feathered thinly at the edges to avoid thick build-ups.
- Dry Completely: Allow the first coat to dry thoroughly. This can take several hours, depending on humidity and temperature.
- Sand Smoothly: Once dry, lightly sand the entire wall with fine-grit sandpaper (220). Again, use a sanding block or pole sander for an even finish.
- Dust Removal: Vacuum and wipe down the walls to remove all sanding dust.
- Apply Second Coat (if needed): For very imperfect walls, a second thin coat of joint compound may be necessary. Apply, let dry, and sand again.
- Final Inspection: After the final sanding and dust removal, inspect the walls in good light. They should feel smooth to the touch and look uniform.
Step 7: Priming Bare Drywall and Repaired Areas
Priming bare drywall and any repaired sections is vital for a consistent paint job.
Why Prime?
- Adhesion: Primer helps the paint adhere better to the wall surface, especially to exposed paper or spackled areas.
- Uniformity: It seals porous surfaces and creates an even base color, so your topcoat of paint looks consistent across the entire wall. Without primer, repaired areas might absorb paint differently, leading to a patchy appearance.
- Hiding Imperfections: A good quality primer can help mask any faint remaining imperfections or discoloration.
- Coverage: It improves the coverage of your final paint color, meaning you might need fewer coats of paint.
Choosing the Right Primer
- Stain-Blocking Primer: If you suspect any residual adhesive or discoloration from the old wallpaper, a good quality stain-blocking primer is recommended.
- General Purpose Primer: For walls that are clean and free of major issues, a good quality latex-based drywall primer is usually sufficient.
- Oil-Based Primer: Sometimes recommended for very porous surfaces or if you are concerned about lingering adhesive or potential mold. However, latex primers have improved significantly.
The Priming Process
- Apply Evenly: Apply the primer with a roller or brush, just as you would paint. Work in manageable sections.
- Cover All Areas: Ensure all repaired spots, skim-coated areas, and any patches of exposed drywall are completely covered.
- Avoid Over-Application: Apply thin, even coats. Avoid drips and runs, as these can be difficult to sand out later.
- Dry Completely: Allow the primer to dry fully according to the manufacturer’s instructions. This is crucial before applying your paint.
Step 8: Final Inspection and Touch-ups
Before you reach for your paint roller, give your walls one last check.
The Final Walkthrough
- Feel the Surface: Run your hand over the walls. Do they feel smooth and even? Are there any rough spots or missed areas?
- Check the Light: Look at the walls from different angles and under different lighting conditions. This helps reveal any subtle imperfections that might not be visible in direct light.
- Address Any Issues: If you find any remaining rough spots, use fine-grit sandpaper to gently smooth them. Wipe away any dust. If you discover a missed spot of adhesive or a small imperfection, address it with spackle and re-prime that specific area if needed.
Frequently Asked Questions (FAQ)
Q1: Can I paint directly over old wallpaper without removing it?
While it’s technically possible, it’s generally not recommended. Paint may not adhere well, seams can show through, and the wallpaper could bubble or peel over time, especially in humid conditions. Proper removal and wall preparation lead to a much more durable and professional-looking finish.
Q2: How long does it take to prep walls after wallpaper removal?
The time can vary greatly depending on the amount of wallpaper, the type of adhesive, the condition of the walls, and the extent of repairs needed. It can take anywhere from a day for a small, easy job to several days or even a week for a larger or more complex project. Rushing the process will compromise the final result.
Q3: What is the best way to remove stubborn wallpaper glue?
For stubborn wallpaper removal residue, start with a solution of warm water and white vinegar. If that doesn’t work, consider a commercial wallpaper remover or a TSP substitute, always following product instructions and ensuring good ventilation and protective gear. Thorough rinsing is key regardless of the product used.
Q4: Do I need to skim coat every time I remove wallpaper?
No, skim coating is not always necessary. If your walls are in good condition after cleaning and minor repairs, you might be able to skip this step. However, if you have significant imperfections, unevenness, or stubborn residue that sanding alone can’t fix, skim coating is highly recommended for a perfect finish.
Q5: Can I reuse my old wallpaper tools?
Yes, you can clean and reuse most tools like scrapers, sponges, and buckets. Ensure they are thoroughly cleaned of all wallpaper paste and stripper residue before storing them to prevent them from becoming unusable or damaging them.
Q6: How do I know if I’ve removed all the wallpaper glue?
The best test is to run your hand over the wall. If it feels sticky or tacky, there’s still residue. Visually, residue might appear as dull or shiny patches that don’t match the surrounding wall. Thorough rinsing and drying, followed by a light wipe with a damp cloth, should leave the wall feeling clean and smooth.
By following these detailed steps, you can transform your walls from a wallpapered past to a beautifully painted future. Patience and thoroughness are your greatest allies in achieving a professional, lasting finish.