
Can you paint galvanized metal? Yes, you can paint galvanized metal, but proper preparation is key for a lasting finish. This guide will walk you through every step needed to ensure your painted galvanized surfaces look great and withstand the elements. We’ll cover everything from cleaning and degreasing to choosing the right paint for galvanized metal.
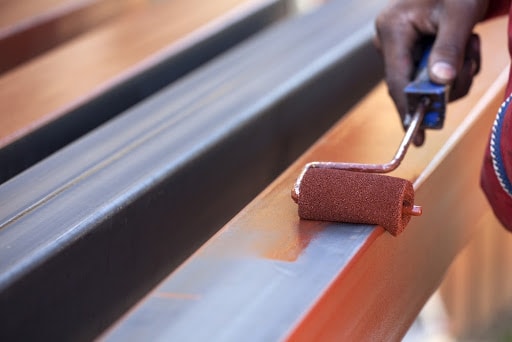
Image Source: universalgalvanizing.com
Why Prep Galvanized Metal?
Galvanized metal, typically steel coated with a layer of zinc, is known for its corrosion resistance. This zinc coating, applied through a process called galvanization, acts as a sacrificial barrier. However, this very zinc layer can pose challenges when you want to paint it. Without the correct preparation, paint can peel, chip, or blister. This guide aims to decipher the complexities of preparing zinc for paint, ensuring optimal adhesion for galvanized paint and a beautiful, durable result.
The Science Behind the Zinc Coating
The galvanization process involves dipping steel into molten zinc. This creates a metallurgical bond, meaning the zinc becomes part of the steel’s surface. This bond is strong but also reactive. The zinc naturally oxidizes when exposed to air, forming a dull gray layer called zinc patina. This patina, while protective, can interfere with paint adhesion. Therefore, cleaning galvanized metal effectively is the first crucial step.
Common Pitfalls to Avoid
Many DIYers jump straight to painting without proper prep. Common mistakes include:
- Not cleaning thoroughly: Dirt, grease, and oil will prevent paint from sticking.
- Skipping etching or degreasing: These steps are vital for creating a surface the paint can grip.
- Using the wrong primer: Not all primers are formulated for galvanized surfaces.
- Painting too soon after galvanization: Newly galvanized metal requires a curing period.
The Essential Steps for Successful Galvanized Metal Prep
Successfully preparing galvanized metal for painting involves a systematic approach. We’ll break down each stage, from initial cleaning to the final primer application.
Step 1: Initial Cleaning and Inspection
Before you do anything else, a thorough cleaning is non-negotiable. This is your first step in cleaning galvanized metal properly.
H4: Removing Surface Contaminants
- Dust and Debris: Use a stiff brush or broom to remove loose dirt, cobwebs, and other debris.
- Dirt and Grime: Wash the surface with a mild detergent or a specialized galvanized metal cleaner and water. A soft-bristled brush or a sponge can help scrub away stubborn grime. Rinse thoroughly with clean water.
- Grease and Oil: For tougher grease or oil stains, you’ll need to focus on degreasing galvanized metal.
H4: Addressing Existing Paint or Coatings
If the galvanized metal already has paint, you need to assess its condition.
- Sound Paint: If the existing paint is in good condition and well-adhered, you might be able to clean it and paint over it. Lightly scuffing the surface can improve adhesion.
- Peeling or Chipping Paint: If the paint is peeling or flaking, it must be removed. Scraping with a putty knife or wire brush is often necessary. For larger areas, a paint stripper or a power washer can be used, but be cautious not to damage the zinc coating itself.
H4: Inspecting for Rust
While galvanized metal is designed to resist rust, it’s not immune, especially if the coating is damaged. Rust removal on galvanized surfaces requires specific attention.
- Light Rust: Small rust spots can often be removed with a wire brush or steel wool.
- Heavier Rust: For more significant rust, you might need to use a rust remover specifically designed for metal. Always follow the product instructions carefully. After rust removal, it’s crucial to neutralize the area.
Step 2: Degreasing for Optimal Adhesion
Degreasing galvanized metal is a critical step to ensure the paint will adhere properly. Even if the surface looks clean, microscopic oil and grease residues can prevent a strong bond.
H5: Choosing the Right Degreaser
- Mild Detergent and Water: For light grease, a good wash with dish soap and water can suffice.
- Mineral Spirits or Acetone: For more stubborn grease or oil, mineral spirits or acetone are effective. Use these in a well-ventilated area and wear appropriate gloves. Ensure you rinse thoroughly after using these solvents.
- Specialized Degreasers: There are many commercial degreasers formulated for metal surfaces. Look for products that are safe for galvanized metal.
H5: The Degreasing Process
- Apply the Degreaser: Apply your chosen degreaser to a section of the metal.
- Scrub: Use a clean cloth, sponge, or soft brush to work the degreaser into the surface.
- Wipe: Wipe away the grease and degreaser with a clean, lint-free cloth.
- Rinse: Thoroughly rinse the area with clean water to remove any degreaser residue.
- Dry: Allow the surface to dry completely.
Step 3: Etching or Abrasive Preparation
This step is crucial for creating a surface profile that promotes paint adhesion. This process is often referred to as etching galvanized surfaces, and it can be done chemically or mechanically.
H4: Chemical Etching
Chemical etching uses a mild acid solution to slightly roughen the zinc surface. This is often done with a TSP (trisodium phosphate) substitute or a dedicated metal etching solution.
- TSP Substitute: Mix TSP substitute with water according to the manufacturer’s instructions. Apply the solution to the galvanized surface.
- Etching Solution: Commercial metal etching solutions are available. Read and follow the product’s safety guidelines and application instructions carefully.
- Process: Apply the etching solution with a sponge or brush. Allow it to sit for the recommended time (usually a few minutes).
- Neutralizing: After etching, it is vital to neutralize the acidic residue. This is a key part of neutralizing galvanized metal. A baking soda and water solution (about 1 cup baking soda to a gallon of water) is commonly used. After neutralizing, rinse the surface thoroughly with clean water.
- Drying: Allow the metal to dry completely.
H4: Mechanical Preparation (Sanding)
Sanding galvanized surfaces is another effective way to create a profile for paint adhesion.
- Choosing the Right Grit: You don’t need to aggressively sand galvanized metal. The goal is to scuff the surface, not to remove the zinc coating. Use a fine-grit sandpaper (180-220 grit) or a Scotch-Brite pad.
- Sanding Technique: Sand the entire surface gently. This will create microscopic scratches that the paint can grip. Avoid using too much pressure, as this can damage the zinc.
- Cleaning After Sanding: After sanding, it’s crucial to remove all dust. Use a vacuum with a brush attachment or a tack cloth. Then, repeat the degreasing process to ensure no oils from your hands or from the sanding process are left behind.
Table 1: Grit Recommendations for Sanding Galvanized Metal
| Task | Grit of Sandpaper | Pad Type |
|---|---|---|
| Light scuffing | 220 grit | Fine-grit |
| Removing minor sheen | 180 grit | Fine-grit |
| Cleaning after oil | N/A | Scotch-Brite pad |
Step 4: Rust Treatment and Neutralization
If you found any rust during your inspection, now is the time to address it thoroughly. This involves both rust removal on galvanized surfaces and then neutralizing galvanized metal to prevent future issues.
H5: Rust Removal Methods
- Wire Brush/Steel Wool: For light rust, a wire brush or steel wool can be effective. Always brush in the direction of the metal grain if possible.
- Rust Converters: These products chemically convert rust into a stable, paintable surface. They are particularly useful for areas where rust is ingrained. Ensure the product is suitable for galvanized metal.
- Rust Removers: Acid-based rust removers can be used, but extreme caution is needed. After using an acid-based remover, thorough neutralization and rinsing are absolutely critical to prevent further corrosion.
H5: Neutralizing After Rust Treatment
This is a vital step, especially if you used an acidic rust remover or employed chemical etching.
- Baking Soda Solution: The most common and effective method is to use a baking soda and water solution. Mix approximately one cup of baking soda with a gallon of water.
- Application: Apply the baking soda solution generously to the treated area.
- Rinsing: Rinse the entire surface thoroughly with clean water. Repeat the neutralization and rinsing process if necessary to ensure all acidic residues are gone.
- Drying: Ensure the metal is completely dry before proceeding to the next step.
Step 5: Priming for Maximum Adhesion
Priming is arguably the most important step when painting galvanized metal. The right primer creates a strong bond between the metal and the topcoat, ensuring longevity. This is where priming galvanized steel correctly makes all the difference for adhesion for galvanized paint.
H4: Choosing the Right Primer
- Galvanized Metal Primer: Look for primers specifically labeled for use on galvanized metal or zinc-coated surfaces. These primers are formulated to adhere to the zinc and block any potential outgassing from the metal.
- Water-Based Acrylic Primers: High-quality water-based acrylic or latex primers are often suitable. Ensure they are designed for exterior use and have good adhesion properties.
- Oil-Based Primers: Some oil-based primers can also work, but they may require more careful application and longer drying times. Always check the product specifications for compatibility with galvanized metal.
- Avoid Latex Primers Not Designed for Galvanized Metal: Standard latex primers may not adhere well to the smooth, non-porous surface of galvanized metal and could peel.
H4: Applying the Primer
- Application Method: Apply the primer evenly using a brush, roller, or spray gun. Follow the manufacturer’s recommendations for application.
- Coverage: Ensure complete and even coverage. Do not apply the primer too thickly, as this can lead to sagging or uneven drying.
- Drying Time: Allow the primer to dry completely according to the manufacturer’s instructions. This is crucial for proper adhesion. Do not rush this step.
- Second Coat (Optional but Recommended): For extra durability and a better foundation for your topcoat, consider applying a second coat of primer. Ensure the first coat is dry before applying the second.
Step 6: Topcoating for Durability
Once the primer is dry and ready, you can apply your topcoat. The best paint for galvanized metal will depend on the application and desired finish.
H4: Selecting the Topcoat
- Exterior Acrylic Latex Paints: These are excellent choices for outdoor galvanized surfaces like railings, fences, or gutters. They are durable, flexible, and resistant to UV rays and moisture.
- Oil-Based Enamels: These offer a hard, durable finish and are often used for metal that requires a high-gloss or industrial look. However, they can be less flexible than acrylics and may be prone to cracking over time if the metal expands and contracts significantly.
- Epoxy Paints: For areas that experience heavy wear or exposure to chemicals, epoxy paints provide exceptional durability and adhesion.
H4: Applying the Topcoat
- Application: Apply the topcoat in thin, even layers. Avoid over-application.
- Number of Coats: Typically, two coats of topcoat are recommended for full coverage and maximum protection.
- Drying Between Coats: Allow each coat to dry thoroughly according to the manufacturer’s instructions before applying the next.
- Curing: Be aware that paint takes time to fully cure, even after it’s dry to the touch. Avoid exposing the painted surface to heavy use or harsh conditions until the paint has fully cured.
Special Considerations for Galvanized Surfaces
There are a few additional points to keep in mind when working with galvanized metal.
H3: The Age of the Galvanized Metal
- New Galvanized Metal: Newly galvanized metal has a very smooth surface and may have residual oils from the galvanizing process. It’s often recommended to let new galvanized metal weather for 3-6 months before painting. This weathering process helps to break down some of the surface oils and creates a slight patina, which can improve paint adhesion. If you can’t wait, thorough degreasing and etching are even more critical.
- Old Galvanized Metal: Older galvanized metal will have a more established patina. This can be beneficial for paint adhesion, but it’s still essential to clean and degrease thoroughly.
H3: Temperature and Humidity
- Ideal Conditions: Aim to paint when the temperature is between 50°F and 85°F (10°C and 30°C). Avoid painting in direct sunlight, high humidity, or when rain is expected.
- Condensation: Ensure the surface is completely dry before painting. Condensation can form on metal surfaces, especially in humid conditions or during temperature changes, which will affect adhesion.
H3: Ventilation
- Safety First: Always work in a well-ventilated area, especially when using solvents like mineral spirits or acetone, or when spray painting. Wear a respirator, gloves, and eye protection.
Summary of Key Steps for Painting Galvanized Metal
Here’s a quick recap of the essential steps to ensure success:
- Clean: Remove all dirt, grease, and grime.
- Degrease: Use a suitable solvent to remove any remaining oils.
- Prepare Surface: Lightly scuff with fine-grit sandpaper or use a chemical etcher.
- Neutralize: If you used a chemical etcher or acidic rust remover, neutralize the surface.
- Prime: Apply a high-quality primer specifically designed for galvanized metal.
- Topcoat: Apply your chosen paint in thin, even coats.
By following these steps, you can achieve a professional-looking and long-lasting painted finish on your galvanized metal projects. Proper preparation is the foundation for any successful painting job, and it’s especially true for the unique challenges presented by galvanized surfaces.
Frequently Asked Questions (FAQ)
Q1: Do I need to use a special primer for galvanized metal?
Yes, it is highly recommended to use a primer specifically formulated for galvanized metal or zinc-coated surfaces. These primers are designed to bond effectively to the zinc and prevent adhesion issues.
Q2: Can I paint over old, peeling paint on galvanized metal?
No, you should not paint over peeling or flaking paint. The old paint must be removed by scraping, sanding, or using a paint stripper until you reach the bare galvanized surface or sound, well-adhered paint.
Q3: How long should I wait before painting new galvanized metal?
Ideally, new galvanized metal should be allowed to weather for 3-6 months before painting. This weathering process helps to remove surface oils and create a slight patina that improves paint adhesion. If you cannot wait, thorough cleaning, degreasing, and etching are essential.
Q4: What is the best paint for galvanized metal?
The best paint for galvanized metal is typically a high-quality exterior acrylic latex paint. However, oil-based enamels or epoxy paints can also be used depending on the application and desired durability. Always ensure the paint is compatible with a galvanized metal primer.
Q5: Can I use a wire wheel on a drill to prepare galvanized metal?
While a wire wheel can remove rust or old paint, it can be too aggressive for the zinc coating on galvanized metal. It’s generally better to use finer abrasives like sandpaper (180-220 grit) or Scotch-Brite pads for scuffing the surface. If you use a wire wheel, do so very gently and be mindful of damaging the zinc.
Q6: What if I find rust on my galvanized metal?
If you find rust, you need to remove it completely using a wire brush, steel wool, or a rust remover. After removing the rust, it’s crucial to neutralize the area, especially if you used a chemical rust remover, and then proceed with priming.
Q7: How do I ensure my paint sticks to galvanized metal?
The key to ensuring paint sticks to galvanized metal is thorough surface preparation: cleaning, degreasing, creating a surface profile through light sanding or etching, using the correct primer, and allowing adequate drying time between coats.
Q8: Can I pressure wash galvanized metal?
Yes, you can pressure wash galvanized metal as part of the cleaning process. However, use a lower pressure setting and a fan tip to avoid damaging the zinc coating. Always follow up with thorough drying.
By following this comprehensive guide, you’ll be well-equipped to tackle any galvanized metal painting project with confidence, ensuring a durable and beautiful finish.