
Can I achieve a perfect paint finish without smooth walls? No, you cannot achieve a truly professional and flawless paint finish on uneven or damaged walls. Smooth walls are the foundation of a beautiful paint job.
Achieving perfectly smooth walls for painting is the cornerstone of any professional-looking paint job. Whether you’re tackling new drywall or refreshing an older space, proper wall preparation is key. Skipping this crucial step often leads to visible imperfections, streaks, and an overall amateurish appearance that can detract from even the best paint color. This guide will delve into the pro secrets and essential techniques for smoothing walls, ensuring your painting project results in a finish you’ll be proud of. We’ll cover everything from basic spackling to advanced skim coating, empowering you to transform your walls from rough to ready for that stunning new coat of paint.
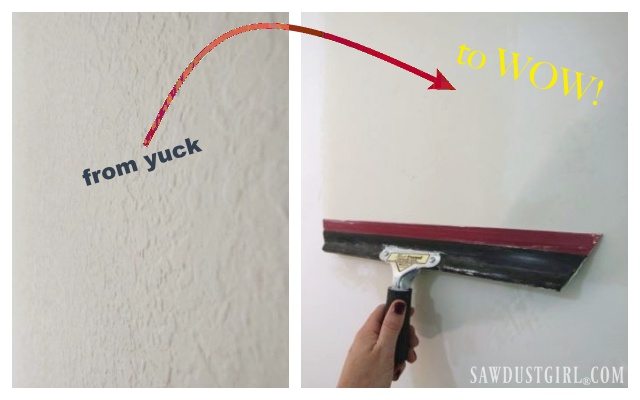
Image Source: sawdustgirl.com
The Importance of Smooth Walls: Beyond Aesthetics
Why are smooth walls so important for painting? Smooth walls don’t just look better; they also interact with paint more predictably. Paint adheres better to a uniform surface, reducing the chances of peeling or bubbling. Furthermore, a smooth surface allows paint to be applied evenly, preventing blotches and uneven coverage. Light reflects more consistently off a smooth wall, making the color appear richer and more vibrant. Conversely, bumps, imperfections, and texture can catch the light in undesirable ways, highlighting flaws rather than the paint itself. This is why meticulous wall surface preparation is non-negotiable for a high-quality outcome.
Fathoming the Surface: Identifying Wall Imperfections
Before you can smooth your walls, you need to know what you’re dealing with. A thorough inspection is the first step in effective wall preparation. Turn on your best lights, even during the day, and look at the walls from different angles.
Common imperfections include:
- Nail Pops: These are nails that have worked their way out of drywall, leaving a small bump.
- Cracks: These can range from hairline cracks along seams or corners to larger, more significant fissures.
- Holes: From minor dings and dents to larger holes from doorknobs or accidents.
- Surface Dings and Scratches: Minor damage that can mar the paint finish.
- Uneven Seams: In new drywall installations, tape and mud seams can be uneven if not applied correctly.
- Old Paint Texture: Textured walls or peeling paint from previous applications.
- Water Stains or Damage: These require specific treatment before painting.
Essential Tools and Materials for Wall Smoothing
Gathering the right tools and materials makes the entire process more efficient and effective. Having everything ready before you start will save you time and frustration.
Tools:
- Putty Knives/Scrapers: A flexible 1.5-inch and a stiffer 4-inch putty knife are essential for spackling and applying joint compound application.
- Drywall Taping Knives/Broad Knives: For skim coating and applying wider coats of joint compound, 6-inch, 10-inch, and even 12-inch knives are invaluable.
- Sanding Sponges/Blocks: Various grits (80, 120, 180, 220) are needed for sanding drywall and smoothing compound.
- Orbital Sander (Optional but Recommended): Significantly speeds up the sanding drywall process, especially for larger areas.
- Dust Mask: Crucial for protecting your lungs from drywall dust.
- Safety Glasses: To protect your eyes from dust and debris.
- Drop Cloths/Plastic Sheeting: To protect your floors and furniture from dust.
- Utility Knife: For trimming loose wallpaper or debris.
- Stepladder: For reaching higher areas.
- Bucket/Hawk (for larger areas): To hold and transfer joint compound.
- Measuring Tape: For assessing the scope of repairs.
- Paint Roller or Brush: For applying primer.
Materials:
- Spackling Compound: For small holes and minor imperfections.
- Lightweight Joint Compound (All-Purpose Mud): For filling cracks, seams, and broader repairs. It’s easier to sand.
- Setting-Type Joint Compound (Hot Mud): Dries harder and faster, excellent for larger repairs and taping but can be harder to sand.
- Drywall Tape: Paper or fiberglass mesh tape for seams and larger cracks.
- Primer: Essential for sealing the repaired areas and ensuring even paint adhesion.
- Clean Rags/Sponges: For cleaning surfaces.
Step-by-Step Guide to Smoothing Walls
Let’s break down the process into manageable steps, focusing on effective wall smoothing techniques.
Step 1: Cleaning and Inspection
Begin by thoroughly cleaning your walls. Remove any cobwebs, dust, or dirt. If there’s old, peeling paint or wallpaper, remove it using a scraper or steamer. This is a vital part of thorough wall preparation.
Step 2: Addressing Minor Imperfections (Spackling)
For small holes (nail pops, dings) and minor cracks, spackling is your go-to method.
How to Spackle:
- Prepare the Area: If there’s loose debris around a hole, gently push it in or use a utility knife to trim any flaking material.
- Apply Spackle: Using a putty knife, scoop a small amount of spackling compound. Press it firmly into the hole or crack, ensuring it fills the void completely.
- Smooth the Surface: Scrape the putty knife at an angle across the filled area to remove excess spackle and create a smooth, flush surface with the wall. Aim to leave a slight crown that will shrink slightly as it dries.
- Allow to Dry: Follow the manufacturer’s instructions for drying time, which is usually a few hours. Spackle shrinks as it dries, so you might need a second application for larger holes.
- Sand: Once dry, lightly sand the spackled area with fine-grit sandpaper (150-220 grit) until it’s flush with the wall. Feather the edges into the surrounding wall.
Step 3: Tackling Larger Cracks and Seams
For larger cracks or gaps, especially along drywall seams, you’ll need joint compound and possibly drywall tape. This involves more detailed joint compound application.
Filling Cracks with Joint Compound:
- Widen the Crack (if necessary): For very thin cracks, sometimes widening them slightly with a utility knife or the corner of a putty knife can help the compound adhere better.
- Apply First Coat: Use a 4-inch putty knife or a taping knife to apply a thin, even layer of all-purpose joint compound over the crack. Embed drywall tape into the wet compound if the crack is significant (like along a seam). Smooth the compound over the tape, ensuring it’s fully covered and any excess is removed.
- Allow to Dry: Let the compound dry completely. It will likely shrink and may require a second or even third coat.
- Apply Subsequent Coats: Apply additional thin coats of joint compound, feathering the edges wider with each coat. Use progressively wider knives (6-inch, then 10-inch) for subsequent applications to create a smooth, seamless transition.
- Sand: Once the final coat is thoroughly dry, sand the area smooth with medium-grit sandpaper (120-150 grit) to level any ridges, then finish with fine-grit sandpaper (180-220 grit) for a perfectly smooth finish. Always sand gently to avoid creating depressions.
Step 4: Skim Coating for Ultimate Smoothness
Skim coating is a more advanced wall smoothing technique used to cover entire walls or large sections with a thin layer of joint compound. This is ideal for walls with widespread minor damage, texture, or where a perfectly uniform surface is desired. It’s essentially creating a new, smooth surface over the old one.
Skim Coating Process:
- Apply a Thin Layer: Using a broad knife (10-inch or 12-inch), apply a very thin, even layer of lightweight joint compound over the entire wall. Work in manageable sections.
- Feather the Edges: As you apply the compound, hold the knife at a slight angle and drag it across the surface to feather the edges and remove excess material. The goal is to leave as little buildup as possible.
- Allow to Dry: Let the first coat dry completely.
- Sand: Lightly sand the dried compound with fine-grit sandpaper (180-220 grit) to knock down any ridges or high spots.
- Apply Second Coat (if needed): For deeper imperfections or to ensure complete coverage, apply a second thin coat, again feathering the edges.
- Final Sanding: Once the second coat is dry, sand it thoroughly. This is where you achieve that glass-smooth finish. Use a sanding sponge or an orbital sander with a dust collection system for best results.
Step 5: Sanding Drywall: The Key to a Flawless Surface
Sanding drywall and joint compound is perhaps the most critical step in achieving a smooth finish. Proper sanding techniques prevent visible trowel marks, ridges, and dust.
Sanding Tips:
- Use the Right Grit: Start with medium-grit sandpaper (120-150 grit) to level out compound and then finish with fine-grit (180-220 grit) for smoothness.
- Feather Edges: Always feather the edges of your sanded areas into the surrounding wall to avoid creating visible lines.
- Sanding Motion: Use long, sweeping motions. For hand sanding, a sanding block helps maintain an even pressure.
- Check Your Work: Periodically wipe the wall with a damp cloth to reveal imperfections that might not be visible when dusty. The water highlights low spots and rough areas.
- Dust Control: This cannot be stressed enough. Wear a good quality dust mask and eye protection. Cover everything with drop cloths and consider sealing off the room with plastic sheeting. An orbital sander connected to a shop vacuum is highly recommended for dust management.
Step 6: Priming Walls: The Final Preparation
Once your walls are smooth and all dust has been meticulously removed, it’s time to prime. Priming walls is an essential step that seals the repaired areas and provides a uniform surface for the paint to adhere to. Unprimed joint compound can absorb paint differently than the surrounding drywall, leading to an uneven sheen and color.
Priming Best Practices:
- Clean the Walls: Even after sanding, a final wipe-down with a damp cloth is crucial to remove any lingering dust.
- Choose the Right Primer: Use a high-quality drywall primer or a good quality stain-blocking primer, especially if you have dark paint colors or water stains.
- Apply Evenly: Apply the primer with a roller and brush, ensuring full coverage of all repaired areas and the entire wall if necessary. Pay special attention to feathered edges.
- Allow to Dry: Let the primer dry completely according to the manufacturer’s instructions before you begin painting.
Addressing Specific Wall Issues
Plaster Repair
Older homes often feature plaster walls, which have their own set of plaster repair nuances. Plaster can crack, chip, or become brittle.
Plaster Repair Steps:
- Inspect for Loose Plaster: Gently tap areas suspected of damage. Loose plaster needs to be removed.
- Remove Loose Material: Chip away any crumbling plaster around the crack or hole until you reach solid plaster. Undercut the edges slightly to create a better key for the new material.
- Clean the Area: Remove all dust and debris.
- Apply Plaster or Joint Compound: For minor cracks, a durable patching compound or setting-type joint compound can be used. For larger repairs, consider specific plaster patching compounds or a mesh tape and joint compound technique similar to drywall repair.
- Feather and Sand: Apply in thin layers, feathering edges, and sand smooth once dry.
- Prime: Always prime plaster repairs before painting.
Dealing with Textured Walls
If you’re painting over a textured wall (like popcorn ceilings or orange peel), you have two options:
- Skim Coat: The most effective way to achieve a smooth finish over texture is by skim coating the entire surface. This requires multiple thin coats of joint compound, with sanding between each layer, to bury the texture. This is a labor-intensive process.
- Use a Thick Primer/Paint: Some very thick, high-hiding primers or textured paints can help to obscure minor textures, but they won’t create a truly smooth finish. For a perfectly smooth look, skim coating is the way to go.
Filling Holes in Drywall
Filling holes is a common part of wall preparation.
- Small Holes (up to 1 inch): Use spackling compound. Apply, let dry, lightly sand, and apply a second coat if needed.
- Medium Holes (1 inch to 6 inches): Use a drywall patch kit. These usually involve a self-adhesive mesh patch. Apply the patch, then apply joint compound over it with a taping knife, feathering the edges. You’ll likely need multiple coats to hide the patch and blend it in.
- Large Holes (over 6 inches): These require cutting out the damaged section and inserting a new piece of drywall, taping and mudding the seams. This is a more advanced drywall repair technique.
Pro Secrets for a Perfect Finish
- Work in Good Light: Always use bright lights to inspect your work. Light held at an angle (a “raking light”) is excellent for spotting imperfections.
- Feather, Feather, Feather: This is the golden rule of joint compound application. Each subsequent coat of compound should be applied with a wider knife, extending further out from the previous coat, and feathered to create a smooth transition.
- Thin Coats are Better: It’s easier to build up smooth layers with multiple thin coats of compound than to try and cover everything in one thick application.
- Patience is Key: Rushing the drying or sanding process will lead to a poor finish. Allow adequate drying time between coats.
- Don’t Over-Sand: Sanding too aggressively can create dips or remove too much compound, requiring more work.
- Clean Your Tools: Keep your knives and rollers clean between applications to avoid adding lumps or debris to your compound.
- Scrape Between Coats: Sometimes, lightly scraping high spots after a coat has dried but before sanding can make the sanding process easier.
- Inspect Before Priming: This is your last chance to catch any significant imperfections before committing to primer and paint.
Frequently Asked Questions (FAQ)
Q1: How many coats of joint compound do I typically need?
A1: For minor repairs, one or two coats might suffice. Larger cracks or areas requiring skim coating can take two to three thin coats. Always apply thin coats and allow them to dry completely between applications.
Q2: What is the best sandpaper grit for smoothing walls?
A2: For initial leveling of joint compound, use 120-150 grit. For the final smoothing before priming, 180-220 grit is ideal.
Q3: Can I skip priming after smoothing walls?
A3: No, priming walls is crucial. It seals the joint compound, which absorbs paint differently than drywall, preventing sheen differences and ensuring uniform color.
Q4: What’s the difference between spackling and joint compound?
A4: Spackling is lighter and dries faster, best for small holes. Joint compound (mud) is heavier, stronger, and shrinks less, making it better for larger repairs, seams, and skim coating.
Q5: How do I prevent dust when sanding drywall?
A5: Wear a high-quality dust mask, use drop cloths, seal off the room, and consider using an orbital sander attached to a shop vacuum for maximum dust control.
Achieving smooth walls for painting is an art that combines preparation, patience, and the right techniques. By following these pro secrets and diligently carrying out each step of wall preparation, you can transform any surface into a pristine canvas, ready for a flawless paint finish. Remember, the effort you put into smoothing your walls will be evident in the final, beautiful result.