
Yes, you can absolutely paint your kitchen cabinets! But before you grab a brush and can of paint, there’s one crucial step that separates a stunning transformation from a disappointing mess: thorough cleaning and preparation. So, what’s the best way to clean wood cabinets before painting? It involves a multi-step process that tackles grease, grime, and any lingering residues to ensure your new paint adheres beautifully and lasts for years.
Painting your kitchen cabinets can be one of the most impactful and budget-friendly ways to update your home’s look. It’s a project that many DIY enthusiasts tackle, promising a dramatic visual shift with a relatively modest investment. However, the secret to a professional-looking, durable finish lies not in the painting itself, but in the meticulous preparation beforehand. Skimping on this vital stage is a recipe for peeling paint, uneven application, and a finish that simply won’t stand the test of time.
This comprehensive guide will walk you through every step of cabinet surface prep, ensuring you degrease cabinet doors effectively, address any issues like mildew, and create the ideal foundation for primer and paint. We’ll cover everything from choosing the right kitchen cabinet cleaning solution to the best methods for removing old finish from cabinets if necessary, and the importance of sanding cabinets for paint. Let’s dive into achieving that flawless finish!
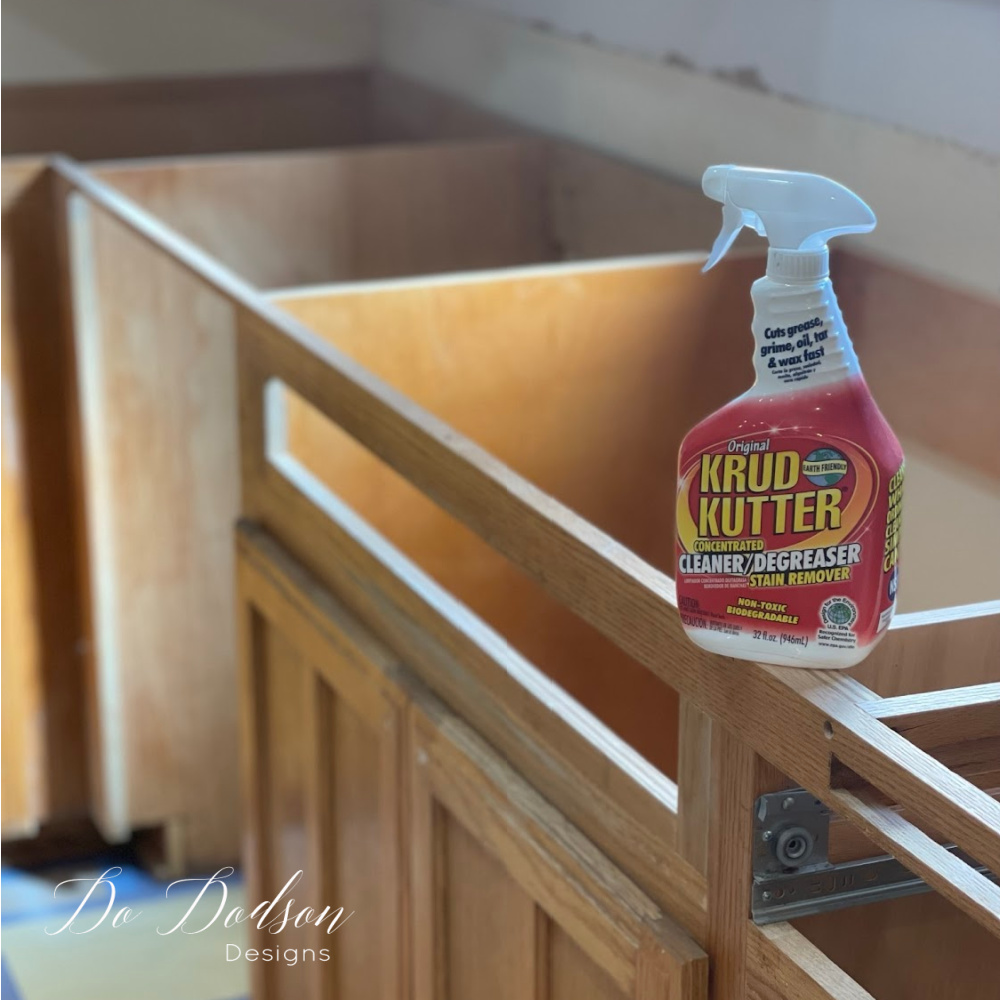
Image Source: www.dododsondesigns.com
Why Cabinet Cleaning is Non-Negotiable Before Painting
Think of painting cabinets like preparing a canvas for a masterpiece. If the canvas is dirty, dusty, or has any imperfections, the paint won’t adhere properly, and the final artwork will suffer. Cabinets, especially in the kitchen, are constantly exposed to a variety of substances that can compromise a paint job:
- Grease and Grime: Cooking splatters, food particles, and everyday touch mean cabinets are often coated in a layer of oily residue. This is a major paint adhesion killer.
- Dust and Dirt: Airborne dust settles on every surface, including your cabinets.
- Food Residue: Sticky fingerprints, spills, and crumbs can be found on cabinet surfaces.
- Previous Finishes: If your cabinets have been previously painted or varnished, these layers need to be assessed and properly prepped.
- Moisture and Mildew: In some environments, moisture can lead to mildew growth, which needs to be eradicated.
Without addressing these issues, your new paint will have nothing to grip onto. This can lead to:
- Poor Adhesion: The paint won’t stick well.
- Peeling and Chipping: Paint can easily lift off the surface.
- Uneven Finish: Grease and dirt can create blotchy areas.
- Dimpled or Bubbled Paint: Trapped moisture or oils can cause surface defects.
- Reduced Durability: The paint job won’t last as long.
Therefore, mastering cabinet surface prep is paramount for a successful cabinet painting project.
Step 1: The Initial Clean – Removing the Surface Grime
Before you can truly degrease cabinet doors or tackle any more stubborn residues, a good initial clean is essential. This removes the loose dirt and dust, making your subsequent cleaning steps more effective.
What You’ll Need:
- Soft cloths or microfiber towels
- Warm water
- Mild dish soap
- Bucket
The Process:
- Remove Cabinet Doors and Drawers: This is the ideal time to detach all cabinet doors and drawer fronts. This allows you to work on a flat surface and reach all edges and corners more easily. Label each door and its corresponding cabinet opening with painter’s tape and a marker (e.g., “Upper Left,” “Drawer 1”) to ensure you reassemble everything correctly.
- Wipe Down with Soapy Water: Mix a few drops of mild dish soap into warm water. Dampen a soft cloth with the solution – you don’t want it dripping wet.
- Wipe All Surfaces: Gently wipe down the entire surface of each cabinet door, drawer front, and the cabinet frames. Pay attention to corners, edges, and any areas with visible grime.
- Rinse Thoroughly: Using a separate clean cloth dampened with plain warm water, wipe down all surfaces again to remove any soap residue. Soap left behind can also prevent paint from adhering.
- Dry Completely: Use a dry, soft cloth to thoroughly dry all surfaces. Ensure no moisture remains, especially in any crevices.
This initial step gets rid of the most superficial dirt and dust, setting the stage for more intensive cleaning.
Step 2: Deep Cleaning and Degreasing – The Key to Adhesion
Now it’s time to get serious about tackling the real enemies of a good paint job: grease and grime. This is where you truly degrease cabinet doors and prepare the surface for a lasting bond.
Option 1: The Power of TSP (Trisodium Phosphate)
For heavily soiled or greasy cabinets, TSP is a time-tested and highly effective cleaner. It’s a strong alkaline cleaner that excels at breaking down grease and grime.
What is TSP and Why Use It?
TSP is a powerful cleaning agent. While it’s excellent for deep cleaning, it’s also caustic and requires careful handling. It’s particularly effective at degreasing cabinet doors that have seen years of kitchen activity.
What You’ll Need:
- TSP cleaner (available at hardware stores)
- Warm water
- Bucket
- Stiff scrub brush or non-abrasive scrubbing pad
- Clean cloths or sponges
- Rubber gloves
- Eye protection
- Face mask (optional, but recommended)
The TSP Cleaning Process:
- Mix the Solution: Follow the manufacturer’s instructions for mixing TSP with warm water. Typically, it’s a ratio like 1/2 cup TSP to 1 gallon of warm water. Always wear rubber gloves and eye protection when working with TSP.
- Apply and Scrub: Dip your scrub brush or sponge into the TSP solution. Work in manageable sections, scrubbing the cabinet surfaces. You’ll likely see the grease and grime lift off.
- Rinse Repeatedly: This is a crucial step. You must thoroughly rinse away all TSP residue. Use a clean sponge or cloth dampened with plain water. Rinse each section multiple times. TSP residue will interfere with paint adhesion.
- Dry Thoroughly: Wipe down all surfaces with a dry cloth to remove any remaining moisture.
Important Note on TSP: In some regions, TSP has been phased out due to environmental concerns. Check local regulations and availability. If TSP is unavailable or you prefer a less caustic option, several excellent alternatives are available.
Option 2: The Versatile Kitchen Cabinet Cleaning Solution (Alternative)
If TSP isn’t an option or you prefer a gentler approach that still packs a punch, a good homemade or commercial kitchen cabinet cleaning solution can work wonders.
What You’ll Need:
- White vinegar
- Warm water
- Mild dish soap (like Dawn)
- Baking soda (optional, for tougher spots)
- Bucket
- Soft cloths or sponges
- Spray bottle (optional)
The Alternative Cleaning Process:
- Vinegar and Water Solution: Mix equal parts white vinegar and warm water in a bucket or spray bottle. Vinegar is a mild acid that helps cut through grease and also has mild disinfectant properties.
- Add a Drop of Dish Soap: For extra degreasing power, add a tiny amount (just a drop or two) of mild dish soap to the vinegar and water mixture.
- Apply and Scrub: Dampen a cloth or sponge with the solution and wipe down the cabinet surfaces. For tougher spots, you can use a non-abrasive scrubbing pad.
- Tackle Stubborn Grime: For very stubborn greasy areas, you can make a paste of baking soda and water. Apply the paste to the spot, let it sit for a few minutes, then gently scrub with a damp cloth. Baking soda is a mild abrasive that can help lift grime without scratching.
- Rinse Thoroughly: Just as with TSP, rinsing is critical. Use a clean cloth dampened with plain water to wipe away all the cleaning solution. Repeat this rinsing step to ensure no residue remains.
- Dry Completely: Dry all surfaces with a clean, soft cloth.
Cabinet Cleaning Hacks:
- Use a Squeegee: After rinsing, a small window squeegee can help remove excess water quickly, reducing drying time and streaks.
- Microfiber is Your Friend: Microfiber cloths are excellent at trapping dirt and grease and are less likely to leave lint behind.
- Work in Batches: Don’t try to clean all cabinets at once. Clean a few doors or a section of the frames at a time to keep your cleaning solution effective and prevent surfaces from drying with cleaner on them.
Step 3: Addressing Mildew and Stains
If your cabinets are in a humid environment, or if you’ve discovered any discoloration, you might need to address potential mildew or tough stains. A mildew remover for cabinets is essential in these cases.
What You’ll Need:
- Bleach (chlorine bleach)
- Water
- Bucket
- Soft cloths or sponges
- Rubber gloves
- Eye protection
The Mildew Removal Process:
- Mix a Bleach Solution: Mix 1 part bleach with 3 parts water in a bucket. Ensure good ventilation and wear rubber gloves and eye protection.
- Apply to Affected Areas: Dampen a cloth or sponge with the bleach solution and gently wipe the mildewed areas.
- Let it Sit (Briefly): Allow the solution to sit on the mildew for a few minutes to kill the spores. Do not let it dry.
- Scrub Gently (if needed): If the mildew is stubborn, gently scrub with a soft brush or non-abrasive pad.
- Rinse Thoroughly: Rinse the area completely with a clean, water-dampened cloth. Repeat rinsing to ensure no bleach residue remains.
- Dry Completely: Thoroughly dry the cabinets.
Important Cautions:
- Never mix bleach with ammonia or other cleaners, as this can create toxic fumes.
- Test the bleach solution in an inconspicuous area first to ensure it doesn’t damage the cabinet finish.
- If the mildew has penetrated deeply into the wood, you may need to consider more aggressive cleaning or even sanding.
Step 4: Removing Old Finish (Optional, but Sometimes Necessary)
If your cabinets have a thick, peeling, or damaged old finish (paint or varnish), you may need to remove old finish from cabinets before proceeding with cleaning and painting. This is a more labor-intensive step but crucial for a smooth, professional result.
What You’ll Need:
- Chemical paint stripper (follow product instructions carefully)
- Putty knife or scraper
- Steel wool or fine-grit sandpaper
- Mineral spirits or denatured alcohol (for cleanup)
- Old cloths or rags
- Drop cloths
- Gloves, eye protection, and a respirator mask
The Finish Removal Process:
- Protect Your Workspace: Lay down drop cloths to protect your floor and surrounding areas. Ensure good ventilation and wear appropriate protective gear.
- Apply Paint Stripper: Apply the chemical stripper according to the manufacturer’s instructions. Typically, you’ll use a brush to apply a thick, even layer.
- Allow Stripper to Work: Let the stripper sit for the recommended time. You’ll see the old finish bubble and lift.
- Scrape Away the Old Finish: Use a putty knife or scraper to gently scrape away the softened finish. Work in the direction of the wood grain.
- Stubborn Spots: For stubborn areas, you might need to reapply the stripper or use steel wool or fine-grit sandpaper.
- Clean Up Residue: Once most of the old finish is removed, clean the cabinets with mineral spirits or denatured alcohol according to the stripper’s instructions to remove any remaining stripper residue.
- Rinse and Dry: Wipe down with a clean, damp cloth and allow the cabinets to dry completely.
Important Note: If your cabinets are laminate or veneer, be extremely cautious with strippers and aggressive scraping, as you can easily damage the underlying material.
Step 5: Sanding Cabinets for Paint – Creating the Perfect Surface
Sanding is arguably the most critical step in cabinet surface prep. It doesn’t just smooth the surface; it creates a “tooth” for the primer and paint to adhere to. This process ensures your paint job won’t peel or chip. We’ll cover prepping cabinets for primer here, as sanding is a key part of that.
Why is Sanding Important?
- Adhesion: Sanding creates microscopic scratches that give the primer and paint something to grip.
- Smoothness: It levels out any imperfections, bumps, or minor damage, leading to a smoother finished look.
- Old Finish Removal (Partial): Even if you don’t strip the old finish entirely, light sanding can help scuff it up for better adhesion.
What You’ll Need:
- Orbital sander (optional, but recommended for speed and evenness)
- Sanding sponges (great for edges and details)
- Sandpaper in various grits:
- 120-150 grit (for initial scuff-sanding or if there are minor imperfections)
- 220 grit (for a smoother finish before priming)
- Tack cloth or microfiber cloths
- Vacuum cleaner with a brush attachment
The Sanding Process:
- Start with the Right Grit: For most cabinet painting projects, you’ll start with a medium grit sandpaper, like 120 or 150 grit. If your cabinets are already quite smooth and in good condition, you might even start with 150 grit. If there are minor imperfections or you’re lightly scuffing an old finish, 120 grit is good.
- Sand All Surfaces: Whether using an orbital sander or sanding by hand with a sanding block or sponge, sand all surfaces of the cabinet doors, drawer fronts, and frames. Work in the direction of the wood grain.
- Focus on Edges and Details: Use sanding sponges to get into corners and along the edges of doors and drawers.
- Smooth with Finer Grit: After the initial sanding, switch to a finer grit sandpaper, typically 220 grit. This will further smooth the surface and remove any deeper scratches left by the coarser grit. The goal is a silky-smooth surface that feels good to the touch.
- Clean Up Dust Meticulously: This is absolutely critical. Use a vacuum cleaner with a brush attachment to remove as much dust as possible. Then, wipe down all surfaces with a tack cloth or a clean, slightly damp microfiber cloth. Dust left behind will ruin your paint finish. Repeat the tack cloth wipe down.
Sanding Cabinets for Paint Tips:
- Don’t Over-Sand: You’re not trying to remove all the old finish or significantly alter the shape of the cabinets. You’re just creating a uniform, slightly roughened surface.
- Even Pressure: Apply even pressure to avoid creating divots or uneven patches.
- Check for Smoothness: Run your hand over the surface. If you feel any roughness, sand it down.
Step 6: Final Wipe Down and Inspection
Before you can even think about applying primer, one last thorough cleaning is in order.
What You’ll Need:
- Tack cloths
- Clean, lint-free cloths
The Final Prep:
- Tack Cloth Wipe Down: Use tack cloths to go over every single surface one last time. Tack cloths are designed to pick up the finest dust particles that even vacuuming might miss.
- Inspect for Imperfections: Carefully inspect all surfaces. Look for any remaining dust, grease spots, or areas you might have missed during sanding. Address any issues before moving on.
This meticulous final wipe-down ensures that when you apply your primer, it adheres to a perfectly clean, dust-free surface.
What is the Best Way to Clean Wood Cabinets Before Painting?
The best way is a multi-step approach that includes:
- Initial Wash: With mild soap and water to remove surface dirt.
- Deep Degreasing: Using a strong cleaner like TSP or a vinegar-based solution to cut through grease.
- Rinsing: Thoroughly rinsing away all cleaning residue.
- Drying: Ensuring surfaces are completely dry.
- Sanding: Creating a smooth, adherent surface.
- Dust Removal: Meticulously removing all sanding dust.
This comprehensive process is key to prepping cabinets for primer and ultimately, a flawless paint finish.
Frequently Asked Questions (FAQ)
Q: Do I really need to remove the cabinet doors before painting?
A: While you can paint cabinets with the doors on, removing them makes the job significantly easier and allows for a much more thorough and professional finish. You can paint the doors and drawer fronts flat, ensuring even coverage without drips, and you can access all the cabinet box interiors and edges much better.
Q: What kind of sandpaper should I use for cabinets?
A: For most wood cabinets, start with 120-150 grit sandpaper to scuff the surface and remove any minor imperfections. Then, follow up with 220 grit sandpaper for a smoother finish that’s ideal for primer adhesion.
Q: Can I skip the sanding step?
A: No, skipping the sanding step is one of the most common mistakes people make. Sanding creates the necessary “tooth” for the primer and paint to adhere to. Without it, your paint is likely to peel or chip over time.
Q: What’s the best way to deal with stubborn grease on kitchen cabinets?
A: For stubborn grease, a strong degreaser like TSP (Trisodium Phosphate) mixed with water is very effective. Alternatively, a solution of equal parts white vinegar and warm water with a drop of dish soap can also work well. Always rinse thoroughly after using any cleaner.
Q: My cabinets have a laminate finish. Can I still paint them?
A: Yes, you can paint laminate cabinets, but the prep is even more crucial. Ensure the surface is very clean and then scrupulously sanded to create a good grip for the primer. Using a high-quality bonding primer is essential for laminate.
Q: How long should I wait between cleaning and sanding?
A: Ensure the cabinets are completely dry after cleaning before you begin sanding. Any residual moisture can clog your sandpaper and create a less effective surface.
Q: What are some good cabinet cleaning hacks?
A: Some effective cabinet cleaning hacks include using a squeegee after rinsing to remove excess water, employing microfiber cloths for their superior cleaning power, and working in smaller batches to keep your cleaning solutions effective.
Conclusion: Prep is Paramount for Perfect Cabinets
Painting your kitchen cabinets is a rewarding project that can dramatically improve your home’s aesthetic. However, the success of your paint job hinges entirely on the quality of your preparation. By diligently following these steps – from thorough cleaning and degreasing to meticulous sanding and dust removal – you are laying the foundation for a durable, beautiful, and flawless painted finish that you can be proud of for years to come. Remember, the time invested in proper prep work is the most critical factor in achieving professional-looking results. Happy painting!