
Have you ever stared up at your popcorn ceiling and wondered how to make it look fresh and new? Painting a textured ceiling can feel like a big project. You worry about the paint dripping or not covering those bumps just right. Many people struggle to find the perfect paint that hides imperfections without making the texture look worse.
Choosing the wrong paint can lead to frustrating touch-ups or a patchy finish. It is important to pick a paint that clings well and flows smoothly over all those peaks and valleys. Don’t let your ceiling bring down the look of your whole room!
This guide will break down everything you need to know. We will show you the best types of paint for textured surfaces and give you simple tips for a professional-looking result. Get ready to transform that bumpy ceiling with confidence. Keep reading to discover the secrets to a flawless painted texture!
Top Ceiling Paint For Textured Ceiling Recommendations
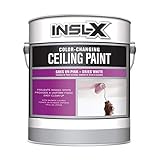
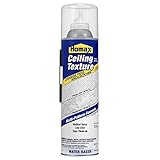
- Acrylic ceiling paint formulated with a disappearing pink color-change technology.
- Easy to apply – helps prevent missed spots.
- For smooth or textured ceilings.
- Quick drying: recoat in as little as two hours.
- Self-priming paint for ceilings.


- KILZ Stainblocking Ceiling Paint is a unique combination of stainblocking technology and a coverage/dry time indicator.
- This ceiling paint rolls on with a subtle pink color that dries to white in under an hour.
- Dries to touch in 1 hour. Recoat in 2 hours. For use on all interior ceilings.Use soap and water to clean hands, tools and spill. Multiple coats may be required for complete hide. For maximum stainblocking recoat after 4 hours.
- Spatter-resistant formula rolls on easily with low odor making it a great choice for any room. This paint covers approximately 250 square feet per gallon on porous surfaces and up to 400 square feet per gallon on smooth, non-porous surfaces.
- Apply with a quality nylon/polyester brush or a 3/8"-1/2" nap roller depending on surface texture. Can also be applied with a sprayer. See product packaging for complete application instructions. KILZ Stainblocking Ceiling Paint offers excellent coverage for minor to moderate staining. For severe stains try a KILZ Primer such a KILZ Original, KILZ Original Low Odor or KILZ 3 Premium Primer.
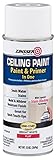
- Ceiling spray paint blocks stains and primes interior surfaces for quick touch ups
- Low odor formula is perfect for use as an all-purpose interior paint primer
- Dries to the touch in 30 minutes and covers up to 15 sq. ft. per can
- Mold and mildew resistant finish provides long lasting performance on indoor ceilings
- Flat white finish will not yellow over time and matches brush or roller applied Zinsser Ceiling Paint
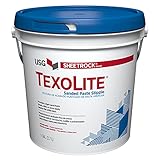
- Sheetrock Brand TexoLite Sanded Paste Stipple produces a light, sand-textured finish on interior surfaces of gypsum, drywall, plaster, concrete, wood and other materials. Applies easily with brush, roller or spray equipment, creating swirl patterns and other designs Conceals minor surface defects Dries to a hard, durable, natural white finish Fast, low-cost application with coverage up to 200 sq. ft. per gallon
- "SHEETROCK" WALL & CEILING TEXTURE PAINT
- Conceals minor surface defects
- Spray, brush or use roller
- Covers up to 200 sq. ft. per gallon
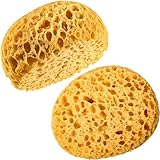
- Function: the knockdown sponge is intended for small repairs and areas that need textured, which blends well with original texture. Note: The sponge is vacuum-packed. Please wet the sponge to expand it upon receiving the sponge
- Drywall repair helper: if you are looking for knockdown effect, this texture patch sponge allows you to finish drywall repair by yourself, which will save you time on asking for help and bring you a sense of achievement
- Convenient to use: with this texture sponge, you don't need to worry about making a mess; Quick and easy instructions are provided for the beginners
- Wide application: this texture patch sponge is a nice match to light, medium, and heavy knockdown texture, suitable for construction punch-out, apartment maintenance crews, house flipper, handymen
- Washable and reusable: this knockdown texture tool is made of porous sponge, easy to wash, durable for your next use

- Ready-mixed, grab-n-go white ceiling paint
- Excellent hide to brighten a ceiling that has dulled over time; Covers approximately 300 - 400 sq. ft. per gallon
- Durable flat finish that minimizes surface imperfections
- Spatter resistance for easier ceiling application
- Use on properly prepared or previously painted drywall, plaster, masonry, wood or metal materials
- Aerosol Ceiling Texture, Orange Peel & Knockdown can be used to make small repairs to damaged textured ceilings
- Vertical spray tip provides precision control of orange peel and knockdown textures
- Water-based formula is low odor and cleans up easily with water
- Paintable and sand able
- 20 oz. covers up to 80 sq. ft
Choosing the Best Paint for Your Textured Ceiling: A Complete Buying Guide
Textured ceilings, often called popcorn or stucco, add character to a room. However, painting them can be tricky. The rough surface soaks up paint fast and can look blotchy if you use the wrong kind. This guide helps you find the perfect paint to make your textured ceiling look smooth and fresh.
1. Key Features to Look For
When shopping for ceiling paint, you need a product designed to handle the uneven surface.
- **High-Build or Low-Viscosity Formula:** Textured surfaces need paint that can fill in the small dips and bumps without dripping. Look for paint labeled as “high-build” or one that is slightly thicker than standard wall paint. This thicker formula helps the paint stick better to the peaks of the texture.
- **Flat/Matte Finish:** Glossy or satin paints show every single imperfection on a textured surface. Always choose a flat or matte finish. A flat finish hides shadows and texture variations much better, giving a cleaner look.
- **Primer Included (Self-Priming):** Textured ceilings, especially older ones, are often very porous. A self-priming paint saves you a major step. It seals the surface so the topcoat goes on evenly.
- **Good Hide/Coverage:** Because you are painting a rough surface, you need excellent coverage. Look for paints with high Titanium Dioxide (the ingredient that makes paint white and opaque). This means fewer coats are necessary.
2. Important Materials and Ingredients
The type of paint base matters a lot for ceiling projects.
Latex vs. Oil-Based Paints
For ceilings, latex (water-based) paint is almost always the best choice.
- Latex paint dries faster. This is great because you can apply a second coat sooner.
- It has low odor, which is important since you are working directly overhead.
- Modern acrylic latex formulas adhere very well to ceiling materials.
Oil-based paints are durable but they yellow over time, have very strong fumes, and clean up is messy. Avoid them for standard ceiling painting.
Thickeners
Check the label for ingredients that help with texture. Some premium paints include special additives that slightly thicken the paint upon application. This helps the paint “hug” the peaks of the texture instead of sliding off into the valleys.
3. Factors That Improve or Reduce Quality
What you choose directly impacts the final look.
Factors That Improve Quality:
- **Higher Solids Content:** Paint quality often relates to the percentage of actual solids (pigment and binder) in the can. Higher solids mean better coverage and durability.
- **Mold/Mildew Resistance:** If your ceiling is in a bathroom or basement, choose a paint with added mildewcides. This keeps the texture clean and white longer.
- **Washability:** While you rarely wash a ceiling, a paint that resists scuffs and minor marks is a bonus.
Factors That Reduce Quality (What to Avoid):
- **Using Cheap, Thin Paint:** This is the biggest mistake. Thin paint runs, requires three or four coats, and highlights every bump in the texture. You waste time and money.
- **High Sheen (Glossy) Finishes:** Glossy paint acts like a mirror. It reflects light directly off the peaks of the texture, making the texture stand out sharply.
4. User Experience and Use Cases
How the paint feels to use and where you use it matters.
User Experience During Application
For textured ceilings, consider using a **thick nap roller cover (3/4 inch or 1 inch)**. A thick nap roller holds more paint and transfers it more effectively to the deep grooves of the texture. Look for paints that roll on smoothly without excessive splatter. If the paint is too thick, it might tear the texture when you roll it on.
Best Use Cases:
- **Old Popcorn Ceilings:** Use a high-quality, self-priming flat latex. This is the most common need.
- **Stucco or Knockdown Textures:** These are less deep than popcorn. You can sometimes use a high-quality standard flat ceiling paint, but a slightly thicker formula still provides a better finish.
- **Dark to Light Color Changes:** If you are going from a dark color to white, invest in a dedicated high-hiding primer first, then follow up with your chosen flat ceiling paint.
Ceiling Paint for Textured Ceiling: 10 Frequently Asked Questions (FAQ)
Q: Do I have to use a special roller for textured ceilings?
A: Yes. You need a roller with a thick nap, usually 3/4 inch to 1 inch thick. This helps push the paint deep into the texture.
Q: Can I use regular wall paint on my textured ceiling?
A: You can, but it often does not cover well. Ceiling-specific paints are formulated to be thicker and hide better on rough surfaces.
Q: What finish is best for hiding texture?
A: A flat or matte finish is the best choice. Glossy finishes show every bump and imperfection.
Q: Should I prime a popcorn ceiling before painting?
A: It is highly recommended. Old, dry popcorn ceilings soak up paint quickly. A dedicated primer seals the surface and ensures the topcoat looks even.
Q: Will paint cause my popcorn ceiling to fall down?
A: If the ceiling is old and the texture is already loose, heavy, wet paint can cause it to detach. Use lighter coats and avoid soaking the texture too much.
Q: How many coats of paint do I need?
A: Most textured ceilings require two good coats of high-quality paint for uniform color and coverage.
Q: Is it okay if the paint runs a little while I am applying it?
A: A little bit of slight running might happen, but heavy dripping means your paint is too thin or you are pressing too hard with the roller. Stop and let the area dry before trying again.
Q: What if my ceiling is already painted? Can I paint over it?
A: Yes, you can paint over existing paint. Just clean the surface first. If the old paint is glossy, lightly scuffing it with fine sandpaper helps the new paint stick better.
Q: Which color should I use on a textured ceiling?
A: Most people use white or a very light off-white. Dark colors make the texture look heavier and lower the ceiling height visually.
Q: How long does ceiling paint take to dry?
A: Latex ceiling paints usually dry to the touch in 1 to 2 hours. You should wait at least 4 hours, or check the can instructions, before applying a second coat.