
Can you hang art on a concrete wall? Absolutely! Hanging art on a concrete wall is entirely possible and can be done securely and easily with the right tools and techniques. This guide will walk you through everything you need to know to confidently mount your favorite pieces, from choosing the right fasteners to ensuring your artwork stays put for years to come.
Concrete walls, often found in basements, garages, and modern architectural designs, present a unique challenge for art display. Unlike drywall, concrete is dense and hard, requiring specialized methods for drilling and fastening. However, with a bit of preparation and the correct approach, mounting artwork on concrete can be a straightforward and rewarding DIY project. We’ll cover the best methods for hanging heavy art concrete situations, explore various concrete wall fasteners, and discuss the effectiveness of different picture hanging systems concrete options.
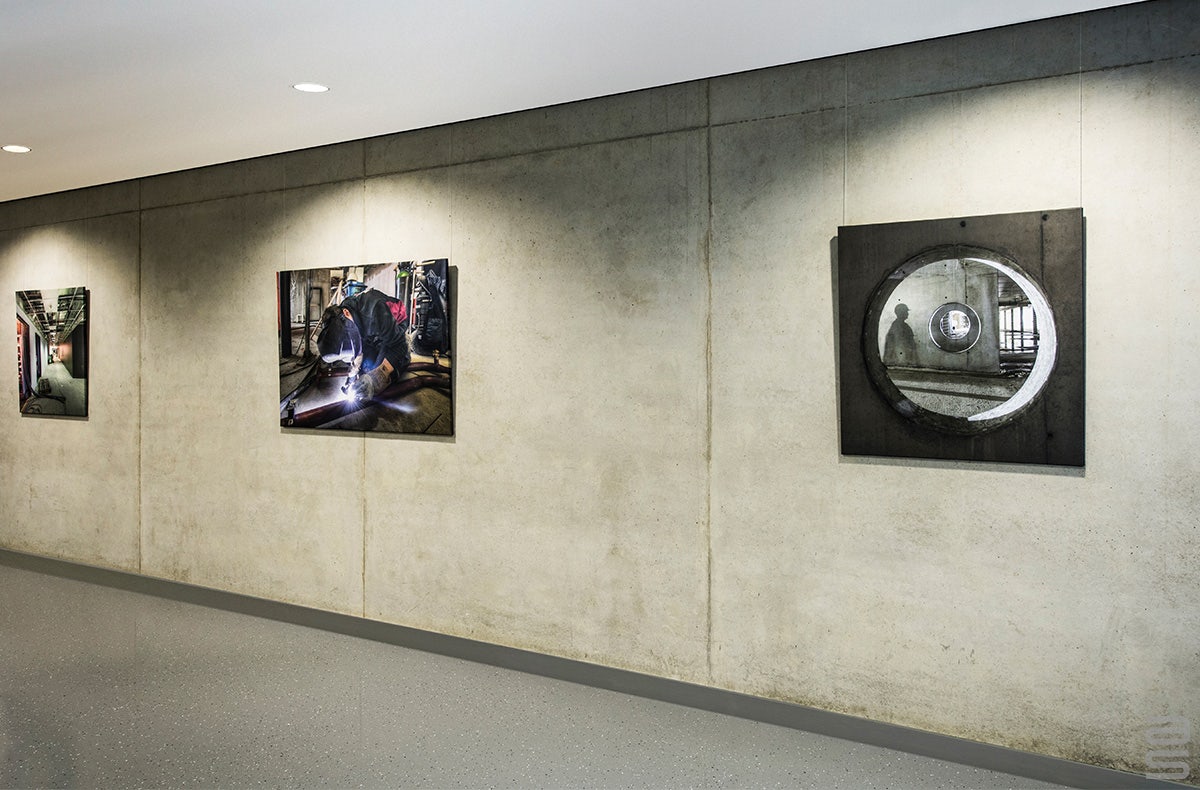
Image Source: www.ashanging.com
Preparing for Your Concrete Canvas
Before you pick up a drill, a little preparation goes a long way. Think of this as setting the stage for your beautiful artwork.
Selecting the Perfect Spot
Consider the following when choosing where to hang your art:
- Lighting: Natural light can be beautiful, but direct sunlight can fade artwork over time. Consider artificial lighting that highlights your piece without causing damage.
- Wall Surface: Ensure the concrete wall is clean and free of loose debris or crumbling sections.
- Humidity: Basements and garages can be prone to humidity. If this is a concern, consider how it might affect your artwork and the mounting hardware over time.
- Placement: Think about the overall aesthetic and how the piece will fit with your existing decor.
Gathering Your Tools and Materials
Having everything ready before you start makes the process much smoother. Here’s a list of essential items:
Essential Tools
- Drill: A hammer drill is highly recommended for drilling into concrete. A regular drill might struggle and overheat.
- Drill Bits: You’ll need specific best drill bits for concrete. Carbide-tipped masonry bits are designed for this purpose. The diameter of the bit should match the diameter of your chosen wall plug or anchor.
- Measuring Tape: For accurate placement.
- Level: To ensure your artwork hangs straight.
- Pencil: For marking drill points.
- Safety Glasses: Crucial for protecting your eyes from dust and debris.
- Dust Mask: Concrete dust can be harmful if inhaled.
- Vacuum Cleaner or Dustpan and Brush: For cleaning up dust after drilling.
- Hammer: To gently tap wall plugs into place.
Essential Fasteners and Hardware
The type of fasteners you use will depend on the weight of your artwork and the type of concrete.
- Concrete Wall Anchors (or Wall Plugs Concrete): These are the most common and reliable solution for mounting artwork on concrete. They expand within the drilled hole to create a secure grip.
- Screws: Choose screws that are compatible with your anchors and suitable for the weight of your art.
- Picture Hanging Systems Concrete: For lighter to medium-weight items, specialized picture hanging systems designed for hard surfaces might be an option.
- Adhesive for Hanging Art on Concrete: While not ideal for heavier pieces, some strong adhesives can work for very lightweight decorations. We’ll explore this further.
Deciphering Concrete Wall Anchors: Your Primary Fastening Solution
Concrete wall anchors, also known as wall plugs concrete, are your best friends when it comes to securely hanging art on concrete walls. They work by creating a solid point of attachment within the concrete itself.
Types of Concrete Wall Anchors
There are several types of anchors, each with its own advantages:
- Plastic Expansion Anchors (Sleeve Anchors): These are common and affordable. Made of nylon or plastic, they insert into the pre-drilled hole, and the screw you drive into them expands the anchor, creating a tight fit. They are good for lighter to medium-weight items.
- Metal Expansion Anchors (Wedge Anchors): These are much stronger and suitable for hanging heavy art concrete applications. They consist of a bolt with a sleeve and a wedge at the end. As you tighten the bolt, the wedge is pulled up, expanding the sleeve against the concrete.
- Self-Drilling Concrete Anchors (Drilling into concrete walls): These unique anchors are designed to be screwed directly into the concrete. They have a hardened metal tip that drills its own pilot hole as you screw them in. While convenient, they are typically best for lighter loads and may not be as secure as expansion anchors for heavier pieces.
Choosing the Right Anchor
The choice of anchor depends primarily on the weight of your artwork:
| Artwork Weight | Recommended Anchor Type | Example Fastener |
|---|---|---|
| Lightweight (e.g., unframed prints, small decor) | Plastic Expansion Anchor, Self-Drilling Anchor | Small nylon anchor with a screw, small self-driller |
| Medium Weight (e.g., framed prints, canvas art) | Plastic Expansion Anchor, Metal Sleeve Anchor | Medium nylon anchor with a screw, medium metal sleeve anchor |
| Heavyweight (e.g., large framed paintings, mirrors) | Metal Expansion Anchor (Wedge Anchor) | Heavy-duty metal wedge anchor with a bolt |
Crucially, always check the weight rating of the specific anchor you choose. Manufacturers provide this information, and it’s essential to exceed the anchor’s capacity.
The Art of Drilling into Concrete Walls
Drilling into concrete walls requires the right technique and the correct drill bits to avoid damaging your drill or the wall.
Selecting the Best Drill Bits for Concrete
This is where best drill bits for concrete become essential.
- Masonry Bits: These bits have a hardened carbide tip that is designed to bore through hard materials like concrete, brick, and stone. They typically have a fluted design to help clear dust.
- Hammer Drill Function: Most modern drills have a “hammer” setting. This setting combines rotation with percussive blows, making drilling into concrete walls significantly faster and easier.
The Drilling Process: Step-by-Step
- Mark Your Spot: Use a pencil to mark the exact point where you want to drill.
- Select the Right Bit Size: Choose a masonry drill bit that matches the diameter of your chosen concrete wall anchor or screw. The anchor packaging will specify the required drill bit size.
- Set Up Your Drill:
- If using a hammer drill, switch it to the hammer drill setting.
- Insert the masonry bit securely into the drill chuck.
- Start Drilling:
- Hold the drill perpendicular to the wall.
- Begin drilling at a slow speed to create a small indentation. This prevents the bit from wandering.
- Once you have an indentation, increase the speed and apply firm, steady pressure.
- Let the hammer drill do the work. Avoid excessive force, as this can overheat the drill or break the bit.
- Periodically pull the drill bit out of the hole to clear out concrete dust. This also helps prevent overheating.
- Drill to the Correct Depth: Drill the hole to the depth specified by the anchor manufacturer. You can mark the correct depth on your drill bit with a piece of tape.
- Clean the Hole: Thoroughly clean the drilled hole. Use a vacuum cleaner to suck out all the dust. A clean hole is crucial for the anchor to grip effectively.
Installing Your Concrete Wall Fasteners
Once you have your holes drilled and cleaned, it’s time to install the concrete wall fasteners.
Installing Plastic Expansion Anchors
- Insert the Anchor: Gently push or tap the plastic anchor into the drilled hole. It should fit snugly. If it’s too tight, the hole might be slightly too small. If it’s too loose, the hole might be too large.
- Drive the Screw: Place the object you are hanging against the wall, aligning the pre-drilled hole in the object with the anchor. Insert the appropriate screw through the object and into the anchor.
- Tighten Securely: Tighten the screw with your drill or a screwdriver until the anchor expands and the object is held firmly against the wall. Be careful not to overtighten, which can strip the anchor or damage your artwork.
Installing Metal Expansion Anchors (Wedge Anchors)
- Insert the Anchor: Insert the wedge anchor into the pre-drilled hole. The sleeve should slide in easily.
- Secure the Artwork: Place your artwork against the wall, aligning its mounting holes with the anchor’s bolt.
- Tighten the Bolt: Use a wrench to tighten the bolt. As you tighten, the bolt will pull the wedge upwards, expanding the sleeve against the concrete. Continue tightening until the artwork is secure and the anchor feels firm.
Installing Self-Drilling Concrete Anchors
- Position the Anchor: Place the self-drilling anchor directly into the desired spot on the concrete wall.
- Drill and Drive: Use a drill with a Phillips or hex head bit (depending on the anchor type) to drive the anchor into the concrete. The anchor will drill its own pilot hole and then thread itself into the concrete.
- Attach Artwork: Once the anchor is flush with the wall, you can screw your artwork directly into the anchor’s head.
Exploring Picture Hanging Systems for Concrete
While traditional anchors and screws are robust, there are other picture hanging systems concrete solutions for specific needs.
Wire and Hook Systems
For lighter pieces, you might consider heavy-duty wire and hook systems designed for masonry. These often involve specialized screws or anchors that can support the weight of the wire and the artwork. Ensure the system you choose is rated for the weight of your piece.
Specialized Adhesives
While not typically recommended for heavy items, some very strong industrial-strength adhesives can hold lightweight decorative items on concrete.
-
Considerations:
- Weight: Only suitable for very light items (e.g., small foam board prints, lightweight decorative objects).
- Surface Preparation: The concrete surface must be perfectly clean, dry, and smooth for the adhesive to bond effectively.
- Permanence: Many strong adhesives are semi-permanent or permanent, making removal difficult and potentially damaging the concrete or the artwork.
- Environmental Factors: Extreme temperatures or humidity can affect adhesive performance.
-
When to Use: Perhaps for a small, lightweight, unframed print in a low-traffic area where drilling is not an option. It’s always best to test the adhesive on an inconspicuous area first.
Hanging Heavy Art on Concrete: Special Considerations
When you’re hanging heavy art concrete walls, safety and security are paramount.
Reinforce Your Mounting Points
- Use Multiple Anchors: Distribute the weight by using two or more anchors for a single hanging point if the artwork’s hanging hardware allows.
- Choose Heavy-Duty Hardware: Opt for the strongest anchors and screws available that are appropriate for your artwork’s weight. Metal expansion anchors are generally the best choice for significant weight.
- Secure Frame to Concrete: For frames with D-rings or wire, ensure these are securely attached to the frame itself. If the frame’s hardware seems flimsy, consider reinforcing it with stronger screws or brackets before hanging.
Professional Consultation
If you are dealing with extremely heavy or valuable artwork, or if you are unsure about any aspect of the process, it’s always wise to consult with a professional art installer or a handyman experienced with concrete work. They can assess your specific situation and recommend the most secure mounting solutions.
Frequently Asked Questions (FAQ)
Q1: Can I use regular drywall anchors on a concrete wall?
A1: No, drywall anchors are not designed for concrete. They will not grip the dense material and will likely pull out, causing your artwork to fall. You must use concrete wall anchors.
Q2: Do I need a special drill for concrete?
A2: A hammer drill is highly recommended for drilling into concrete walls. While a regular drill might eventually get through, it will be slow, difficult, and can overheat. A hammer drill uses percussive blows to break through the concrete more effectively.
Q3: What are the best drill bits for concrete?
A3: The best drill bits for concrete are carbide-tipped masonry bits. They are specifically designed to cut through hard materials like concrete and brick.
Q4: How do I know which size anchor to use?
A4: The packaging for your concrete wall anchors will specify the required drill bit diameter. Always match your drill bit size to the anchor’s recommendation.
Q5: Can I hang very heavy art on concrete using only adhesive?
A5: It is strongly discouraged. While some industrial adhesives exist, they are generally not reliable or safe for hanging heavy art concrete walls. Specialized anchors are the only secure method for heavier pieces.
Q6: What if the concrete is very old or crumbly?
A6: If the concrete appears crumbly or is in poor condition, standard anchors may not hold securely. You might need to use larger anchors, longer screws, or consider a different wall surface if possible. In severe cases, professional advice might be necessary.
Q7: How do I remove an anchor from concrete?
A7: For plastic anchors, you can often unscrew the screw and then grip the anchor with pliers to pull it out. For metal anchors, you might need to cut the bolt flush with the wall and leave the anchor in place, or carefully chisel it out.
Q8: Are there any picture hanging systems concrete specific that don’t require drilling?
A8: For lightweight decorative items, some heavy-duty adhesive hooks or strips designed for smooth surfaces might work, but they are not typically suitable for framed art or heavier items. For secure mounting artwork on concrete, drilling and using proper concrete wall fasteners is the most reliable approach.
By following these detailed steps and choosing the right concrete wall anchors and best drill bits for concrete, you can confidently hang your art on concrete walls, ensuring it remains securely in place for years to enjoy. Remember to always prioritize safety and select the appropriate concrete wall fasteners for the weight of your artwork.