
Does your basement ceiling look dull, dark, or just plain unfinished? You are not alone! Many homeowners face the challenge of painting this often-neglected space. Choosing the right paint for a basement ceiling is tricky. Basements can be damp, and some paints just do not hold up against moisture or hide imperfections well. You want a ceiling that brightens the room, not one that peels or shows every little flaw.
Picking the perfect paint can feel overwhelming. Should you use a flat finish? What about mildew resistance? These questions stop many people before they even start. This post cuts through the confusion. We will explore exactly what makes a paint great for a basement environment.
By the end of this article, you will know the best types of paint to use. You will learn how to pick colors that make your basement feel bigger and brighter. Get ready to transform that dreary overhead space into something you actually enjoy looking at. Let’s dive into the secrets of painting your basement ceiling like a pro!
Top Paint For Basement Ceiling Recommendations


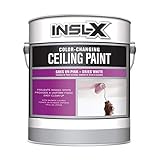
- Ready-mixed, grab-n-go white ceiling paint
- Excellent hide to brighten a ceiling that has dulled over time; Covers approximately 300 - 400 sq. ft. per gallon
- Durable flat finish that minimizes surface imperfections
- Spatter resistance for easier ceiling application
- Use on properly prepared or previously painted drywall, plaster, masonry, wood or metal materials

- KILZ Stainblocking Ceiling Paint is a unique combination of stainblocking technology and a coverage/dry time indicator.
- This ceiling paint rolls on with a subtle pink color that dries to white in under an hour.
- Dries to touch in 1 hour. Recoat in 2 hours. For use on all interior ceilings.Use soap and water to clean hands, tools and spill. Multiple coats may be required for complete hide. For maximum stainblocking recoat after 4 hours.
- Spatter-resistant formula rolls on easily with low odor making it a great choice for any room. This paint covers approximately 250 square feet per gallon on porous surfaces and up to 400 square feet per gallon on smooth, non-porous surfaces.
- Apply with a quality nylon/polyester brush or a 3/8"-1/2" nap roller depending on surface texture. Can also be applied with a sprayer. See product packaging for complete application instructions. KILZ Stainblocking Ceiling Paint offers excellent coverage for minor to moderate staining. For severe stains try a KILZ Primer such a KILZ Original, KILZ Original Low Odor or KILZ 3 Premium Primer.
- Acrylic ceiling paint formulated with a disappearing pink color-change technology.
- Easy to apply – helps prevent missed spots.
- For smooth or textured ceilings.
- Quick drying: recoat in as little as two hours.
- Self-priming paint for ceilings.
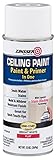
- Ceiling spray paint blocks stains and primes interior surfaces for quick touch ups
- Low odor formula is perfect for use as an all-purpose interior paint primer
- Dries to the touch in 30 minutes and covers up to 15 sq. ft. per can
- Mold and mildew resistant finish provides long lasting performance on indoor ceilings
- Flat white finish will not yellow over time and matches brush or roller applied Zinsser Ceiling Paint

- Ceiling paint blocks stains and primes interior surfaces in one coat
- Low odor formula is perfect for use as an all-purpose interior paint primer
- Dries to the touch in 1 hour and covers up to 250-400 sq. ft. per gallon
- High performance, high hide paint features no splatter and Stain Blocking technology
- Color changing formula applies pink and dries bright white to never miss a spot

- Ready-mixed, grab-n-go white ceiling paint
- Excellent hide to brighten a ceiling that has dulled over time; Covers approximately 300 - 400 sq. ft. per gallon
- Durable flat finish that minimizes surface imperfections
- Spatter resistance for easier ceiling application
- Use on properly prepared or previously painted drywall, plaster, masonry, wood or metal materials
The Ultimate Buying Guide: Painting Your Basement Ceiling Right
Painting a basement ceiling is a big job. But the right paint makes a huge difference. It can transform a dark, damp space into a bright, usable room. This guide helps you choose the best paint for your project.
Key Features to Look For
When you shop, look for specific features that matter most in a basement environment. Basements often have moisture problems.
- **Moisture Resistance:** This is number one. The paint must block water vapor from getting in or out easily. Look for paints labeled “mildew-resistant” or “moisture-blocking.”
- **Low VOC (Volatile Organic Compounds):** Basements are often enclosed spaces. Low-VOC paints smell less harsh and are better for your health.
- **Good Hiding Power (Coverage):** Basement ceilings often have stains, marks, or uneven surfaces. A paint with high coverage hides these imperfections in fewer coats.
- **Scrubbability/Durability:** If you have pipes or ducts, you might need to clean the ceiling occasionally. A durable finish resists wiping damage.
Important Materials and Paint Types
The type of paint you select determines how well it performs. Most basement ceilings need latex (water-based) paint because it handles moisture better than oil-based paint.
Latex Paints (Acrylic or Vinyl)
Latex paints are the standard choice. They dry fast and clean up easily with soap and water. For basements, choose a 100% acrylic formula. Acrylic holds up better against humidity.
Specialty Basement Paints
Some manufacturers make paints specifically for concrete or masonry surfaces. These often contain additives to fight mold and mildew growth directly. These specialty products are worth the extra cost if your basement is prone to dampness.
Primer is Crucial
You must use the right primer first. If your ceiling is bare concrete or drywall, a quality stain-blocking primer seals the surface. This stops stains from bleeding through your topcoat. Some primers also act as a vapor barrier.
Factors That Improve or Reduce Quality
The quality of the final look depends heavily on preparation and the paint’s formulation.
Factors That Improve Quality:
- **High Solids Content:** More solids mean thicker paint film when dry. This leads to better coverage and a tougher finish.
- **Proper Surface Prep:** Cleaning and priming the ceiling correctly ensures the paint sticks well. Good adhesion prevents peeling later.
- **Choosing the Right Sheen:** A flat or matte finish hides surface imperfections best. A satin or semi-gloss finish is tougher but shows every bump and roller mark. Flat is usually recommended for ceilings.
Factors That Reduce Quality:
- **Painting Over Efflorescence:** If white, powdery salt deposits (efflorescence) are present, the paint will peel. You must clean this off before painting.
- **Using Interior Wall Paint:** Standard wall paint lacks the necessary moisture resistance for a basement. It will likely fail quickly.
- **Applying Too Thinly:** Trying to save money by stretching the paint too far results in poor hiding power and a weak seal.
User Experience and Use Cases
How you use the basement affects your paint choice.
Use Case 1: Storage Area or Workshop: If your basement is purely for storage or a rough workshop, durability is key. A good quality acrylic latex in a flat finish works well. Focus on mildew resistance.
Use Case 2: Finished Living Space (Family Room, Office): If you want a bright, finished look, you need excellent coverage and a clean white color. Users report that using a paint specifically designed for ceilings (often ultra-flat) makes the room look taller and hides roller lines better.
User Tip: Many users prefer spraying ceiling paint rather than rolling. Spraying offers the most uniform, professional finish, especially over textured or uneven surfaces common in basements.
10 Frequently Asked Questions (FAQ) About Basement Ceiling Paint
Q: What is the best type of paint finish for a basement ceiling?
A: Flat or ultra-flat finish is usually best. Flat paint absorbs light and hides surface imperfections like patches, uneven drywall, or minor texture variations common on basement ceilings.
Q: Should I use oil-based or latex paint?
A: Latex (water-based) paint is strongly recommended. It handles humidity better, dries faster, and is much easier to clean up than oil-based paint.
Q: Do I need a special primer?
A: Yes. Always use a stain-blocking or mold/mildew-resistant primer, especially if the ceiling is bare concrete, has water stains, or was previously unpainted drywall.
Q: How does moisture affect the paint quality?
A: High moisture causes standard paint to soften, peel, or blister. It also encourages mold and mildew growth underneath the paint layer. Moisture-resistant paint forms a stronger barrier against this.
Q: Can I paint over popcorn ceilings in a basement?
A: Yes, but only if the popcorn texture is stable. Use a high-build primer first to seal it, and then use a flat finish paint for the best visual result.
Q: How many coats do I need?
A: For best results, apply one coat of quality primer followed by two coats of your chosen ceiling paint. This ensures even color and maximum durability.
Q: What color should I paint the ceiling?
A: White is the most common choice. It reflects the maximum amount of light, making the basement feel larger and brighter.
Q: Does painting the ceiling stop water leaks?
A: No. Paint seals against *moisture vapor*, but it will not stop active water leaks from pipes or foundation cracks. Fix structural water issues before painting.
Q: How long does basement ceiling paint take to dry?
A: Most modern latex paints are dry to the touch in about one hour, but you should wait 24 hours before applying a second coat. Humidity can slow down this process.
Q: Is it okay if my basement smells musty before I paint?
A: No. You must eliminate the source of the musty smell (usually mold or mildew) by cleaning the area thoroughly with a mold killer solution before you prime and paint.