
What is the best way to frame a painting? The best way to frame a painting depends on the artwork itself, its value, and the desired aesthetic for your art display. This comprehensive guide will walk you through the essential steps of canvas stretching, matting and framing, and even creating your own DIY picture frame, ensuring your precious artwork is showcased beautifully and protected for years to come.
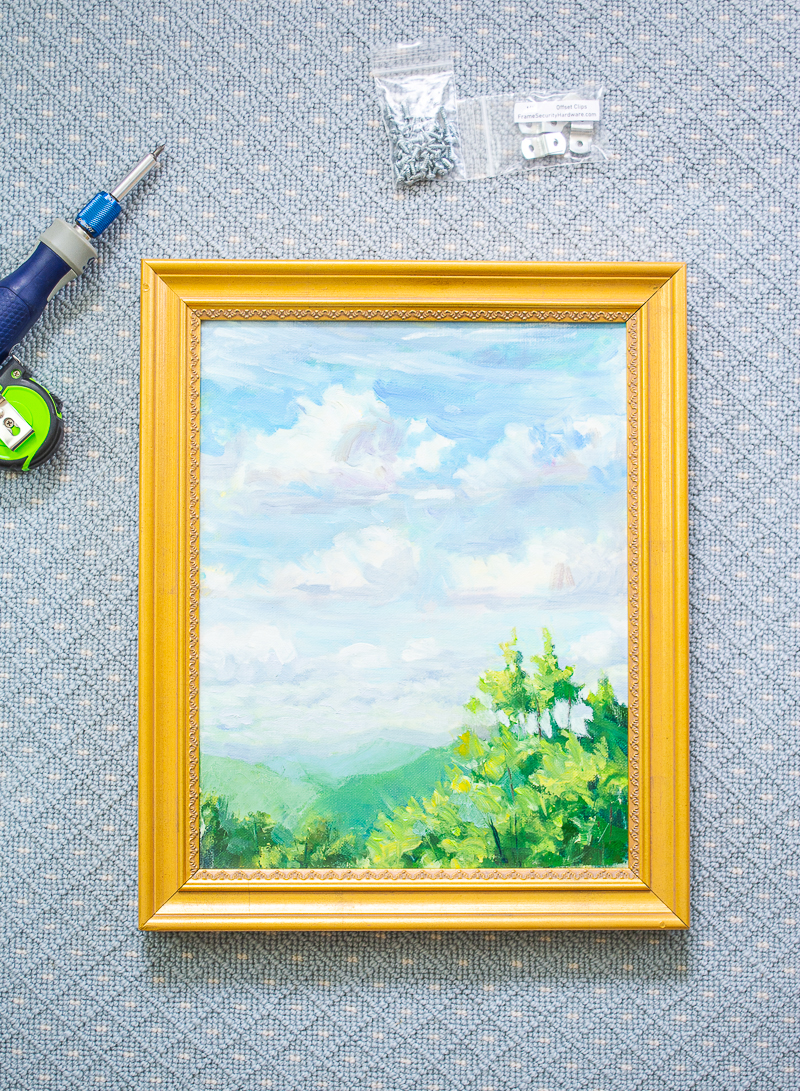
Image Source: penderandpeony.com
Preparing Your Canvas: The Art of Canvas Stretching
Before any painting can be framed, it often needs to be prepared, especially if it’s a fresh creation. Canvas stretching is the fundamental process of tautly stretching a piece of artist’s canvas over a wooden frame, known as a stretcher bar or strainer. This creates a smooth, drum-like surface ready for the artist’s brush, and it’s also the first step for many framing projects.
Why Stretch Your Canvas?
- A Taut Surface: Stretching provides a smooth, even surface for painting, preventing ripples or sagging that can occur with loose canvas.
- Durability: A well-stretched canvas is more durable and less prone to damage.
- Framing Readiness: It’s the foundational step for many framing techniques, particularly for gallery wraps.
Essential Framing Supplies for Canvas Stretching:
Gathering the right framing supplies is crucial for a professional finish. For canvas stretching, you’ll need:
- Stretcher Bars: These are wooden bars, often with beveled edges to prevent canvas impression, that form the frame for your canvas. They come in various sizes and can be joined together.
- Canvas Pliers: These specialized pliers have a flat gripping surface to pull the canvas taut.
- Staple Gun and Staples: A heavy-duty staple gun is used to secure the canvas to the stretcher bars. Stainless steel staples are recommended to prevent rust.
- Hammer: For tapping staples in if needed, or for assembling some stretcher bars.
- Measuring Tape: To ensure your stretcher bars are the correct size for your canvas.
- Craft Knife or Scissors: To trim excess canvas.
- Optional: Corner Clamp: Can help hold stretcher bars together while you work.
Step-by-Step Canvas Stretching:
- Measure and Prepare Your Canvas: Lay your canvas flat, face down. If it’s a new piece, ensure it’s cut to size, allowing at least 2-3 inches of extra canvas around all sides for stretching and stapling.
- Assemble Stretcher Bars: Connect the stretcher bars to form a rectangular frame. If you have corner braces, insert them. Ensure the beveled edges of the bars face upwards (where the canvas will sit).
- Center Your Canvas: Place your canvas face down onto the assembled stretcher bars, centering it carefully.
- Begin Stretching (Corners First):
- Using canvas pliers, pull the canvas taut from the center of one side and staple it securely to the back of the stretcher bar.
- Move to the opposite side, pull the canvas even tighter with the pliers, and staple it.
- Repeat this process for the remaining two sides, always pulling from the center outwards.
- Stretch the Edges: Work your way around the canvas, pulling small sections of canvas taut with the pliers and stapling them to the back of the stretcher bars. Maintain an even tension across the entire surface.
- Folding the Corners (Mitering): This is where a neat finish is achieved. Fold the excess canvas at the corners like wrapping a gift. Pull the canvas taut and staple it securely. There are various methods for folding corners; a simple mitered fold is common.
- Trim Excess Canvas: Once stretched and stapled, use a craft knife or sharp scissors to trim away any excess canvas, keeping the staples neatly tucked away.
This process results in a clean, taut canvas ready for further framing or direct art display.
Beyond the Stretcher: Matting and Framing Your Artwork
Once your canvas is stretched, or if you have a piece that requires a mat, you’ll move into the realm of matting and framing. This is where your artwork begins to take on its final presentation and requires careful consideration of materials and techniques.
The Purpose of Matting
Matting is a border of acid-free material, typically cardboard or thick paper, placed between the artwork and the frame.
- Aesthetics: A mat creates visual separation between the artwork and the frame, allowing the viewer’s eye to focus on the piece itself. It can also enhance the colors and mood of the artwork.
- Protection: A well-fitted mat prevents the artwork from touching the glass of the frame, which can prevent moisture buildup, sticking, and damage. Acid-free matting is crucial to prevent the artwork from yellowing or degrading over time.
Types of Mats:
- Single Mat: A single, uniformly colored mat.
- Double Mat: Two mats of different colors or thicknesses layered together for added depth and visual interest.
- Beveled Mat: The inner edge of the mat is cut at a 45-degree angle for a classic, professional look.
- Raised Mat: The mat is mounted on foam core or spacers to create a gap between the artwork and the mat itself.
Choosing the Right Frame:
The frame is the final touch that complements your artwork and style.
- Material: Wood, metal, and acrylic are common frame materials. Wood offers warmth and tradition, metal provides a modern or industrial feel, and acrylic is lightweight and shatter-resistant.
- Style: Ornate, minimalist, rustic, contemporary – the frame style should align with the artwork and the room it will inhabit.
- Depth: Consider the depth of your artwork. If it’s a thick canvas or you’re considering shadow box framing, you’ll need a deeper frame.
- Color: The frame color should harmonize with the artwork’s colors and the surrounding décor.
The Process of Matting and Framing:
This is where you bring together your stretched canvas, mat board, and frame.
1. Measuring for Mat and Frame:
- Artwork Dimensions: Accurately measure the width and height of your stretched canvas or artwork.
- Frame Opening: Measure the inner dimensions of your chosen frame.
- Mat Window: Decide on the desired size of the opening (the “window”) in your mat. This should be slightly smaller than your artwork (usually 1/4 to 1/2 inch overlap on all sides) to secure it.
- Mat Size: The outer dimensions of your mat will depend on the frame opening. You’ll want the mat to fit snugly within the frame.
2. Cutting the Mat:
- Tools: For precise cuts, a mat cutter (either a handheld rotary cutter or a tabletop board cutter) is essential. You’ll also need a straight edge and a cutting mat.
- Cutting the Window:
- On the back of your mat board, mark the dimensions of your desired mat window.
- Using a mat cutter and a straight edge, carefully cut along your marked lines. Ensure the blade is at a 45-degree angle for a beveled edge. Make multiple shallow passes rather than trying to cut through in one go.
- Cutting the Mat Outer Edge: If your mat board is larger than the frame opening, you’ll need to cut it down to size. Again, use your mat cutter and straight edge for clean, square edges.
3. Assembling the Artwork and Mat:
- Attaching Artwork to Mat:
- Place your artwork face down on a clean surface.
- Position the cut mat, face down, on top of your artwork, aligning the window with the art.
- Using archival mounting tape (acid-free and reversible), carefully attach the artwork to the back of the mat through the window opening. Apply tape to the edges of the artwork, then fold it over to adhere to the mat.
- Placing the Mat in the Frame:
- Open your frame and remove the backing.
- Place a sheet of glass or acrylic (if using) into the frame first.
- Carefully place the matted artwork on top of the glass, ensuring it sits evenly within the frame opening.
- If you are using a backing board (often included with the frame or a separate acid-free board), place it on top of the matted artwork.
4. Securing the Artwork and Closing the Frame:
- Backing and Fastening:
- Use glazier points, staples, or framing clips to secure the backing board, mat, and artwork within the frame. Ensure these fasteners are flush and don’t damage the frame or the artwork.
- Closing the Frame: Reattach the frame backing and any necessary hardware for hanging.
This process of matting and framing transforms a stretched canvas into a polished piece of art ready for its wall.
Exploring Specialized Framing Techniques
Beyond standard matting and framing, several specialized techniques can enhance your art display.
Shadow Box Framing:
Shadow box framing is ideal for displaying three-dimensional objects alongside or instead of flat artwork, such as small sculptures, souvenirs, or textured paintings.
- Creating Depth: A shadow box frame has a deeper profile than a standard frame, creating a “box” effect.
- Mounting Objects: Objects are typically mounted onto a backing board within the shadow box using archival adhesives, pins, or custom-made supports.
- Ideal For: Textured paintings, mixed media, or pieces where you want to create a sense of depth or include accompanying elements.
Canvas Framing Options:
For canvases that don’t require a mat, there are specific framing solutions:
- Floater Frames: These frames create a gap between the canvas and the frame, giving the impression that the artwork is “floating” within it. They are excellent for contemporary art and showcase the edges of the canvas.
- Gallery Wraps: Canvas stretching where the image extends over the edges of the stretcher bars. These can be displayed unframed for a minimalist look or fitted with a simple floater frame.
- Traditional Frames: Canvases can also be fitted into traditional frames using various methods, often with a sub-frame or clips to hold the canvas securely within the larger frame.
DIY Picture Frame Projects: Creative and Affordable Solutions
For those on a budget or looking for a personal touch, creating your own DIY picture frame can be incredibly rewarding.
Simple DIY Frame Ideas:
- Repurposed Materials: Old wooden planks, reclaimed pallet wood, or even thick cardboard can be transformed into unique frames.
- Decorating Frames: Purchase inexpensive plain frames and personalize them with paint, decoupage, fabric, or decorative elements.
- Using Foam Core and Cardboard: For lightweight, temporary displays, you can construct frames entirely from sturdy foam core board and decorative paper or cardstock.
DIY Picture Frame: A Basic Wooden Frame
This project is a great starting point for those new to DIY framing.
Materials:
- Wooden molding or strips (pre-cut or you cut them)
- Wood glue
- Small nails or brads
- Hammer
- Measuring tape
- Miter box and saw (or pre-cut molding at a 45-degree angle)
- Sandpaper
- Paint, stain, or sealant
Steps:
- Measure and Cut: Measure your artwork and determine the desired internal dimensions of your frame. Using a miter box and saw, cut four pieces of molding so that each end is cut at a 45-degree angle. Ensure the corners meet to form a perfect rectangle.
- Assemble the Frame: Apply wood glue to the mitered edges. Carefully fit the corners together. You can reinforce the joints by hammering in small nails or brads from the sides or back.
- Sand and Finish: Once the glue is dry, sand down any rough edges or excess glue. Paint, stain, or seal your frame as desired.
- Add Backing and Hanging Hardware: Once the finish is dry, attach your artwork using the methods described earlier (backing board, glazier points, etc.). Add appropriate hanging hardware to the back of the frame.
Creating a DIY picture frame allows for ultimate customization and can be a fun way to engage with your artwork.
Frequently Asked Questions (FAQ) About Framing Paintings
Q1: How much space should I leave between the artwork and the mat?
A1: Typically, a 1/4 to 1/2 inch overlap of the artwork onto the mat is recommended. This secures the artwork without obscuring too much of it. The width of the mat border itself is an aesthetic choice, but a common practice is for the bottom mat border to be slightly wider than the top and sides.
Q2: Can I frame a painting directly onto canvas without a mat?
A2: Yes, you absolutely can! Many contemporary paintings, especially those on stretched canvas, are framed without mats. Floater frames are a popular choice for this, providing a clean, modern look that highlights the artwork and its edges.
Q3: What are the key differences between custom framing and DIY framing?
A3: Custom framing involves professional services that offer a wide range of high-quality materials and expert assembly. It’s ideal for valuable or delicate artworks and ensures a polished, museum-quality finish. DIY framing allows for greater cost savings and personalization but requires more skill, time, and the right framing supplies to achieve professional results.
Q4: Is it safe to use regular tape to mount my artwork?
A4: No, it is not safe. Regular adhesive tapes are often acidic and will degrade over time, staining and potentially damaging your artwork. Always use archival-quality mounting materials like acid-free tape or photo corners specifically designed for artwork preservation.
Q5: What is the best way to clean the glass or acrylic in a picture frame?
A5: For glass, use a glass cleaner and a soft, lint-free cloth. For acrylic (plexiglass), use a cleaner specifically designed for acrylics or a mild soap and water solution, wiping gently with a soft cloth. Avoid abrasive cleaners or paper towels, which can scratch acrylic.
Whether you’re embarking on a simple canvas stretching project or delving into the intricacies of custom framing, this guide provides the foundational knowledge and steps to ensure your artwork is displayed beautifully and preserved for the future. Experiment with different framing styles, matting options, and even DIY approaches to find the perfect presentation for your art display.