
Yes, you can glaze an acrylic painting! Glazing is a fantastic way to add depth, luminosity, and subtle color shifts to your artwork.
Acrylic paints, when mixed with the right mediums, can become beautifully translucent, allowing you to build up layers of color without obscuring what lies beneath. This technique, known as acrylic glazing techniques, is a game-changer for achieving rich, nuanced effects that traditional opaque acrylics can’t replicate on their own. Think of it like stained glass or oil painting glazes, but with the quick-drying nature of acrylics.
This guide will walk you through everything you need to know to master layering acrylics and unlock the secrets to creating depth in acrylics.
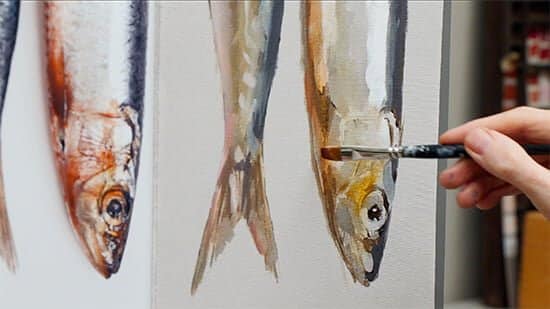
Image Source: willkempartschool.com
What is Glazing in Painting?
Glazing, in the context of painting, is applying a thin, transparent layer of color over an existing painted area. This new layer modifies the color and tone of the underlying layer, creating a luminous effect. Unlike opaque painting where each stroke covers the previous one, glazing allows light to pass through the thin paint film and reflect off the layers below, adding a vibrant glow and incredible depth.
Why Glaze Your Acrylic Paintings?
Glazing offers a multitude of benefits for acrylic artists:
- Creating Depth and Luminosity: This is the primary reason artists turn to glazing. The transparent layers interact with each other and with the underlying colors, creating an illusion of three-dimensionality and a radiant quality that can make your paintings truly pop.
- Subtle Color Shifts: Glazes allow for gentle transitions and subtle variations in hue. You can warm up a cool shadow with a transparent red glaze or cool down a warm highlight with a transparent blue glaze, all without muddying the colors.
- Modifying Existing Colors: Made a color mistake? Instead of painting over it entirely, a glaze can subtly adjust the tone, saturation, or hue of an area.
- Achieving Richer Hues: By layering transparent colors, you can create optical mixing. The viewer’s eye blends the colors as they perceive them, resulting in more vibrant and complex hues than mixing on the palette.
- Adding Subtle Textures and Effects: Certain glazes can also impart unique surface qualities or subtle textures, depending on the medium used.
- Enhancing Realism: For representational artists, glazing is key to rendering realistic skin tones, glowing light, and the subtle shifts in color found in nature.
Essential Supplies for Acrylic Glazing
To begin your glazing journey, you’ll need a few key supplies. The quality of your materials will significantly impact the final result.
Acrylic Paints
While you can glaze with most acrylic paints, you’ll achieve the best results with transparent acrylic colors or by using high-quality artist-grade paints. Artist-grade paints typically have more pigment and less filler, making them more potent and easier to make translucent.
Key Characteristics of Good Glazing Colors:
- Transparency: Look for paints labeled “transparent” or “semi-transparent” on the tube. Brands often indicate this with a filled-in square or a half-filled square.
- Pigment Load: Higher pigment load means the color will be more effective even when thinned significantly.
Acrylic Mediums for Glazing
This is where the magic happens! Acrylic mediums for glazing are crucial for thinning your paints to a transparent consistency without sacrificing adhesion or ruining the paint binder. Using just water can break down the acrylic binder, leading to a chalky, less durable finish.
Here are some of the most important mediums:
- Glazing Medium: This is specifically designed for glazing. It’s typically a gel-like or liquid medium that, when mixed with paint, makes it transparent and adds a lovely flow. It dries clear and maintains the integrity of the paint film.
- Airbrush Medium: While designed for airbrushing, airbrush medium is excellent for glazing because it thins paints to a very fluid, transparent state.
- Flow Aid or Pouring Medium: These mediums are excellent for creating very fluid, transparent washes. Be mindful not to use too much, as they can sometimes alter the sheen of the paint.
- Gel Mediums (Gloss, Satin, Matte): These can also be used for glazing, especially if you want to control the sheen of your glaze. A gloss gel medium will create a glossy glaze, while a matte gel medium will result in a more diffused, less reflective glaze.
- Gloss Medium: A simple gloss medium is a versatile choice for glazing, adding transparency and a nice sheen.
Table: Popular Acrylic Mediums for Glazing
| Medium Type | Primary Use | Glazing Benefit | Considerations |
|---|---|---|---|
| Glazing Medium | Specifically formulated for glazing | Creates transparent, luminous layers; good flow; maintains paint binder integrity. | Can be a bit thicker; choose based on desired opacity and flow. |
| Airbrush Medium | Thinning paints for airbrushes | Excellent for very thin, transparent glazes; smooth application; dries clear. | May require more paint to achieve color saturation compared to other mediums. |
| Flow Aid/Pouring | Creating fluid, pourable acrylics | Produces very thin, transparent washes; good for subtle color shifts and layering. | Use sparingly to avoid compromising binder strength or altering sheen too much. |
| Gel Medium (Gloss) | Thickening paints, creating texture, gloss | Adds transparency and a glossy finish to glazes; can add a slight body to the glaze. | Can slightly increase the viscosity of the glaze. |
| Gel Medium (Matte) | Creating texture, reducing sheen, adding matte | Adds transparency and a matte finish; ideal for achieving softer, less reflective glazes. | Can sometimes cause cloudiness if overused or mixed with too much water. |
| Gloss Medium | Thinning paints, increasing flow, adding gloss | Versatile for thinning paints to glaze consistency; adds transparency and a nice sheen. | Can be used on its own for basic glazing. |
Brushes
The type of brush you use will impact the application and look of your glaze.
- Soft Synthetic Brushes: These are ideal for smooth, even application of glazes. They hold a good amount of liquid and don’t leave harsh brushstrokes. Look for brushes with soft, flexible bristles.
- Flat Brushes: Good for covering larger areas evenly.
- Round Brushes: Useful for detail work and smaller glazed areas.
- Mops and Wash Brushes: Excellent for applying broad, even washes of color.
Palette
A palette for acrylics needs to be suitable for keeping your mixtures wet for a reasonable amount of time, especially when glazing.
- Stay-Wet Palette: Highly recommended for glazing. This system keeps your paints and mediums moist for extended periods, allowing you to mix larger batches of glaze and work at your own pace without your colors drying out.
- Ceramic or Glass Palette: These are smooth and easy to clean, and they don’t absorb the mediums as much as porous surfaces.
Water Container
You’ll need at least two containers: one for rinsing your brush and one for clean water to dampen your palette or add a tiny bit to your medium if needed (use sparingly).
Rags or Paper Towels
For wiping excess paint from your brush and cleaning up spills.
How to Apply Glaze to Acrylic
Applying a glaze is a methodical process. Patience is key!
Step 1: Prepare Your Painting
Ensure your underlying paint layers are completely dry. Acrylics dry quickly, but it’s essential to wait for them to cure properly before applying glazes. This prevents the glaze from reactivating the dry paint and causing muddying or lifting.
Step 2: Mix Your Glaze
This is where you combine your paint and medium.
- Squeeze Out Paint: Place a small amount of your chosen transparent acrylic color onto your palette. Remember, you only need a small amount of paint.
- Add Medium: Add your glazing medium to the paint. The ratio is flexible and depends on the desired transparency. A common starting point is a 1:5 or 1:10 ratio of paint to medium (1 part paint to 5 or 10 parts medium).
- Mix Thoroughly: Mix the paint and medium together until completely combined. The mixture should be fluid and transparent, allowing you to see your palette color through it.
- Test Your Glaze: Test the transparency and color on a scrap piece of paper or canvas. You can also test it on an inconspicuous area of your painting. You want it to be thin enough to allow the underlying colors to show through.
Important Considerations for Mixing:
- Transparency Level: For subtle shifts, use a higher ratio of medium to paint. For more noticeable color changes, use a lower ratio.
- Sheen: If you want a matte finish, use a matte medium or add a bit of matte medium to a gloss glaze. Conversely, a gloss medium or gloss gel will enhance the sheen and luminosity.
- Drying Time: Glazing mediums can slightly extend the drying time of acrylics, giving you a bit more working time.
Step 3: Apply the Glaze
- Load Your Brush: Dip your soft brush into the glaze mixture. Don’t overload the brush; you want a smooth application.
- Apply Evenly: Apply the glaze to the desired area of your painting using smooth, even strokes. Work in one direction if possible, or use gentle circular motions.
- Avoid Overworking: Try to apply the glaze in one or two smooth passes. Overworking the glaze can lift the underlying paint or create an uneven texture.
- Smooth Out Streaks: If you see any brushstrokes or pooling, gently feather them out with a clean, slightly damp soft brush or a soft cloth.
Step 4: Let It Dry
Allow the glaze layer to dry completely before applying the next layer or moving on. This is crucial for building up depth effectively.
Step 5: Repeat for Depth
Continue applying thin layers of glaze, allowing each to dry thoroughly in between. Build up the color and depth gradually. Each layer will subtly alter the appearance of the one below it.
Advanced Acrylic Glazing Techniques
Once you’ve mastered the basics, explore these advanced techniques:
Scumbling
Scumbling involves applying a dry or semi-dry brush loaded with glaze in a broken, random, or circular motion over the surface. This creates a textured, softened effect, allowing the underlying colors to peek through in a more broken pattern. It’s excellent for suggesting texture like foliage, fur, or rough surfaces.
Feathering
Feathering is used to create soft, blended transitions between glazed areas or to soften the edges of a glaze. It involves using a soft, damp brush with very little glaze, and gently feathering the edges into the surrounding dry paint.
Dry Brushing with Glazes
While not a traditional glaze, you can use a dry brush technique with a very thin glaze. Load a stiff brush with a thinned glaze, wipe most of it off on a paper towel, and then lightly brush it over the surface. This will leave the glaze only in the textured parts of the surface, creating interesting broken color effects.
Using Different Sheens
Experiment with applying different glazes with varying sheens (gloss, satin, matte) in different areas of your painting. This can create subtle variations in how light reflects off the surface, adding another layer of realism and depth.
Creating Depth in Acrylics with Glazing: Tips and Tricks
- Work from Dark to Light (Generally): While you can glaze in any direction, it’s often easier to build up lighter colors over darker underlayers. However, for subtle color shifts and darkening, you can also glaze with darker transparent colors over lighter areas.
- Think About Color Temperature: Use warm glazes (yellows, reds, oranges) to bring areas forward and cool glazes (blues, greens, violets) to push them back.
- Don’t Overdo It: Too many layers can sometimes make the painting look muddy or dull the vibrancy. It’s a balancing act.
- Keep Your Brushes Clean: Rinse your brushes thoroughly between colors and mediums to avoid contamination.
- Work on a Toned Ground: Applying a thin glaze over a pre-toned canvas (a single wash of color) can unify the painting and provide a base for subsequent glazes.
- Practice on Scraps: Always test your glaze mixtures and application techniques on a spare piece of canvas or board before applying them to your actual artwork.
Varnishing Acrylic Paintings
Once your acrylic painting is completely dry and cured (allow at least 72 hours, but a week or more is even better, especially if you’ve used heavy mediums or glazes), you should consider varnishing acrylic paintings. Varnishing serves several important purposes:
- Protection: It protects your painting from dust, UV light, and surface damage.
- Uniform Sheen: It can even out the sheen of your painting, making any variations in gloss from your glazes or mediums disappear, creating a consistent finish.
- Enhancing Colors: A good varnish can actually make your colors appear richer and more vibrant.
Types of Acrylic Varnishes:
- Gloss Varnish: Adds a high shine and can make colors appear more intense and luminous.
- Satin Varnish: Provides a medium sheen, less reflective than gloss.
- Matte Varnish: Reduces shine and glare, giving a more subdued finish.
How to Apply Varnish:
- Ensure Painting is Dry: As mentioned, this is critical.
- Work in a Dust-Free Environment: Choose a well-ventilated area free from dust.
- Apply Thin, Even Coats: Use a clean, soft, wide brush or a spray varnish.
- Brush Application: Apply in smooth, even strokes, working in one direction. Avoid going back and forth too much, as this can cause brush marks.
- Spray Application: Hold the can at the recommended distance and spray in a continuous, sweeping motion.
- Allow to Dry: Let each coat dry completely before applying the next. Apply two or three thin coats for best protection.
Varnishing is the final step in finishing acrylic paintings and protects your hard work for years to come.
Frequently Asked Questions (FAQ)
Can I glaze with regular acrylic paints?
Yes, you can glaze with regular acrylic paints, but you must mix them with a glazing medium or a thinning medium. Simply adding water will break down the paint’s binder, making it chalky and less durable.
How many layers of glaze are too many?
There’s no hard rule, but generally, if your colors start to look muddy, lose their vibrancy, or the underlying layers are no longer visible, you’ve likely applied too many glazes. It’s better to build up depth gradually with thin, transparent layers.
Do I need special transparent acrylic colors?
While transparent acrylic colors are ideal for glazing, you can also achieve good results with semi-transparent colors. Some opaque colors can be made more transparent with a high ratio of glazing medium, but they may not be as vibrant as true transparents.
What is the difference between glazing and scumbling?
Glazing involves applying thin, transparent layers of color to create smooth transitions and depth. Scumbling involves applying a dry or semi-dry brush with a broken or random motion, allowing underlying colors to show through in a textured way.
How long should I wait between glaze layers?
Allow each glaze layer to dry completely before applying another. This typically takes anywhere from 15 minutes to an hour, depending on the thickness of the glaze and the humidity.
Can I mix mediums together for glazing?
Yes, you can experiment with mixing different acrylic mediums to achieve specific effects. For example, mixing gloss medium with a touch of matte medium can create a satin glaze.
Does glazing affect the texture of the painting?
When applied smoothly with a soft brush, glazes should not significantly alter the existing texture. However, if you use thicker mediums or a brush with stiffer bristles, you might introduce subtle textural variations.
By mastering acrylic glazing techniques, you can transform your acrylic paintings, adding unparalleled depth, luminosity, and sophisticated color nuances. Experiment, be patient, and enjoy the process of creating depth in acrylics!